Why Does My Slide Out Leak and How to Fix It?
RV slide-outs are essential for comfort and extending your RV space. However, when they leak, they can quickly become a hassle and often require immediate fixes, or owners run the risk of losing their RV.
RV slide-outs often leak because the seals are damaged, or there are other issues with the setup of your RV. These leaks are often easily correctable, but the proper steps must be taken to preserve the integrity of the RV.
These tasks may seem daunting but are remarkably common. There are many simple ways to fix slide-out leaks. Read on to discover common causes of RV slide-out leaks and how to fix them.
Why Does an RV Slide Out Leak?
There are various reasons for your RV slide out to have a leak. These leaks can occur when the slide-out is open or closed and can be detrimental both ways. These leaks can be due to several different things, including:
- Normal wear and tear on the RV
- Incorrect initial installation of parts
- User error
No matter the cause of the leak, it’s essential to notice and troubleshoot quickly. Pooled water and leaks are highly detrimental to travel trailers (and your bank account).
The most likely culprit of a leaky slide out, whether open or closed, is damaged or old seals. When these seals are defective, water can quickly enter the slide out through the cracks and damage the interior space.
RV Slide Out Leaks When Closed
If your travel trailer slide out is leaking when it’s closed, it could be one of several common issues. If your RV has been closed up for the winter, and a leak is discovered when you are doing a routine pre-season inspection, it can mean one of several things.
The most common causes for RV slide-out leaks after the RV has been closed for the winter include:
- Improper storage in the off-season
- Frozen, previously burst water lines thawing out
- Plumbing cracks/failures
When your RV has been out of commission in the off-season and gets started up again, this previously unnoticed damage will be exposed to running water, and a leak can easily start. When you get your RV going again for the season, pay close attention to all of the interiors and test the plumbing before going out, even if you had checked it before storing.
Sometimes RVs may have been exposed to the elements in the off-season (this is not recommended) due to:
- No garage storage
- No cover
- No proper winterization
This can result in an issue with the seals, plumbing, or windows. The rubber seals that surround the slide-out and windows can quickly become damaged by the weather and will start to crack, break, and let water in. This is especially true if you live in a dry, colder climate.
Possible Causes of Slide Out Leaking When Closed
Occasionally, water may become trapped on top of the slide-out from a storm or water activities. If the slide-out is closed while there is water pooled on top, and a piece of debris such as a twig gets caught under the rubber seal, it can squeeze the water into the RV from the top of the slide-out. This generally appears as water running quickly from the slide-out seam into the interior of the RV.
Luckily, this is not necessarily indicative of a more significant problem and may just be a one-off leak that can be avoided in the future. It can, however, cause lasting damage to the seals if it happens too often.
If your RV slide-out is closed (and has been for some time) and you notice a leak, it’s a good indication that the leaks are coming from inside the mechanics and body of the RV itself and not from the slide-out.
This can appear as a wet spot or mold on the ceiling, with drips onto the floor, wet carpet, or water leaking from plumbing fixtures.
Common plumbing leaks in RVs include:
- Under the sink
- Near the bathroom
- Under the windows
The inconsistent use of these plumbing fixtures throughout the year can be hard on the pipes, so make sure to scrutinize all plumbing before starting your RV season and heading out on the road.
RV Slide Out Leaks When Open
If your slide-out is leaking while it is open and in use, several problems can be the cause. This can also be difficult to deal with if you’re in the middle of a camping or road trip with your RV. Many of these leaks mid-trip are unfortunately unavoidable but should be fixed as quickly as possible to avoid more damage.
Possible Causes of Leaking When Open
When your RV slide-out is in use, and you are experiencing a leak, there are several possible culprits. These can include:
- Faulty seals
- Incorrect setup
- Weather damage
The weather seals, or gaskets, are responsible for keeping your slide-out dry when in use. If you are in the RV during a storm or rainfall and you spot a water leak, your best bet is to examine these slide-out seals.
If your camper is set up but not completely level, it can cause leaks in the slide-out. When the slide-out is fully extended -but at an angle- it can pull the seals away from the slide and create potential leaks.
If this is done consistently, it can also wear down the seals faster and result in “friction wear” on the seals and the slide itself. You may also damage the mechanical gear that extends and retracts the slide out.
If you are in a storm and water begins leaking into your slide-out, consider the fact that there may be damage or a crack in the roof.
How to Fix These Common Leaks
Leaks and RVs unfortunately go hand in hand. These vehicles are generally put under a good amount of wear and tear, often out in the elements, and not designed to be as sturdy as houses or other residential buildings.
Luckily, there is a massive RV community online and across the globe. Many leaks can be fixed in a do-it-yourself manner. There are many professional RV shops and service departments across the country for more extensive and intricate fixes.
Below are several common causes of camper slide-out leaks and how to fix them.
Identify the Cause of the Leak
Finding the leaks from your slide-out is essential. Once the leak has been located, it’s important to address the issue, mainly if you are in the midst of an RV trip. Don’t ever wait to repair a leak, even if it just a temporary fix, until you make it back home.
Check visually for signs of a leak. Leaks that have been active previously and then stopped (but were not repaired) are still a risk to your RV. Some of these damaged areas can have:
- Discoloration
- Warping
- Rust
There may also be soft or spongy areas above, within, or below your RV. If there is a leak in the roof, it may have made its way down to the flooring and caused damage there, so don’t rule out originating areas just because they aren’t close by.
After you’ve found the cause of the leak, you can get to fixing it right away.
How to Fix Slide Out Seals
If the leak is due to damaged slide-out seals, this is a common issue and easily fixed. Replacing the damaged slide-out seals yourself is a fairly straightforward process. You can choose to replace the entirety of the slide-out seals or just the damaged portions.
If you are only replacing a section, it will need to be the entire length of one side, like the top or bottom strips. It isn’t easy to replace shorter sections of the seals because they aren’t fully attached anywhere.
You will need to buy new seals which are widely available online or through any RV shop. Make sure to buy the correct size for your specific RV, and the right length.
Generally, seals are purchased by length, ranging from $1.50 to $4.00 per foot. It’s always a good idea to buy more than you need, especially if installing yourself. This will leave extra in case of a mistake.
Installing New Slide Out Seals
To install new slide-out seals, follow the basic guidelines below. Each type of seal will have different requirements, but these are a general guide.
- Get the correct type of seal (there are several) and measure the amount you will be replacing. A quick internet search will help you identify your type of seal.
- Remove the old seal; this is as simple as removing screws at the end of the seal sections and peeling the seal off. There may be some sticky adhesive along the seal line, which can be removed with any commercial adhesive remover and a shop rag. Be sure not to scrape the adhesive off with metal scrapers or blades, as damaging the underlying material can cause leaks.
- Clean all of the surfaces where you will be applying the new seals. Sometimes a firm brush or towel is needed to scrape off any residue or debris. Make sure to let the area dry completely before placing the new seals.
- Press the new seals firmly into place and replace the screws. The seals should sit firmly in the groove.
- Test your slide out several times while you still have your tools handy. You may need to adjust the length of the slide seal to get the right amount of tension, so the seal stays put.
That’s it! There are many blogs and various YouTube tutorials available to assist in replacing slide-out seals if you’re comfortable enough to tackle this on your own.
How to Fix Window Seals
If the source of your leak is determined to be a faulty window seal that lets in the weather, you can replace these on your own as well. This fix includes windows on your slide out as well as the main body of your RV.
A window sealant can be purchased and applied to cover damaged, dried out, or missing seals around the windows.
There are many options for sealant that can be applied. These can be used on a variety of surfaces, including:
- Aluminum
- Vinyl
- Steel
- Glass
- Fiberglass
This is an ideal option for replacing damaged window seals, both inside and out of the RV, if needed. In a few short steps, you can easily fix a leaky window:
- Clean and dry the area and make sure any soggy spots or damaged areas have been repaired before you begin resealing. Locking in residual moisture can lead to mold and mildew.
- Wearing gloves, squeeze the sealant out of the tube and into a smooth, straight bead along the windowpane. You may need to purchase a caulk gun to get the sealant out of the tube. They are reusable and handy to have around for minor repairs.
- Use a straight-edged tool or one of these caulking tools to smooth the RV seal if you’re worried about aesthetics.
- Wait for the sealant to dry (overnight is best). Many of the sealants can be reapplied over themselves if you aren’t happy with the first application or find yourself needing additional layers in the future.
Make sure to use sealants or caulks that are designed for RVs. These are designed to be flexible, which allows for expansion and retraction of the windowpane. RV and outdoor-specific brands will last through the many temperature changes that your RV will experience.
How to Fix Cracks in the Roof
If there are cracks in your main RV body or the slide-out, water can get into the walls and leak all over, damaging insulation or interior surfaces. There are various types of sealant tape that can be placed over the cracks (or even just weakened and rusted areas) to keep the water out. It’s essential to monitor the leaks and take care of any water damage that may have happened before you caught the leak.
This option is excellent for on-the-go repairs and can be used as a quick fix for a larger leak until you are able to repair the RV. It’s a good idea to keep some sealant tape in your RV when you’re out, just in case.
If Plumbing Is the Issue
If you’ve discovered that a leaky pipe is causing water leakage in your RV or your slide out, it’s important to address this right away. Leaking pipes can result in rusty pipes and additional hidden leaks within walls, which can quickly deteriorate the strength of your RV.
To preserve the plumbing and electrical in your RV slide-out or main body, it’s recommended to find a licensed RV repair business or electrician/plumber.
Doing any of this maintenance or replacement yourself can void any existing warranty and end up causing even more damage if done incorrectly.
Installing a Slide Out Topper
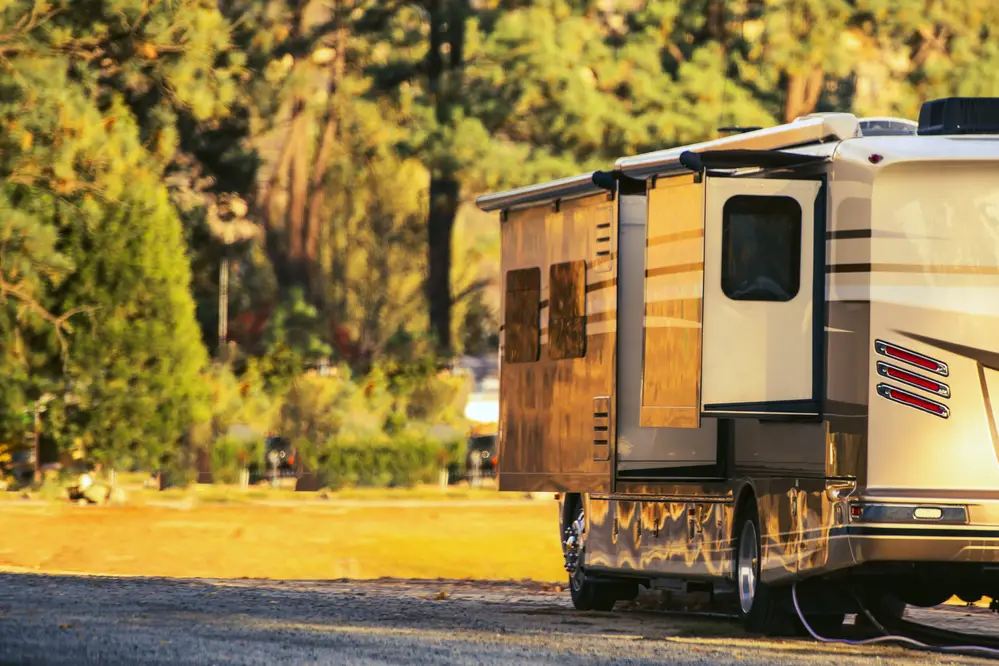
Slide-out toppers may be the most helpful and long-lasting fix for a troubling slide-out leak. They attach to the RV and the top edge of the slide-out and unfurl as you open your slide-out. When you close the slide-out, the topper simply rolls itself back up onto the tension rod. The entire time your slide out is open, there is a waterproof cover keeping it dry and free of debris.
There is a really strong example of an adjustable topper here, but it may set you back a few hundred dollars. Cheaper toppers can be purchased for under $100 and are simple to install on your own. These toppers are also simple to replace when needing new fabric and come in various colors to match your RV.
Ensure you have the correct size slide topper; it should overhang the ends of your slide out by an inch or two to keep debris off.
These kits are simple to install and come with step-by-step directions. A professional RV shop can also install the toppers, but you will save money if you have a few tools handy. You will likely only need:
- A power drill
- Sealant tape
- Step ladder
A topper prevents water and debris from getting caught when you close your slide out. This will damage the seals over time and lead to leaks in your RV. Follow the directions carefully and enjoy your new slide-out topper!
Risks of Not Fixing RV Slide Out Leaks
If your RV has a leak and you are unable or unwilling to fix it within a short period, you run the risk of losing your RV altogether or causing so much damage that you are better off just purchasing a new one!
Also, it’s important to note that many warranties that come with RVs require the owners to check and reseal as needed, sometimes up to twice a year. If this isn’t done, the warranty will not cover replacements and fixes due to leaks and damage.
Interior and plumbing leaks can lead to expensive fixes, such as:
- Rotten flooring needing to be replaced
- Weakened structural components
- Water damage to appliances
- Ruined insulation
- Electrical issues, including fire hazards
In addition to the structural issues, you can experience dangerous and unsightly consequences from a leak. This can include:
- Water damage leading to warped walls, floors, and ceilings
- Mold causing a myriad of health problems
- Mildew will often produce a stench.
The cost of replacing just the visually noticeable problems can easily reach tens of thousands of dollars. Add to that the structural components that need fixing, and you’re looking at a costly repair.
Rather than fixing leaks as they come, you are better off engaging in regular RV maintenance and preventative measures for your RV and RV slide out. This will cut down on overall costs and eliminate the risk of an ugly surprise when you open your RV up for the season.
Regular Maintenance Can Prevent RV Slide Out Leaks
Several preventative measures can keep your RV slide out from being damaged and creating leaks. Take a look below and consider utilizing these tips to avoid future RV leaks and expensive repairs.
Consistent Roof Maintenance
Your RV roof, including the slide-outs, should be fully replaced about every ten years. To decrease the risk of roof leaks in your RV, the roof should be at least resealed every season. RV roofs are often made of one of the following:
- PVC
- Rubber
- Fiberglass
Each of these materials suffers from wear and tear throughout the season. The best preventative measure you can take is to reseal the roof after every season to ensure a safe winterization and a smooth start to the next RV season.
Luckily, this can be done on your own, so there are no added labor costs. Resealing the roof includes scraping off the old sealant and reapplying a new coat. Depending on the roof material, the sealant will vary, as will the steps for resealing.
It’s best to do this maintenance at the end of your RV season to fix any dings, scrapes, or damage that may have been accrued over the summer and keep your RV safe through the storage period.
Regular Seal Replacement
All seals on the slide-out, including on all of the windows, should be replaced every two years if the RV is in regular use. These can be done as stated above or by taking your RV to a professional shop. The costs for this service will vary but expect to pay around $1,000 for a total seal replacement on your RV.
Each fall, after your RV season has ended, it’s a good idea to take a look at all of the seals along your slide out. Check for dry or cracked areas and replace these (or make a plan to in the spring as long as your RV will be stored properly and is safe from the elements).
Seal Conditioner Extends Seal Life
Along with regular visual inspection and RV slide-out seal wipe-downs, use a seal conditioner to keep the seals malleable. This spray conditioner has excellent reviews and won’t break the bank. Many also have additional benefits such as:
- No need to wipe down after spraying
- Clear coats for color-matching
- UV protection
- Works on window seals too
These conditioners won’t fix a damaged seal but can help you to get more life out of the seals you do have.
Clean Up Before Closing
Make sure that the exterior of the slide-out is clean before sliding it back in. If dirt like debris or sticks get into the rubber seals when it closes, that opens up the opportunity for water to get into the slide-out when it is closed or for damage to the seals.
Store your RV Properly in the Off-season
Make sure to winterize and store your RV correctly to extend its lifespan. There are many options for RV storage, so finding something that works best for your situation will be simple.
It’s vital to make sure your RV is absolutely clean and emptied out before storing it.
Winterizing the pipes is also essential, especially in an area that gets cold during the fall and winter seasons. All of the water should be drained from the lines in the RV and replaced with antifreeze for the duration of the off-season. This can be done on your own or at a shop.
There are storage units designed specifically for RVs, basically large garages rented for a monthly fee. This may be an option if you are limited on space at your residence. Many of these storage lots also have cameras and insurance to protect against damages and theft.
You can store your RV on your property if you wish. Just make sure the following guidelines are acknowledged when finding a suitable space:
- Find a flat spot like a driveway to store the RV.
- Do not place the RV in the potential path of other cars, plows, or delivery trucks.
- Stay out from under large trees or powerlines in case of a storm.
If you’re storing the RV outdoors, make sure to get an appropriate RV cover. Options like this one are a good choice. They come in various sizes and will protect from things like:
- UV Rays
- Water Damage
- Pests
It’s also a good idea to check this cover occasionally throughout the off-season to make sure it is still holding up and hasn’t come unattached or suffered any damage or rips.
Ensuring your RV is stored appropriately will ensure that the seals on the main body and the slide-outs are protected, leading to less potential for leaks throughout the season.
Conclusion
As an RV owner, you know the time, money, and commitment that it takes to maintain an RV. Don’t let little slide-out leaks, and the preventive steps deter you. Taking good care of your RV and RV slide-outs is the best way to ensure a long lifespan for your RV and many years of good memories to come.
Dealing with these common leaks can seem overwhelming, but we hope this article provided some valuable insight into fixing slide-out leaks and preventing them in the future.
Sources:
Be the first to be notified about FREE tips, hints, coupon codes, and email-exclusive information. All for FREE!