Everything You Need to Know About Your Black Water Tank
Travel trailer owners know that this form of camping can bring lots of wonderful experiences and adventures. However, there are parts to owning an RV that can be not so alluring. While it might not be the most glamorous part of owning a trailer, owners need to know and understand what their black water tank is and how to keep it clean. Cleaning the black water tank prevents bacteria build-up and unpleasant odors from interrupting your traveling experiences.
To keep black water tanks operating and smelling properly, they need to be regularly maintained with chemicals, and deep cleaned fairly often. This is best accomplished through regular cleaning with chemicals after every use and deep cleaning it every few months with a tank flush.
This job is not hard to do and takes very little time overall to complete. All it requires is a few specific materials that can be purchased at your local RV store or even online. Doing this is an important step for keeping your travel trailer clean and smelling fresh while it is in use.
What is a Black Water Tank?
When a travel trailer is parked at the campground, it can be hooked up to a sewage line in order to release any waste from inside the trailer, such as from the sink, toilet, or shower. But where does this waste go whenever an RV is not hooked up? Typically, there are two types of waste holding tanks aboard a travel trailer: a gray water tank and a black water tank.
Campers also have a third tank which is the freshwater tank. The grey tank holds onto all of the waste that comes from the sink or shower after using it, this is called grey water. The blackwater tank holds onto all of the waste that comes from the toilet. These tanks hold on to all of the waste until it can be dumped using a sewer hose into a designated waste area or dump station.
The black water tank on a travel trailer needs to be regularly cleaned out to prevent bacteria build-up and unpleasant odors from entering the trailer. Since it is positioned underneath the trailer, it is a bit trickier to clean out than some of the other facilities in your trailer. With the proper materials and tools, it is very easy to clean out your tank to prevent these things from happening.
Using Your Black Water Tank

As long as your travel trailer has a fully operational black and gray water tank, you will be able to wash plates in the sink, take a shower and use the toilet. It will all be collected in the tanks that are located underneath the trailer itself. Check your owner’s manual in order to determine how big your tank is before you go on a trip so you are aware of just how much you are going to be able to use it before it gets full.
You will know when it is time to dump your black water tank based on the readings from the sensors inside the tank that are aboard your RV. These sensors let the owner know how full the tanks are at any given moment, and when the tanks reach their full capacity before dumping is required.
Travel trailer owners can not simply dump out all of their waste on the ground. This is actually illegal in most parts of the United States. This will need to be done at a designated waste area. Almost all campgrounds will have the means to help you dispose of the natural waste kept in these tanks, as well as a lot of gas stations and RV dealerships.
The Best Way to Maintain a Black Water Tank
The tank needs to be regularly sanitized to ensure that there is not a bacteria build-up or any unpleasant smells that could make their way into your travel trailer. Regular maintenance on your black water tank should take place after every use. Below are the steps that a travel trailer owner should take after every trip in their rig to prevent this bacteria and smell.
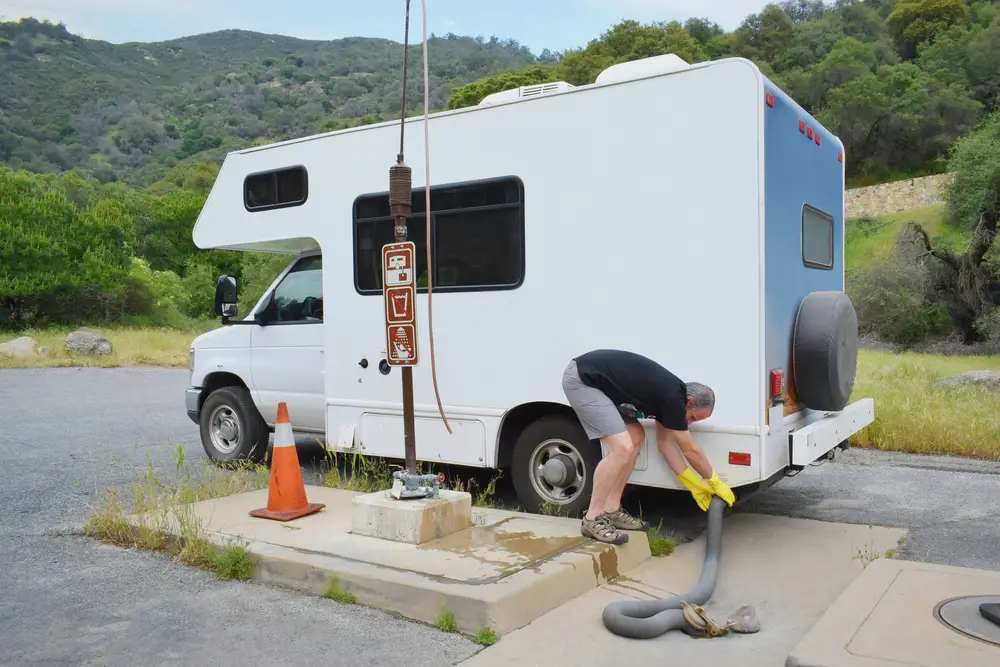
- Drain the Tank – Before you start cleaning the black water tank, make sure that it is completely empty. This will need to be done at one of the designated waste areas that can be found at a campground.
- Add Water – You will need to pour about a gallon of water into the tank. This can also be accomplished by rinsing and flushing the toilet a few times, using a hose that has been brought into the trailer, or by emptying cups or cartons of water. You want the bottom of the tank to be covered in water before you add anything else into the system.
- Add Chemicals – Next, you will need to add the correct dosage of RV black water tank treatment. There are many different options of substances to use to clean the tank which can be easily found at a variety of RV stores or even online. Some are a liquid substance that will be poured, while some come in tablet form that will be dropped into the tank. Follow the directions on your specific substance when it comes to using the chemicals in the tank.
- Let Sit Before Dumping – Let the mixture stand in the RV black tank in order for it to do its job cleaning and removing any unnecessary bacteria or particles from the sides of the tank. After about an hour of letting it sit, dump the remaining liquid from the tank into the same dump station as before.
There are also a variety of homemade cleaners that many RV owners will swear by. These substances may be easier to obtain and even possibly less expensive. Conduct the right amount of research before choosing to go with a homemade method. You want to make sure that you are doing this properly, and not just for ease or cost. There are definitely some things that you should not put in your black water holding tank as it can damage the integrity of the waste tank by rotting seals or worsen the bacteria condition inside.
List of Items to never put in the black water tank

- Bleach: over time this can dry out rubber seals and may eventually ruin the sewage system.
- Antifreeze: for the same reason as bleach.
- Diaper wipes: these WILL NOT break down and can easily clog the tank.
- Diapers
- Tampons: tampons will not break down, dispose of them in the trash
- Plastic
- grease
- Childrens toys: Obviously this is not something we recommend, but as a reminder keep curious kids out of the bathroom, toys and objects ending up in the toilet is very common when young ones are around!
Deep Cleaning the Black Water Tank
While regular cleanings and placing chemicals in the tank will help to keep the black water tank clean and sanitized after each trip, it will be necessary to deep clean and scrub out the inside of the tank as well to ensure that there is no build-up of bacteria or other gunk inside the tank that you can not see.
Disgusted by the idea of cleaning out your black water holding tank? Many RV shops will complete the task for you. This will of course come at an extra cost to the trailer owner. So consider this when deciding how to clean your black water tank.
However, if you are willing and able to complete the task yourself, it is very possible and does not take very long. You will need a few specific tools in order to complete the job.
- A Magic Cleaning Wand – not literally, but this is the tool that will be used to clean out the tank. It is a long “stick” that attaches to the water hose. There are a variety of options for a tank cleaning wand either online or at an RV store. Consider getting a flexible model if your black water tank has a curved pipe to get to it from the toilet. A stiff model will not be able to get into the black water tank easily if there is this sort of piping involved.
- A Water Hose – You will want to use a hose that is compatible with the type of cleaning wand you purchased from the store. You will also want to make sure that it is long enough to reach from the water source to the toilet inside of the RV.
- A Water Source for the Hose – This could be a spigot at a campground or even at home. Just make sure that the hose will be a proper fit and that the water source is putting out enough water for this to be successful in cleaning the inside of the black water tank.
- Gloves: Be sure to stay clean and wear gloves, this is a sticky situation…always be prepared!
Once you have all of the materials you will need for the job, you are ready to get cleaning. It would be ideal to have your tank hooked up to an RV dump station while completing this entire process. If this is not possible, you will need to be aware of how much space you have inside of your tank as to not fill it too much before you are able to get it to a dumping station.
Before you begin deep cleaning your tank, make sure that you have dumped out all of the remains that could be inside and flushed it out by running water through it. This way, there will be nothing to obstruct the cleaning unit from being able to reach and clean all parts of the black water tank.
Attach the hose to a clean water source and snake the hose inside of the trailer to where it will be near the RV toilet. Next, connect the correct end of the cleaning stick to the hose end that is inside the trailer. At this point, you can turn on the water to the hose from the outside water source as long as the valve for the cleaning unit is turned to the off position. You will feed the end of the cleaning unit that is not attached to the hose down inside the black water tank through the toilet pipes.
When you are ready to get started cleaning, turn the valve on the cleaning unit to the on position in order to begin the flow of water through the cleaning unit and into the tank. You will be able to hear the water coming out of the other end and begin to clean the walls of the tank.
Move the unit up and down and in a circular motion to make sure that the other end is able to clean in as many positions as it can during the cleaning process. Continue this for about five to ten minutes in order to get a proper amount of clean inside the tank.
When you are done, make sure to turn the valve on the cleaning unit to the off position before removing the unit from the toilet. At this point, your black water tank will be cleaned and ready to go for another month or two.
The Ice Trick
If you have gunk in your black tank you cannot get clean, one trick is to fill the black tank with a gallon or two of water. Then get lots of ice, 20-40 pounds and pour it in the tank. Now go driving. This will clean the sides of the tank and melt into water and be easy to dump. This is one trick if you really need to clean the sides of your tank.
How Often to Clean Your Black Water Tank

It is highly suggested that you complete this deep clean of your RV waste tanks every month or every other month during the camping season, even if you do not see any signs that make you think that it is needed. Our camping season is roughly 5 months long and typically we will deep clean our black water tank two or three times and that has been effective. However, if you do notice any signs, like a bad smell coming from your toilet, you may want to complete this step as soon as you can.
Another sign that your black water tank may need to be deep cleaned is when your RV holding tank sensors begin to read incorrect information. If you know that you have just dumped out all of the contents of the black water tank, but it is still reading that there is debris in there, this would be an example. If a tank has not been properly cleaned out or scrubbed, grime can begin to build on the sides of the tank and start to affect the monitors. If the sensors are in any way obstructed, the sensors will believe there is more in the tank than there actually is.
Minimizing Issues with Your Black Water Tank
There are many things that an RV owner can do on a daily basis to limit the problems that could occur with the black water tank. Making these steps a part of your routine will help to keep your tank and your pipes in good condition and without a problem.
- Only Use RV-approved toilet paper – Since RVs do not have a complex plumbing system like a regular bathroom or house, it is important to use toilet paper that will be gentle on the black water tank by dissolving easily. This will prevent blockages in your RV tank or piping. RV toilet paper can be purchased in the store or online. Another option is to use one-ply toilet paper so as to put less amounts of toilet paper in the tank.
- Flush the Toilet Regularly – Nothing is grosser than a clogged toilet pipe. Flushing the toilet more regularly will prevent massive build-ups of natural waste when the toilet is flushed, and allow the waste to move smoothly into the black water tank and through the pipes to the dumping station.
- Be Careful What You Flush Down the Toilet- While you may be able to flush a lot of things in a home toilet, it is better to not flush it in a travel trailer toilet. Try to only put natural waste and decomposing toilet paper into the toilet and the black water tank. Everything else will need to be disposed of elsewhere.
- Use Plenty of Water When Flushing – The more water that is present in the tank will help to prevent clogs in the pipes. Having more water will allow for more of a steady flow to carry all of the unwanted things out of the tank and through the pipes so that nothing gets stuck. It will also break down compostable materials faster and easier if they are in water than if not.
Doing these things will greatly decrease your chances of having any issues with build-up or blockages while using your RV septic tank when camping. They are simple and easy methods to ensure that your plumbing system stays in full working condition for the lifetime of your trailer.
What are the Benefits of Regularly Maintaining Your Black Water Tank?
Cleaning the black water tank may be the last thing that you want to do because of what is involved. But you will not regret that it is a step you took due to the benefits that come with doing this process regularly.
Cleaning the black water tank regularly will allow your trailer to smell fresh and pleasant every time that you use it. When there is a build-up of natural waste or clogging in the plumbing, the smell from this can easily sneak into the trailer since everything is so close together. The last thing you want to be doing is smelling that when you are trying to relax!
It will also extend the life of your black water tank, and possibly all of your plumbing. Washing out the tank will keep it clean and not let anything damage the interior of the tank or the lines.
It will also prevent the possibility of costly repairs that could come if something were to break either in the tank or in the pipings. Clogs and other things could lead to expensive repairs that have to be made to fix something that is seemingly avoidable if done correctly and often.
We hope we were able to answer any questions you may have had regarding the black water tank and how it works and is maintained. Although the black water can be less than fun to maintain we know that now you can do so with ease! Happy camping!
Be the first to be notified about FREE tips, hints, coupon codes, and email-exclusive information. All for FREE!