How to Install a Rubber Roof on a Camper / Travel Trailer
Installing a rubber roof on a camper trailer can seem like a nightmare and a several-day job that is also impossible to finish alone. While this process can take some time, it does not mean that you will have to spend the entire weekend on it. With this full guide on RV roof repair, you will be able to complete this job within a few hours and have a new and durable roof for your RV.
What Is the Best RV Roof Material?
Rubber roofing is becoming increasingly popular as the material for roofs for several decades now, out-competing metallic and fiberglass roofs. There are two rubber materials that are commonly used in roofing.
- EPDM: Ethylene propylene diene monomer
- TPO: thermoplastic polyolefin
Both EPDM and TPO are used not only for roofing RVs but also for building construction. EPDM has been commonly used for low-slope roofs for many decades now, like shopping malls. Since the 1990s it has been slowly replaced by TPO in some cases. However, both are highly durable roofing materials and are suitable for travel trailer roofs.
TPO
TPO, or thermoplastic polyolefin, is a durable and resistant material. It is three times more durable against punctures, which means that it will leak less. TPO usually comes in lighter colors like white, so it is more heat-resistant, it reflects light much better. That will help keep the RV cooler if it is being used in hotter climates.
However, TPO is harder to work with. Because of its higher durability, it might require welding for installation and repairs. Check the manual for TPO if you are considering investing in it, and check if you are going to need welding. That might dissuade you from using TPO.
EPDM
Instead, you might want to get EPDM or Ethylene propylene diene monomer. First, it is much cheaper than TPO. It is less durable than TPO, however, it is durable enough for a travel trailer.
There are significant downsides to EPDM though. It comes in black color, which means that you most likely will need to paint it to match the color of the vehicle, but also, it absorbs heat much better than TPO that reflects sunlight. Absorbing heat might sound like a good thing but it will just make the RV hotter inside, which will require additional electricity for air conditioning.
TPO will probably last you longer, that is why some owners prefer it to EPDM. But TPO is harder to work with, and EPDM is way cheaper. Both are good choices, both are very suitable for RV roofs. The choice is yours.
Installing a New Roof
Installing a new RV rubber roof involves several simple steps: uninstalling elements from your existing roof and removing it, cleaning the deck, water sealing, applying adhesive, placing a new rubber membrane, and finally, installing everything you have removed back.
In this guide, you can find all the necessary steps that will allow you to install a new rubber roof and make sure that it lasts for a long time. All these steps are simple but there are a few caveats that you need to know before starting the job, so read it in full first, and then keep it handy during the job. You will also learn what material is best for you, so if you have not done your shopping, you will be ready.
Gather Tools for Installation
Luckily, installing a rubber roof on an RV is quite easy and will not require much spending other than a roof itself, you probably own most tools that you are going to need. Here is the list of things you will need:
- Screwdriver
- Putty knife (or a 5-in-1 tool)
- Adhesive
- Paint Roller
- Sandpaper or electric sanding tool
- Primer
- Duct tape
- Broom or similar product
A word of caution though – having an extra pair of hands can help, so consider getting somebody to assist you. It will make some steps easier for you, and will additionally guarantee that your roof will last longer.
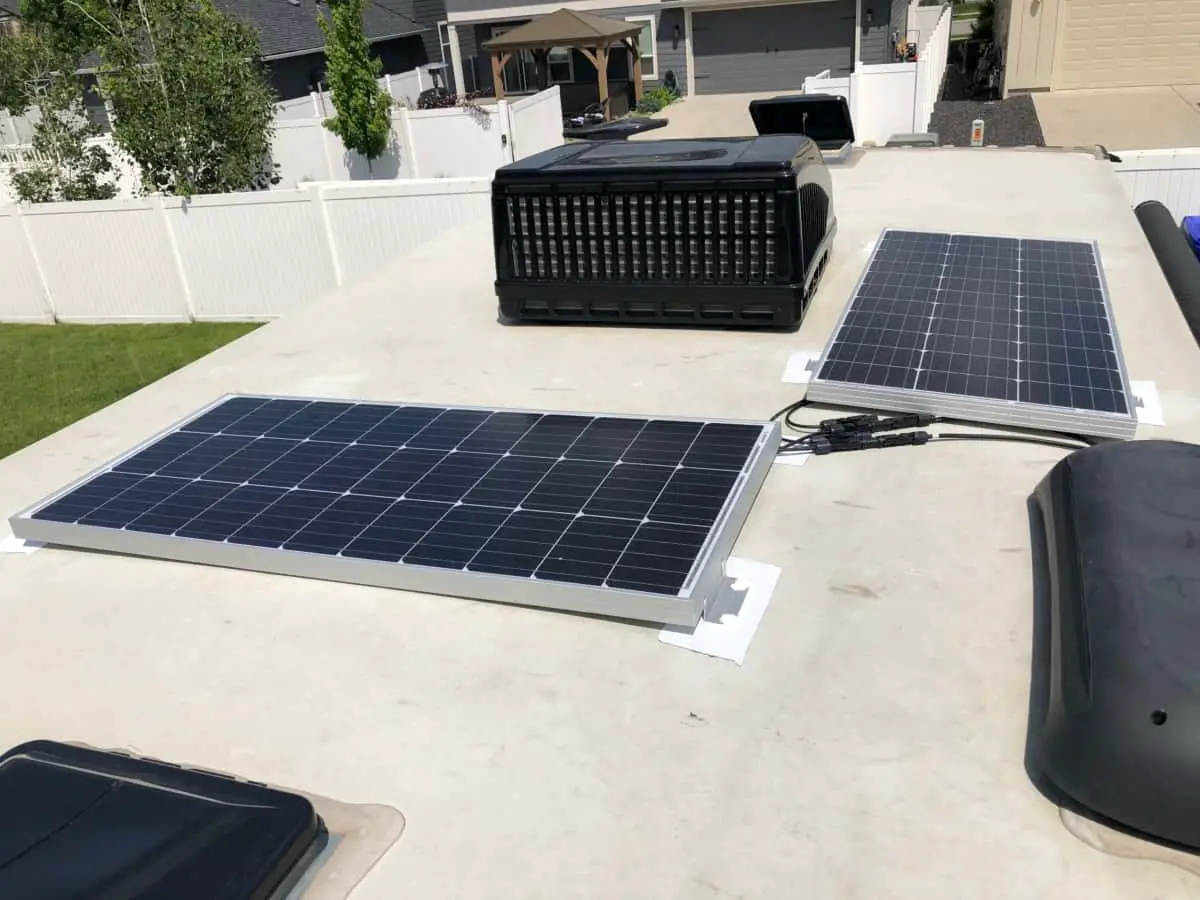
Remove Everything from the Roof
It is likely that you have some things on the roof of an RV that you need to remove. That can include roof vents, skylight domes, antennas. You need to remove all of that, leave nothing behind. It includes termination bars, strips – everything that you have on the roof must be uninstalled and set aside.
It is quite easy to remove these with a simple screwdriver. Usually, it is a ¼” head screwdriver. Scrap off all sealant from these elements too, use a putty knife or a 5-in-1 tool for that. Clean them thoroughly so you can install them back later.
Remove the Old Roof
To remove the old rubber roof, just simply scrap it with a putty knife or a 5-in-1 tool. Be careful so you do not damage the base on which the roof sits. Until you start doing it, think about where you are going to put all this old rubber. Consider putting a garbage bin or placing the RV near a dumpster so you do not have to clean the ground later.
If you plan to remove a metallic roof, that is going to be more challenging. In that case, you are going to need an electric saw and shears. Be careful when operating an electric saw, because it is quite easy to injure yourself in the process.
Clean the Roof
Now that you removed the old roof, you need to clean the roof base. This is a crucial step. In cleaning and washing the roof now, you ensure that the roof will last longer. If you do not clean it now, a new rubber roof will not hold as well as it should. Additionally, if you have considered replacing the roof base itself, it is time to do it now. You will need plywood boards to do so.
It is always a good idea to sand the roof as well. Some inconsistencies might not be visible to the human eye, and if your camper’s roof has them, it might ruin the perfect work in the end. If you do not mind hard labor or want to save some money, sanding paper will work just fine. However, it is much easier and faster to do it with an electric sander which can also be pretty economical.
After you have cleaned the roof, wash it lightly, and make sure that it is dry. You are going to need to use some glue, and glue will not stick if the roof is not dry. Take your time to dry the roof completely.
Install Leak Prevention
Rubber roofs are made to prevent leaks but some damage will occur to them with time, especially when using EPDM rubber. All the moisture should go into a gutter, all inside the roof or the RV, this can damage the plywood base resulting in water getting into the RV.
Examine the roof base thoroughly and try to see if there are any spots that can potentially leak water and seal them. Then consult with the rubber roof manual to see how the deck extension should be installed so that all water from the outside goes into the gutter.
Position the Roof Material
Do not install it yet, just put it on the travel trailer like you want it to be installed in the future. Keep it there for about 30 minutes and check if the rubber got a bit softer after that. This step will help to relax the rubber membrane: the top part of the rubber roof. Relaxing the membrane will later help it stick better.
Alternatively, you can skip right to the next step. Relaxing the membrane is not obligatory, it is just a way to help rubber to get less robust and to shape it around the roof. However, if you do not do that, you can then apply glue in a more convenient way but you risk the new roof not sticking as well.
Apply Glue
There are two ways to work with glue, and it depends on the previous step.
- If you completed the previous step-fold it in half.
- If you skipped the previous step-do not unroll the rubber yet, and pull a roll on one side.
If you decided to relax the membrane, then fold it in half and start applying glue on just a half of the RV. Use a paint roller to apply adhesive. Also, check the manual for the roof – a manufacturer might recommend a different product as an adhesive. When you are done with one half, unfold the roof on the glue layer and then fold a second half on top of the one you have already worked on. Repeat the process.
If you decided to skip the previous step, gluing will be even easier. Put the roll of rubber on one side of the roof and start applying adhesive as you unroll the rubber roll. Do not rush it, work several feet at a time, try not to go over four feet or so. Glue four feet of the roof – unfold four feet of rubber – glue another four feet – unfold another four feet, and so on until you are done.
Do not overuse the glue. The adhesive layer should be quite thin, and additional glue will not make it stickier – you will just lose more glue and make drying longer, actually prolonging the sticking process. Also, do not apply adhesive to the perimeter around the edge of the RV yet, that step will come later. For now, leave about a foot-long piece of rubber that is not glued.
Cut Holes
Now it is time to remember about those roof components that you uninstalled in the first step. It is too early to install them back in, but you need to prepare the roof for them. Locate where your vent or skylight dome should be, and make a cut in the form of X – from the middle to each corner. It can be done with a simple knife. Do not cut out the rubber altogether, you are going to need it.
Now you should have four flaps of rubber hanging down from the roof inside the RV. Put them down the opening and stick to the RV. You can either use the same adhesive or simple screws. This step will help prevent leaking on the perimeter of each hole that you make so that a vent does not let water in.
Clean the Rubber
In this step, you clean the rubber not from dirt or dust but from air bubbles that can stay trapped in between the rubber and plywood. These air bubbles will not let the rubber stick to the roof as well as it should, and you are going to be left with imperfect work that may not last long.
To clean the rubber from bubbles, simply take a tool that is large, robust, flat, and easy to hold. A broom works perfectly but you could find something else around the house if a broom is not an option. Sweep the membrane well and drive it to the edge of the rubber, which should not be glued yet. Make sure you sweep every inch of the rubber, even if you think there are no bubbles – they are there!
In case you decided to skip the step, where you would let the membrane rest, now is the time. When you are done cleaning the roof from bubbles, let the rubber rest for some time and become more flexible. About half an hour should be enough.
Glue the Edges
Now it is time to glue what you have not glued yet – the edges of the rubber. Be perfectly sure that you have got rid of all bubbles underneath the rubber membrane – you will not be able to drive them out. Again, check every inch, it is very important.
Do not use too much adhesive here, contrary to what might seem, too much glue is just as bad as too little, it will simply drop out and create an additional mess for you to clean, and might not stick as well as it could. A thin coat of glue is enough.
Depending on the adhesive you are using, you might need to wait until it is dry. Check the manual for the rubber roof (if it recommends an adhesive) or glue itself. After it is ready, attach sides to the glued part and repeat the same process as for the rest of the membrane – clean out all the bubbles. Trim any rubber that you have left from the edges. A simple knife is enough for this part.
Waterproof Tricky Spots
Some roofs might require additional waterproofing. Check the manual if your roof needs it too, and if it does, check to see if the manufacturer recommends any particular adhesive for this purpose. Usually, what you need to waterproof are some unusual spots and cuts, like the one you made for vents and caps.
- An X-shape cut for a vent is not ideal in terms of waterproofing, they lack material in the corners
- Check for places like that, where the water can soak inside the roof and into the plywood, even minor spots can cause a lot of trouble in the long run. External corners of a vehicle are other common places
- If you have any irregular shapes, extensions, or outdents, then all of these need to be checked and sealed
To apply this kind of adhesive on these types of spots, you are going to need a rubber primer, glue might not work well. Apply primer and wait for it to dry out. Then apply the water-sealing material, you do not need much, just cut it to the size. Repeat the same step as for any adhesive – make sure there are no air bubbles left trapped. This step is especially crucial here because these strips of material are much smaller.
Finish the Replacement
Your roof is ready! Now it is time to finish a couple more steps.
- Double-check all edges, waterproofing, and holes
- Make sure the roof is dry
- Apply rubber primer
- Paint your roof
If your rubber roof does not match the color of the RV, consider painting it. It will look better but also if you decide to go with EPDM that comes in dark colors, painting it to a light color can save you some electricity and hassle. EPDM is a very heat-absorbing material, painting it into a light color will help it reflect a bit more light and heat.
Painting a rubber roof is just as simple as a wall or anything else. Make sure that the rubber is clean from all dirt and dust that might have occurred while you were building it. It will be perfect if you just wash it and let it dry. Apply the rubber primer again, let it dry too. Finish with a fresh painting, two coats of good paint should be enough.
Now you are ready to install back the elements of the roof on your RV that you uninstalled in the first step: vents, skydomes, antennas, and so on. Also, do not forget to install the metal edge trim.
Before you do all that, if you have not painted the roof, double-check for any parts that did not stick properly: rubber itself, especially on the edges, waterproofing, flaps in holes, etc. If you have painted the roof, make sure the paint is dry. It usually takes a couple of hours.
Guaranteeing the Longevity of the New Roof
Congratulations, your new roof is finished! Here are some simple steps that will guarantee that it lasts longer. When the vehicle is not in use, cover it with the RV cover. Never use a pressure washer to wash your RV roof. Try to not park your vehicle under plants with fruits and pollen – residue from them sticks to the rubber, especially EPDM. Clean it often and check the water sealing every few months – it can stick out with time. We hope you enjoy your new roof. Happy camping!
Be the first to be notified about FREE tips, hints, coupon codes, and email-exclusive information. All for FREE!