How to Remove a Cummins Onan Generator from My RV?
One of the most critical pieces of an RV is the Onan generator. Cummins Onan is a company in Indiana that specializes in gas and diesel-powered generators for all classes of RV. How do you remove an Onan Generator from your RV?
Nothing is worse than when the Onan generator in your RV decides to tear up. The process of removing the generator will take an immense amount of effort and a fair amount of mechanical know-how. Read on and learn what you need to know to remove an Onan generator from your RV.
How to Remove an Onan Generator from an RV
Removing an Onan RV generator is a tough job that requires that you know a little about each system, electrical and mechanical, connected to the genny. Knowing how each system works keeps you from cutting any wires or pipes that might be important to the equipment. Any mistakes made could ruin the systems and leave the motorhome in need of repair.
Tools Needed for The Job
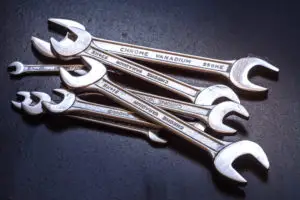
Removing the generator is going to take an assortment of tools, as well as a heavy lift or jack. You will also need something to move the generator once it comes off the jack. The Onan is seriously heavy, almost 300 pounds, and could take several hands to get it moving in the right direction.
Some of the tools you will need to remove the generator are:
- Lift – The lift is the most essential part of the process. Without it, you won’t be able to loosen some of the bolts or hold the generator in place once it frees up. It must be something strong enough to support 300 pounds and stable enough that it doesn’t tip over. Ensure that the wheels lock to keep the lift from rolling away.
- Cart – Once the generator is removed, you will need something to move it out of the way. This is different from the lift, which just holds the unit in place while you are working. The cart is used for hauling it off when you get finished.
- Wrenches – A set of wrenches is going to be necessary for removing the hoses and bolts required to free up the unit. Choose an assortment as the frame of the generator is connected to the RV frame and a couple of brackets that keep it from jostling around when you are in transit.
- Buckets – You will need a couple of buckets to catch any fuel or other fluids that could leak out of the insides. You will be disconnecting several hoses from the body, and they are sure to have some lingering fluid in them.
- Screwdrivers – The casing on the outside of the generator has some screws that will need to be removed so you can get to the inner frame. Have a couple of different sizes and head types if there are some weird screws on the frame.
Tools are needed throughout the process, and if you don’t have any, find a neighbor who can lend a few tools. If that doesn’t work, you can search around for a decent mechanic to do the job for you. A pro should have it knocked out in a day, whereas the less mechanically inclined could end up with a job that never ends.
Make Sure the Vehicle is Stable
Ensure that the vehicle is turned off and isn’t connected to an additional power or water source. Working with power can be deadly if it is co-mingled with water. Keep your work area clear of debris and choose a flat location with no significant hills or holes. Stable land is a must as being crushed under your home away from home is not on your to-do list.
Getting Under the RV is the Place to Start

RVs often don’t have tons of clearance around the generator area. Getting in a comfortable position could take working on your back for several hours or using ramps to get as much extra space as you can. Using the ramps isn’t going to make the task much more accessible but can assuage some fears of being underneath and getting claustrophobic.
Putting the RV up on ramps could be a dangerous situation that leaves you open to accidents that could result in death. Use metal ramps and a sturdy surface to ensure as much safety as possible. Always have someone with you in case the ramps collapse and you are stuck underneath the motorhome.
Brace the Generator With a Jack or Lift

Before breaking out the tools and taking stuff apart, you need to ensure that the generator’s weight is supported. If you are lucky enough to have a lift, you can support the weight on the top. If you have a jack, the thing to do is find something, like wooden blocks, that you can distribute the weight, so it doesn’t become off-balance.
Secure the weight by moving the base of the lift or jack against the generator and applying pressure. It should lift slightly, but not so much that you can’t get to the bolts on the generator housing underside. Ensure the force is applied evenly as it will shift once it is freed from the brackets on the inside.
Disconnect the 12V Power to the Generator
The generator gets its charge from the batteries of the RV. There will be wires that run to the battery and a wire used as ground. These wires must be disconnected from the motorhome before you go any further. Shocks could cause severe pain and possibly death and won’t occur if there is no power.
The steps to disconnecting the power to the generator are:
- Disconnect the Positive – The positive is going to be connected to the battery of the vehicle. Make sure that it doesn’t connect with the battery terminals by using something to cover or hold it to the side. Depending on the model of generator, the positive could be one or two wires. Make sure that both are disconnected.
- Remove the Ground – The ground wire will be much easier to find as it only runs towards the machine’s bottom. It is often a black wire that will be connected somewhere around the inside pan of the generator. It will have its bolt and could have a rubber washer to prevent shock.
- Pull the Wires – Once both of the wires are disconnected, you can remove the wire that runs to the RV’s main battery. You will need to get further underneath the vehicle to reach the wire as it could be attached close to the inner frame. There are three bolts on the bottom; loosening them will allow for an easier pull.
As always, once the power is removed from the generator, you should secure all the wires and not cut anything. Cutting wires is an excellent way to permanently damage the generator or give yourself a vast workload increase. It is always a good idea to tape off unknown wires as opposed to cutting them.
Disconnect the AC Power Cables on the RV
When you are connected to power at the campsite, it runs off the same energy you use in your home. This means that you have a fuse or junction box in your RV, just like the home as well. Removing these wires can be a bit involved and take some taping and securing to ensure that none of the other systems are damaged.
The steps to disconnect the AC power in your RV are:
- Remove Wiring Harness – The wires that run to the inside of the RV will populate somewhere on the generator’s back. The precise location depends on the model of the generator but lookout for a set of wires covered in dark gray. This layer covers the ground and main wire for running into the RV.
- Pull from the Box – The set of gray wires attached to the generator will end at the bottom of your fuse box. A tip to help is bundling the wire and using some 550 cord to help pull them is another. These wires could be running along the same paths as the hot wire for the DC power if you are lucky.
- Leave a Runner – You should leave a bit of cord or wire in place of the wires you pulled. If you are going to rewire for a new genny or going solar, you will need to have a way to guide new cables to the new generator.
Going back to AC power after removing the generator will need a bit more work with wiring. One of the all-time heavy-weight champs of bad days is having to rewire something with no experience. Trust a good electrician or be forced to scour wires and pore over documents chasing down the correct wiring instructions.
Take Out the Fuel Line With Care
Dealing with flammable chemicals like gasoline, you should be careful not to have any heated surfaces or open flames near the work area. The fuel line could have a pressure clamp or fitting that needs to be removed. Once the seal is broken, be careful of gas that could leak out onto the workspace.
The steps in removing the fuel line are:
- Release the Clamp – The fuel filter pressure will be so much that a clamp could be required on the connection. These clamps are either held in place with a screw clamp or some other form of pressure. Release the clamp on the fuel line slowly and move it away once it loosens.
- Clean the Gas – There is a good chance that some gas will be stuck in the fuel line. Have a towel or some rags ready to soak it up and clean the excess away from the machine. Any that escapes could corrode washers and other rubber or fabric pieces on the generator.
- Plug the Line – The fuel line will have a direct connection to the gas tank or reservoir. That means that gas could continue to leak directly from the tank unless you find something to clog it up. Use a rubber stopper and place it into the line. Add some tape to make a proper seal before moving on.
Once the gas and power are disconnected from the machine, you will be ready to attack the structural connections and free up the genny from the RV body. Make sure before moving on that all fuel is drained from the fuel tank and there is nothing to start a fire. Also, any leaks could make the RV or jack slip. Keep the area as dry as possible.
Removing the Exhaust Could Take Some Elbow Grease
The attachments to the exhaust pipe on the generator could be coated in mud and grime. The clamps that are holding it together could need extra effort to break them free, so be ready to put in extra work to get them loose. Be prepared to break out the WD40 and bust loose whatever you need to get things going.
Once all the electrical and mechanical pieces are disconnected, you can move on to removing the generator from underneath the RV. Be careful that the weight of the genny does not tip or shift during removal as it could be harmful if it landed on you. Using something to evenly distribute the weight is recommended.
Removing the Generator From Its Housing
One of the dirtiest places on Earth is the nooks and crannies of an RV. Most of the roads they traverse are not paved, and dirt and sand can corrode or seize bolts on the undercarriage. It may take several coatings of WD40 or degreaser to make bolts move freely, and some still could break off or need to be drilled out.
Remove the generator from its housing by following these steps:
- Presoak the Bolts – Take the time and make sure that the fight against the bolts turns in your favor. Using a powerful penetrating spray is essential in this step because you can guarantee that the undercarriage of the RV is covered in dust or sand.
- Break Loose the Bolts – Use the appropriately sized wrench to remove the bolts that are on the underside of the pan. They could have Torx heads, so be on the lookout for those and have the wrenches you need.
- Reset the Jack – Depending on the type of generator; you might need to reset the jacks to make sure it doesn’t tip. Some models are heavier towards the rear, and a jack slipping is a real consequence of not being prepared. Make sure that the weight is secure before letting go of the jack handle or lift button.
- Lower the Jack – Once the weight is settled, you can begin to lower the weight of the genny. Some models could weigh as little as 100 pounds or as much as 300. It is always good to have as many hands as you can to make the load much lighter.
- Move to the Floor Once the generator is off the RV, it will need to go on the floor. Moving it off the jack can be the most troubling part of the move. Move it slowly and try not to jostle any of the delicate works on the inside.
Once the generator is on the ground, the job is complete. Take care to avoid dropping the generator on its pan as it could ruin any of the equipment on the inside. Usually, an Onan is easy to work on and should only have a few bolts holding it inside the generator frame.
Tips When Shopping for Replacements for an Onan Generator
Cummins Onan generators are often such reliable generators that customers usually replace their old ones with a new one. The critical thing to remember is that you must get the appropriate size and dimensions. At the same time, keep in mind your power goals, whether expanding or moving towards a solar-powered system.
Price tags on new systems are enough to send fear into the heart of the most devout outdoors person. Pricing is another big hurdle that might lead some to a total rebuild of the older model, or generator maintenance, which could save money in the long run. Keep in mind that Onan generators come with great service plans and even better customer support.
Consider a portable replacement
It may be a lot cheaper to purchase a replacement that is not built-in. If you need something that has 2000 watts, consider our favorite model here. If you are looking to run your air conditioner, consider this model as it offers both propane and gas fuel for your generator.
Conclusion
Removing a Cummins Onan RV generator from underneath your RV is an invasive job requiring knowledge of most of the motorhome’s working systems. Making a mistake while removing could mean the end of the electrical system in your camper, so, take your time and make sure that you are not crossing any lines you can’t uncross.
The generator could be heavy, too heavy for a couple of people. Take the time and get as many hands-on the machine as possible when lowering it from the jack in the final stage. Lowering it to the floor could require more strength than two ordinary people could muster. Make sure that the floor is cleared and nothing will be crushed when it moves to the floor. We wish you luck in the removal of your Onan generator! Happy camping!
Be the first to be notified about FREE tips, hints, coupon codes, and email-exclusive information. All for FREE!