How to add an additional RV furnace duct in 8 Steps
Our trailer came from the factory with three heating ducts, one in the main living space, one in the bathroom, and one to heat the undercarriage. When purchasing the trailer, we figured this would be good as it is a small place to heat.
Overall, it does a great job at keeping the trailer heated with the exception of our bed area which is a murphy bed. We get some cold airflow coming from the uninsulated area the bed folds into when folded up which is in the pass through storage area. This causes our head/shoulder area to always be a bit drafty. When plugged in to utilities, the a/c rooftop fan kicks on with the heater and blows air through the roof vents to distribute the air, but at night this is quite loud, and it does not work unless we are plugged in to shore power. We do most of our camping off grid, so this doesn’t help us much.
The second part to the equation is that the one heat vent is located as far away from the bed as it can be, and it blows towards the thermostat providing false temperature readings throughout the trailer. Our daughter sleeps closer to the heater on the fold down couch and we typically like it a bit colder in the night when we sleep so this works fine besides the cold air that blows around us from the pass through storage.
Our solution was to add a heating duct to blow towards the front of the travel trailer and retain a factory look and keep the rest of our heating functioning as best as possible.
How to add an additional RV Furnace Duct? First purchase the parts you need to add an additional vent, then tap into your furnace or an existing nearby duct line with a duct branch connector or T connector. Next run your ductwork and install your vent louver. Lastly, connect your new vent louver to your ductwork you ran and you are finished.
The Guide to Adding Ductwork to your RV Furnace
Step 1: Examine your existing system
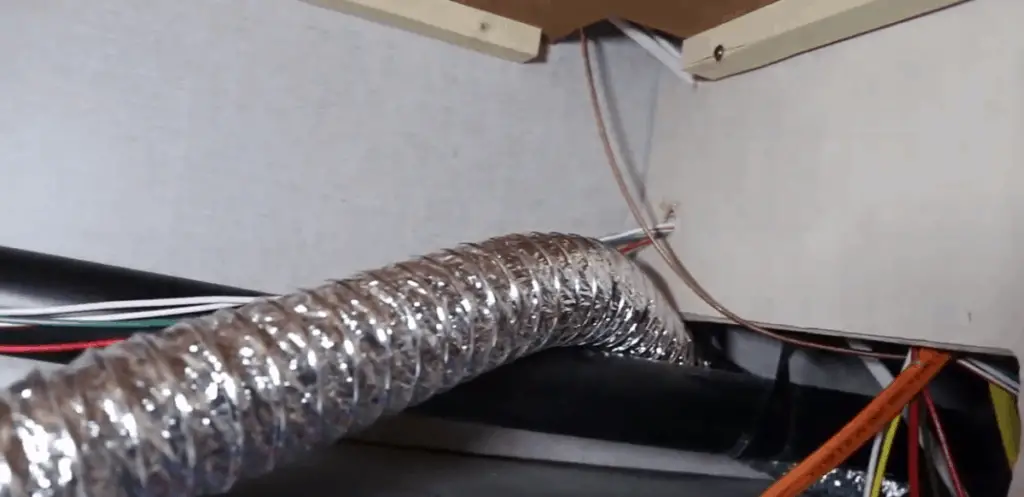
The first step to adding additional ductwork to your travel trailer is to find out what your current system looks like and how you will add additional vents and a diffuser. For us, this involved taking the cover off of the furnace and tracing the current ductwork all over the trailer. Our system has 3 duct branches with the ability to add an additional duct off of the furnace.
The first duct off of the furnace was a 5” duct to the main trailer cabin, the second duct was a 4” duct to the bathroom, and the last duct was a 2” duct which routes down to heat the underbelly. Our furnace box has a cut out to add another 4” duct, but we decided against utilizing a 4” duct to not rob too much airflow form the other ducts and we did not need to much airflow towards the front of the trailer as we do like to sleep in the cold, we did not want a monster 4” pipe feeding us air. The other reason we decided against running a 4” duct is that it would have required a lot more work to route under the undercarriage versus routing under the cabinetry.
With our system, we could have gone a few routes, either use the 4” cutout off of the furnace distribution box, or T off of the 2” line to get lesser airflow. We chose to T off of the undercarriage heat as we typically do not go camping in the winter and we do not need much airflow towards the front of the coach. If we do require more heat towards the front and we are not in freezing temperatures, we may just plug the vent which goes under the undercarriage to provide more airflow towards the front as we don’t go camping in freezing temperatures anyway.
Step 2: Determine your Ductwork Route
In your particular situation, you will need to determine if you would like to run a new line directly from your furnace, or will be using a T connector to extend a nearby duct.
Either way, while you are investigating taking panels off of your RV, or spending time in the undercarriage, make sure to be planning the route you will take when you are running your new ductwork as not to have to think about it twice. Once you have planned your route, make note of distances your ductwork will need to run and connectors you will need as well as your vent diffusers.
If you are running your vent pipe directly from the furnace, make sure to get the correct connectors for your factory knock outs, if you are running off an existing duct, purchase a T, Y, or make your own connector.
Step 3: Purchase the parts
Purchase all of the parts needed, this would be ductwork, fittings, metal tape, vent diffuser, zip ties, and anything else you can think of. Here are links to items which would be used:
| Ductwork | Connectors |
| 2” Flex Duct | 3” T Connector |
| 3” Flex Duct | 4” T Connector |
| 4” Flex Duct | |
| 5” Flex Duct | Furnace Collar |
| 2″ Collar | |
| Diffusers | 4″ Collar |
| 2” Diffuser Vent | |
| 3” Diffuser | Duct Splice Connector |
| 4” Diffuser | 3″ Duct Splice Connector |
| 5” Diffuser | 4” Duct Splice Connector |
| 5” Duct Splice Connector | |
| Other Items | |
| Metal Tape | |
| Zip Ties | |
| Zip Ties |
Step 4: Route the Ductwork
Once you receive your parts, you can start to route your ductwork. Start from one direction and work to the other, we started at the furnace and layed the ductwork towards the front of the trailer under the cabinetry. We had to remove some access panels and this was a fairly easy process, but in other cases you may need to run ductwork in the undercarriage which may be a bit more difficult.
To run ductwork in the undercarriage, you may need to drill a hole in your floor under your furnace area the size of your duct. Once you are finished, you will want to stuff insulation around your pipe to keep the cold air from coming into the trailer area. Before you make any holes, make sure you are not drilling into any propane lines, water lines, or holding tanks.
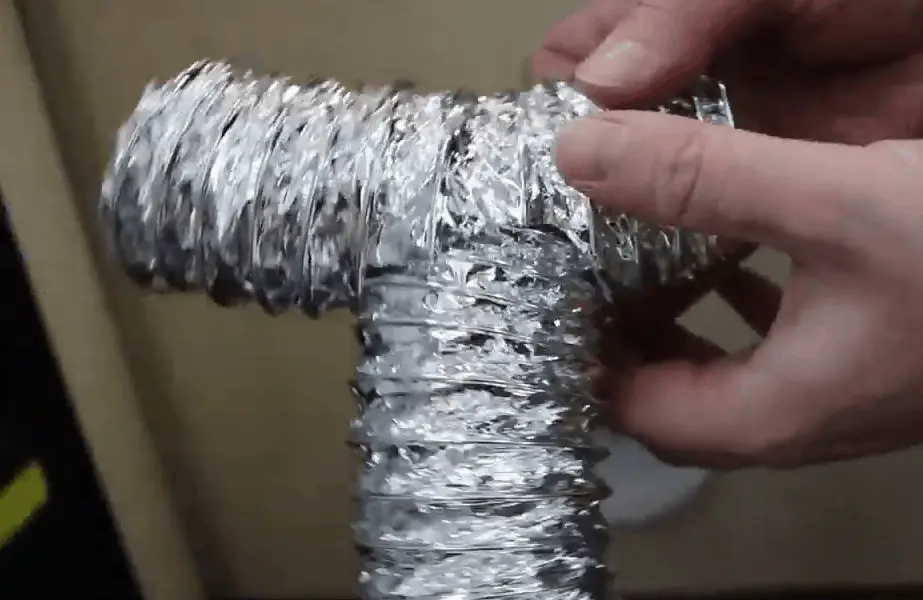
If you have a duct nearby and are just relocating or adding a second diffuser, such as under a couch to keep your feet warm, your installation will be simpler. This will involve making a T off of the supply duct to provide two ducts, one for your original, and one for the new duct you are installing.
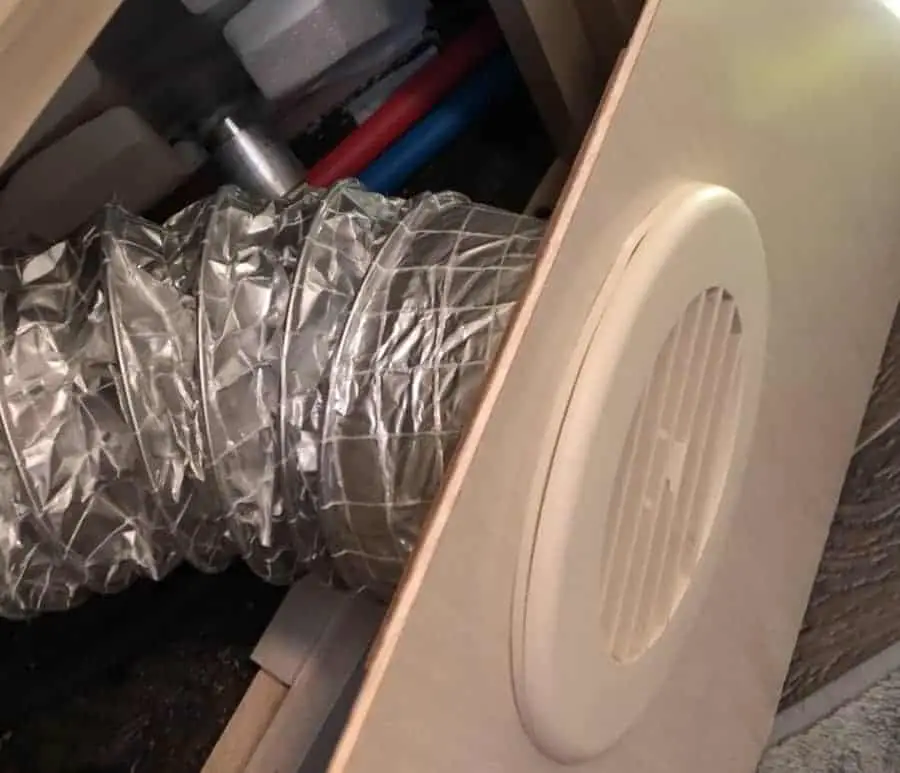
Step 5: Install the Register
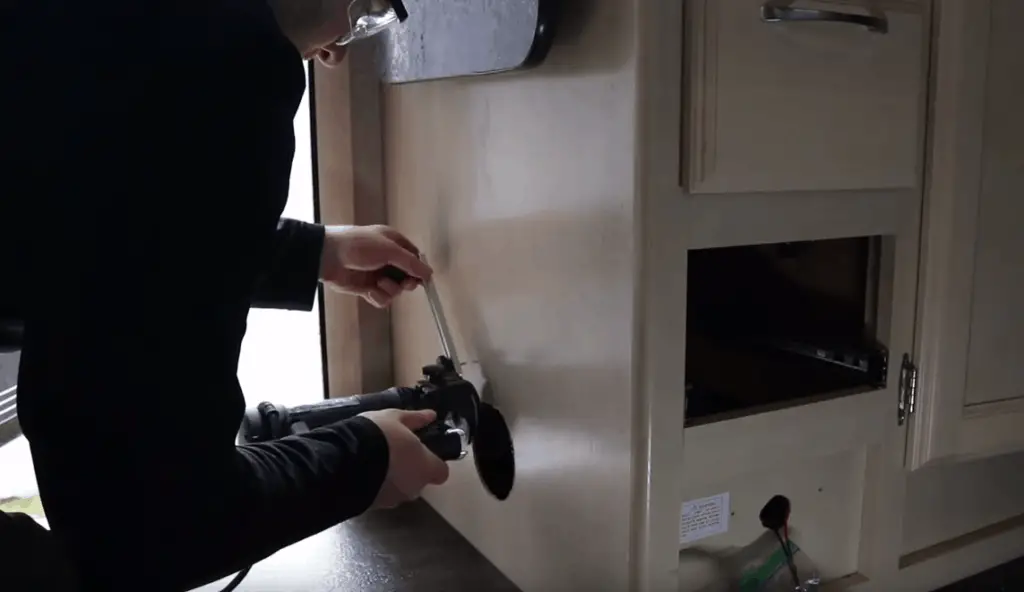
Once your ductwork is installed, it is time to install your new diffuser or register. Ours needed a 4” hole so we used a Rotozip Dremel type tool to make a perfect circle. You can also use a jigsaw, or hole saw depending on the size and shape of what hole you will need to cut.
Always make sure you are aware of what you are cutting into and that you will not cut into any vital areas such as electrical or behind a drawer which needs space to open and shut. We predrilled holes in our cabinet and fastened our register with three screws.

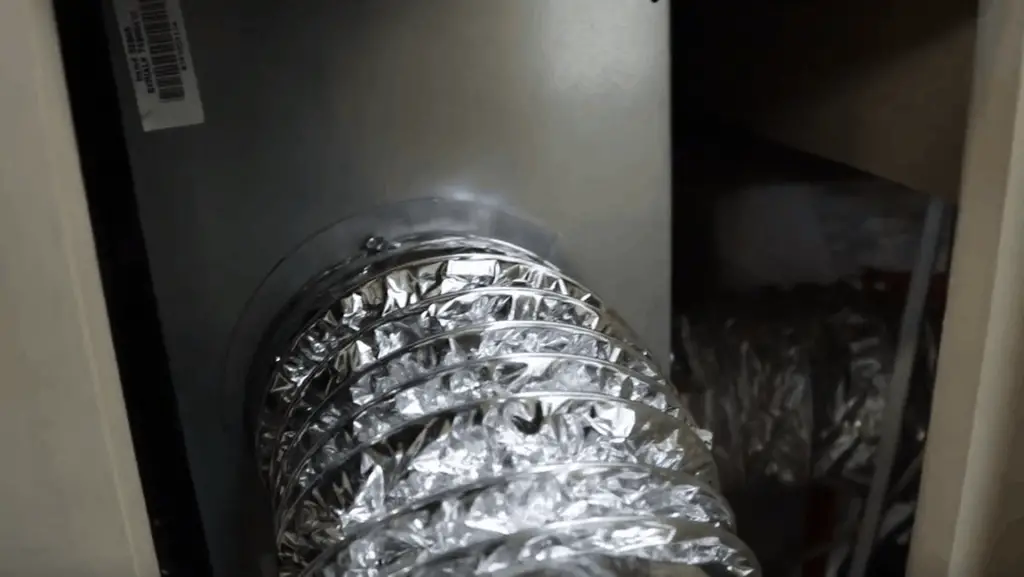
Step 6: Connect the Ductwork
After your duct is installed, you will need to connect your ductwork. We installed a screw to hold our duct onto our diffuser vent as well as a zip tie. If you do not have a airtite connection, it is a good idea to use some metal ductwork tape in order to provide a secure connection.
When connecting any T connectors or a connector to your furnace, make sure to screw your ductwork so it does not rattle off while you are driving. After it is screwed on, use a zip tie and some ductwork tape to provide a secure airtite connection.
If you are connecting directly to your furnace with a premade knock out section provided, make sure to use the appropriate brand of collar to attach your duct to. If there are any air leaks, make sure to patch them up with metal tape to get the best airflow to your trailer or RV as possible.
Step 7: Test it
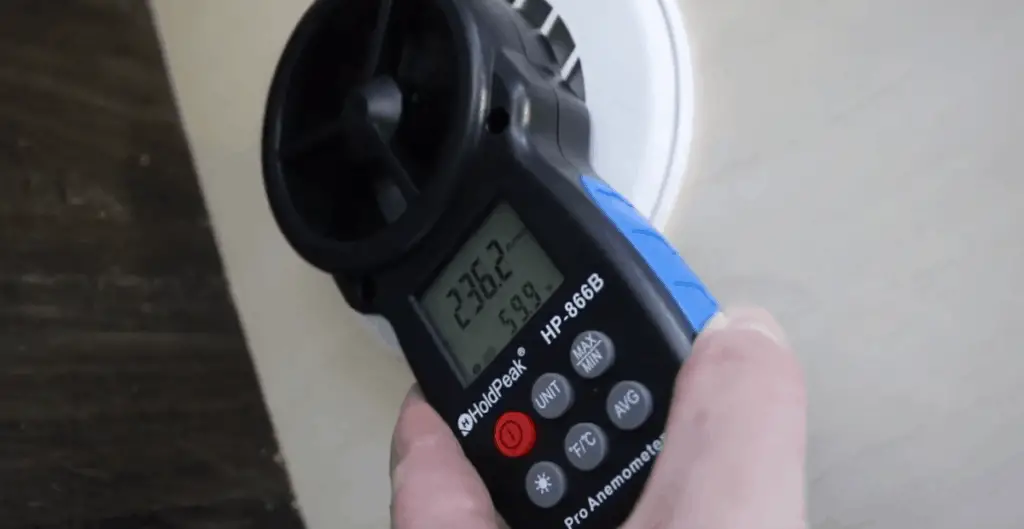
Once you are complete, make sure to test your heating system to make sure all of your ducts are installed correctly and you have airflow from each one. I have a wind speed monitor I use when flying remote control airplanes, so I was able to take readings of how much airflow I am getting from each duct. This really gives you a good before and after of airflow to make sure you don’t rob too much off of other ducts. If you buy a diffuser that enables you to shut off airflow, you can shut it off to provide air just like it was from the factory with the ability to provide more airflow to the area when you need it.
Step 8: Put trailer back together

Last but not least, put all of your access panels back on and your trailer together and you are done. You have successfully added airflow to where you need it in your trailer. Always make sure to keep your airflow to each duct flowing and not to block ducts thinking you will get more air in another area as this can cause your heat exchanger to heat up and crack as your furnace was not designed to do this.
Be the first to be notified about FREE tips, hints, coupon codes, and email-exclusive information. All for FREE!