How To Reseal RV Exterior Walls, Windows, and Seams | Plus 4 Tips and Tricks
Whether you’re a new RV owner or have had one for years, resealing your RV’s walls is something that you should be able to do. It’s a necessary part of maintaining a travel trailer, but only a few actually know how. So, how do you reseal your RV exterior walls?
To reseal your RV exterior walls, prepare the necessary tools, remove the old sealant, clean the surface until it’s a clear base, apply the new sealant, clean up the application, and wait for the seal to cure. The process may take a day or more, depending on your RV.
Resealing the exterior walls of a travel trailer will be tricky without the proper knowledge, but it’s a straightforward process. It will require a lot of time and effort on your part, especially if the project involves a large RV. However, let me walk you through a step-by-step guide on how to do the process, as well as a few handy tips and tricks.
1. Inspect Your RV and Prepare the Necessary Tools
Before everything else, take the time to inspect your RV’s exterior walls for possible issues, such as structural and water damage.
Look out for signs like cracked sealants and gaps in the seams and window joints. Take note of the affected spots since those will be your priority for the actual resealing process. This step is important for you to know if you need to take any precautionary measures apart from reapplying the sealant.
Afterward, prepare all the tools and products that you’ll need for the project. Here’s a list that you can use as a guide:
- Your choice of caulk or sealant (we use this for our exterior seals)
- Acetone (or any appropriate cleaning agent for your exterior walls)
- Gloves (optional but recommended)
- Caulk gun and/or heat gun (make sure your caulking gun has a seal puncture tool like this one)
- Pick or screwdriver
Make sure that you have enough sealant to cover all the seams of your exterior walls. Ask a professional from the store you’re buying from to help you estimate how much product you need, so you won’t have to make double trips if ever you run out.
I usually have two packs of caulk as you don’t want to run out while you have the tools and materials out and have to stop the job to go get more.
2. Scrape Off Existing Sealants
For the next step, you’ll need to scrape off all the existing sealants on your RV’s exterior walls that have failed.
You may have heard from others that you can just remove damaged sealants to save time, and although this may possibly work for them, it’s not recommended.
Directly applying the new sealant on your exterior walls without scraping the old one can lead to uneven seams. It also doesn’t provide the guarantee that your RV will be fully free from possible water damage after the process.
That said, grab your pick and start scraping all those old sealants off. It’s best if you use a plastic pick to prevent damage to your exterior walls, but you can also use a screwdriver, though you’ll have to be more careful if you do.
Keep scraping until nothing is left. While there may be some stubborn little parts, don’t worry about them too much since we can still remove them while cleaning.
Handy tip: You can heat the existing seals using a heat gun to scrape them off easier.
3. Clean the Surface of the RV’s Exterior Walls
After scraping the old sealant off, the next step involves thoroughly cleaning the surfaces using acetone. Unless you’re dealing with stubborn stains, acetone will be enough to remove all the seams’ residue and oils. Your goal is to end up with a clear base where the new caulk or sealant can easily stick.
Note that you shouldn’t use any standard household cleaners or harsh abrasives in place of acetone. The chemicals in these products may react negatively with the material or paint of your exterior walls, leading to more issues in the long run.
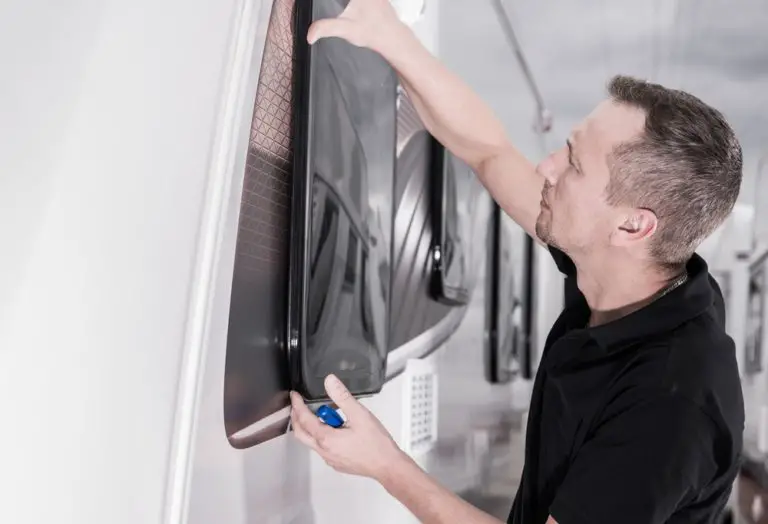
4. Apply the Sealant Using a Caulk Gun
Now that we have a clear base, you can finally apply the new sealant on your RV’s exterior walls. Wear a pair of gloves, grab your caulk gun, and get to work. Position it at a 30 to 45° angle from the joint or seam that you’re applying it to.
If you’re doing the task with bare hands, make sure to have a rag by your side since the sealant can get very sticky. You wouldn’t want to make a mess of your task by letting the seal get to where you don’t need it to.
5. Clean Up the Newly Applied Sealant and Let It Cure
After applying the sealant to all the joints and seams of your RV exterior walls, it’s now time to clean up their edges. Smoothen it out using your fingers, and remove the excess products on the edges until they sit nicely on the seams.
Recheck everything. Once you’re satisfied, let the sealant cure. You’ll have to wait at least 24 hours, depending on the brand of the sealant you used. Inspect the condition of your RV’s seals after curing to know if the results are up to par.
4 Tips and Tricks To Know When Resealing Your RV Exterior Walls
Now that you know the process of resealing your RV’s exterior walls, it’s essential to know how you can keep them in their current state for as long as possible.
Here are some tips and tricks to ensure that you get the most out of your newly resealed exterior walls of your RV.
1. Track the Timeline of Your RV’s Resealing Schedule
Resealing your RV exterior walls is a maintenance activity rather than a repair solution, meaning resealing shouldn’t only cross your mind when there are evident structural issues.
Schedule-wise, you need to inspect your travel trailer every six months for possible water damage and cracked sealants. If you find an issue, then you need to reapply the sealant by this time period. If there aren’t any problems, reseal your RV’s exterior walls every year, which applies whether the existing seal is in good or bad condition.
To ensure that your RV’s seals stay in their best state, make sure to keep track of its resealing schedule and be consistent with it.
2. Use Denatured Alcohol To Clean Your RV’s Exterior Walls
Acetone is the safest option when cleaning up your RV’s exterior walls. However, if you need something stronger, feel free to use denatured alcohol as a substitute. It’s more powerful, which will come in handy if the existing sealant is stubborn or the walls are oilier than usual. Just be careful not to let it come into contact with your skin, so use gloves and rags.
If you don’t like how strong denatured alcohol is, you can also use mineral spirits as an alternative. It’s the best choice if your main problem lies in greasy walls.
3. Use Painter’s Tape Before Resealing for Cleaner Edges
To save time in cleaning up after sealant reapplication, I recommend sticking painter’s tape on the edges of the seams and joints of your exterior walls. Do this before applying the new seal, and remove it just before letting it cure.
You can get painter’s tape at your local hardware shop. Going to a store is recommended if you don’t know how much you’ll need for your resealing project.
You can also order one online. I recommend this ScotchBlue Multi-Surface Painter’s Tape from Amazon since it’s specifically designed to stick smoothly to various surfaces, including textured walls and trims. It’s also affordable and sustainable, so you can feel free to use as much as you need.
4. Use a Caulk Spatula To Smoothen the Sealant
It takes a lot of time and skill to smoothen your sealant using your bare fingers. Fortunately, you can always use a caulk spatula instead to make the task easier, especially if it’s your first time. Just like a regular spatula, you can use the flattened surface to even out the seal or caulk and make the results neater.
You can get the NADOBA 4-Piece Caulking Spatula from Amazon if you don’t have one yet. The set consists of four spatulas with varying sizes, which will be helpful in really getting into all the joints of your RV’s exterior walls. They’re also equipped with rubber handles for a stronger yet comfortable grip.
Final Thoughts
To reseal your RV exterior walls, start with prepping the walls for the new sealant. Make sure to check for cracks, remove old seals, and clean the surfaces. Once everything is set, you can apply the caulk or sealant using a caulk gun or just your fingers. Simply wait for 24 hours for it to cure.
Remember: Your RV’s exterior walls are not the only thing you should care for. Make sure to check the condition of your trailer’s roof, too. Check this article on how to inspect, care, seal, and repair an RV roof for a more thorough guide.
Be the first to be notified about FREE tips, hints, coupon codes, and email-exclusive information. All for FREE!