5 Essential RV Water Heater Maintenance Tips to Keep Your System Running Smoothly
RV water heaters use gas, electricity, or both, to heat water from a storage tank and deliver it to the RV’s kitchen sink, shower, etc. RV water heating devices use gas, electricity, or both. Some heathers use gas or electricity to heat the tank’s outflow pipes, while others use an electric metal element hot rod and lightning rod “add-on” units to heat the water inside the tank.
Gas and electrical RV water heaters are designed to be safe and stable. However, ongoing use and RV movements may eventually cause wear and tear, even in robust RVs with excellent shocks and a solid heating system. It is, therefore, advisable to service an RV water heater at least twice per year.
Your RV water heater helps you keep a comfortable lifestyle by supplying hot water so you can shower, wash your hands and dishes and do the laundry. An unmaintained water heater could suddenly stop performing and leave you in the cold. It may also consume more gas or electricity, negatively affecting your budget.
5 Things You Should Do To Maintain Your RV Water Heater
Your water tank takes in, stores, and releases freshwater on demand. If it is clean, fresh water remains safe to drink and use for about 14 days. Even if you fill the tank with fresh water twice a month while on the road, you must drain, flush, and clean the tank between 2 and 6 times each year. You also need to fully clean the water tank when you park the RV for an extended period.
Apply General Maintenance Practices
Turn the water heater on only after you check that the tank is full. Your indicator is the flow of the water from the faucet: if the water flows out in spurts, there is not enough water in the tank.
Clean your water tank thoroughly after a winter without any action. An empty water tank may have accumulated dirt, and even if you cleaned it before you winterized it, it might carry mineral residue, partially corroded components, and other leftover sediments.
Check and clean your heather’s vents and covers. You can never know or guess what type of debris finds its way to your vents and covers: insects, cobwebs, leaves, and even nests. You must remove these and clean all grids.
Drain Your Water Tank

Your water tank needs to be drained, cleaned, and refilled with water at least twice a year. If you winterize your RV, drain the tank fully before parking it for the winter. Here is an in depth article on how to drain your RV hot water tank.
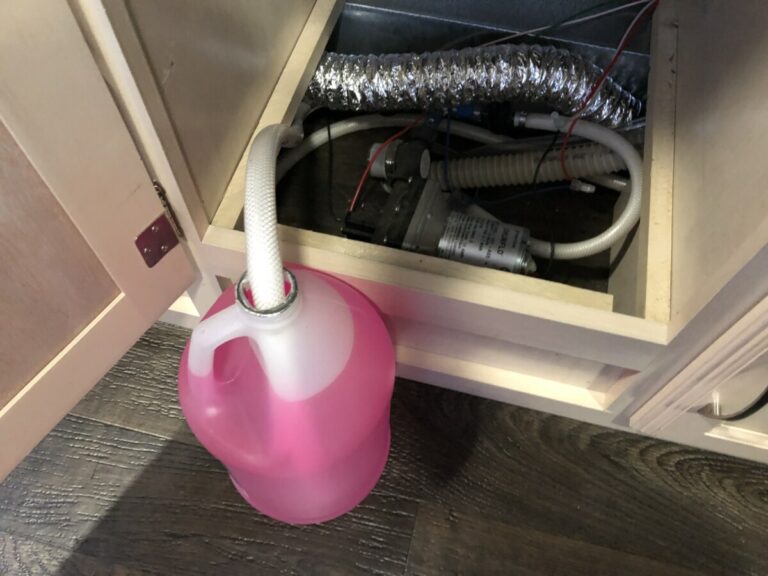
Switch all the water sources off and let the tank cool off overnight. Turn off the water pump and shut down or disconnect your city water inlet. Next, pull the pressure relief valve slowly. Water will come out. Wait until the water stops coming out.
Leave the pressure relief valve open. Use an inch and 1/16 socket to open the plug, and the water in the tank will start draining out. There will not be any back pressure as water comes out because the pressure relief valve is now released. When the water stops coming out, your water tank is drained.
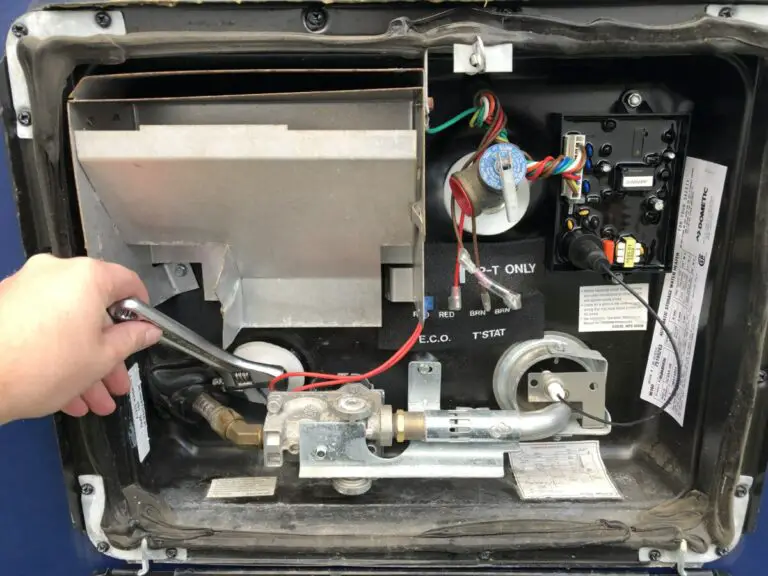
Check The Anode Rod
The two leading brands of water heaters are Suburban and Dometic (used to be called Atwood.). Suburban heaters are made of steel lined with porcelain and require an anode rod, a metal shaft that keeps the water heater from corroding.
If your RV has a Suburban-brand water heater, pull out the anode rod and set it aside once you have opened the plug. Dometic’s RV heaters do not require an anode rod because they are made of aluminum, which is non-corrosive.
Some manufacturers recommend replacing the anode rod if more than 50% has been consumed. Others suggest an automatic replacement every 12 to 36 months. Not replacing an anode rod will result in accelerated corrosion in the tank, causing degradation and rusting-through of tank walls.
Never cheap out and get a knock off brand for replacement. Always buy a quality product like this model.
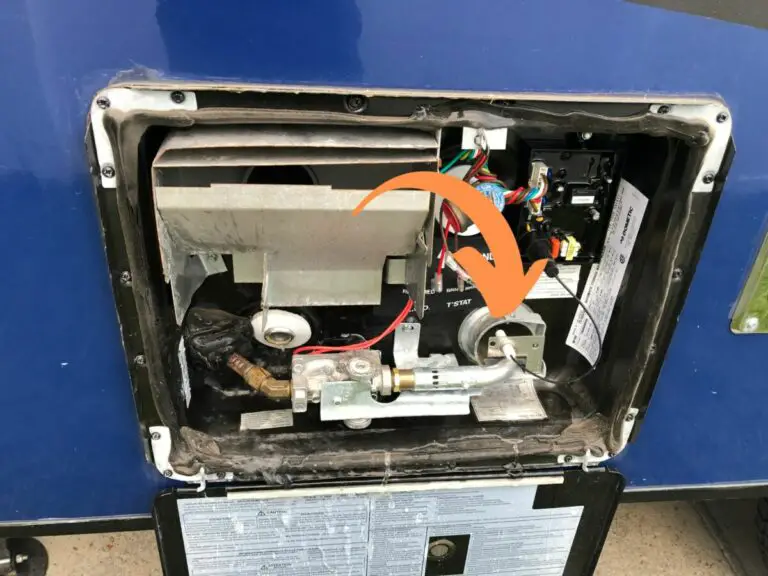
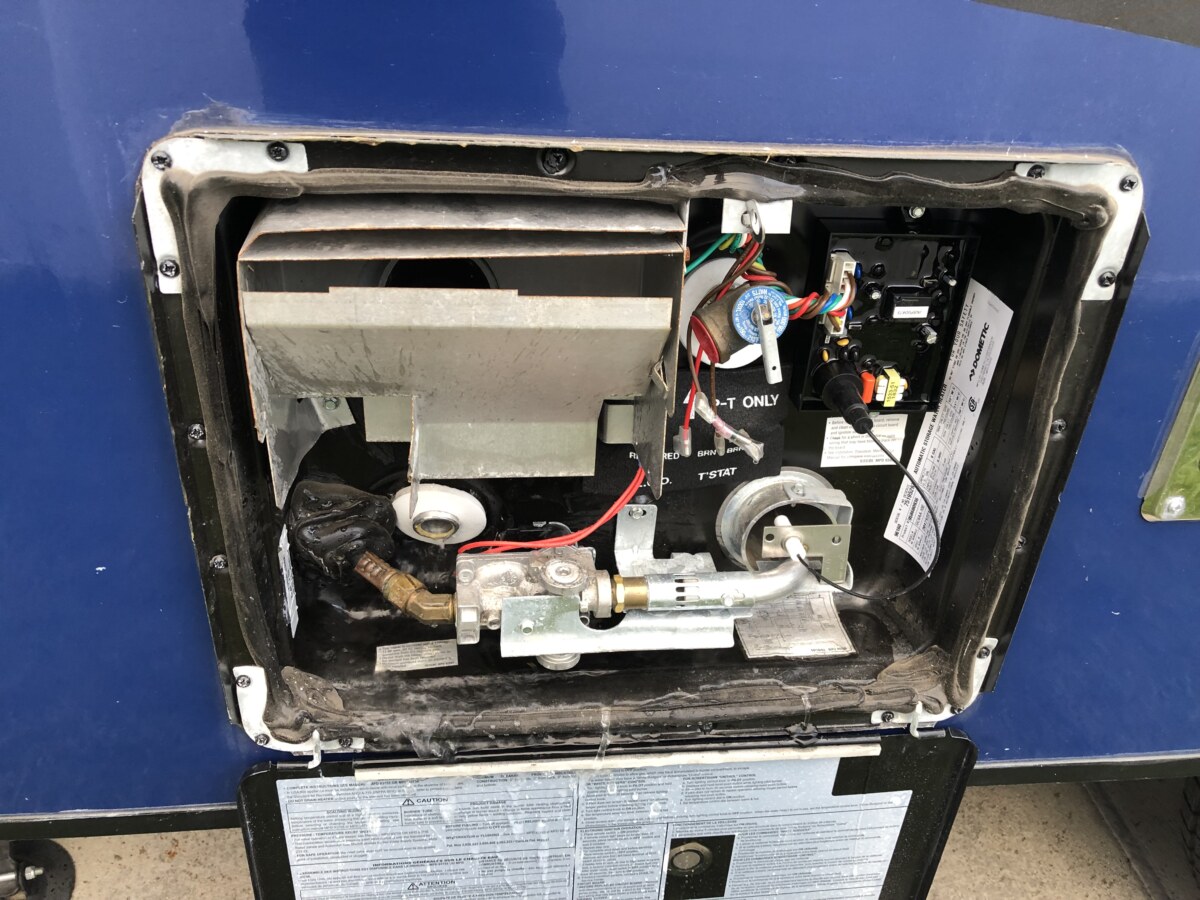
Clean The Thermal Fuses And Gas Tube
The RV water heater works on gas, electricity, or both. It used [] to switch on the electric elements inside the tank and an ignition system to pipe gas into the ignition mechanism to light the pilot and heat the water. If any of these parts are broken or dirty, the heating system will not work.
To check the electric system, check the first thermal fuse that controls the electric current sent to the element in the tank. This safety device is linked to the thermostat, usually placed next to it, and cuts off the current if it gets above a predefined heat, usually above 140 degrees Fahrenheit.
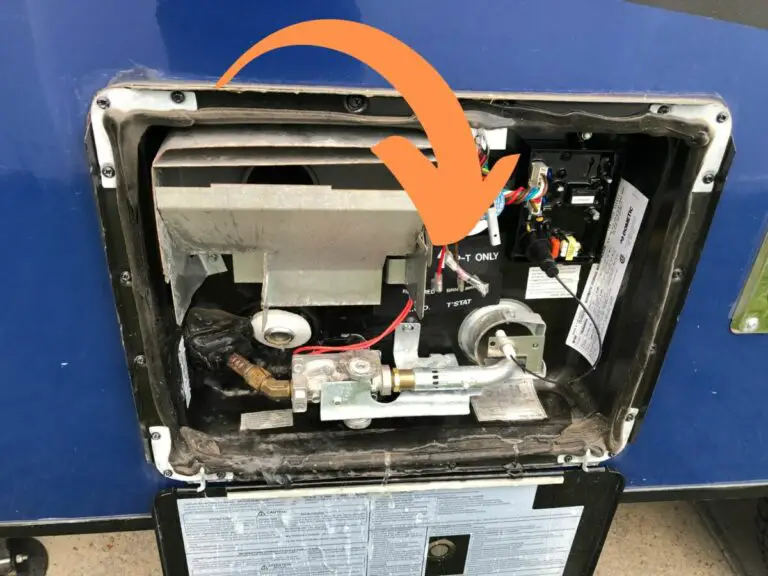
Unplug the fuse, check it for signs of dirt and corrosion, and clean it with a metal brush. Check the fine wire inside the plastic tube, if it is broken or frayed, you should replace it.
The safety device is a switch that directs the flow of gas to the ignition mechanism by controlling the valve that allows gas to flow through and activate the sparker. This switch may stop the gas from flowing if it is faulty. Finally, check the tube that drives gas to the ignition mechanism. It should be cleaned if it is rusty, corroded, or dirty.
Check Your Water Tank For Water Leakages
Water leakages are an RV owner’s biggest headache. When water is stored in metal containers, one can expect that the tank will spring a leak sooner or later. When this happens, your best-case scenario is that the leak is linked to the water pump and may require a new diaphragm to resume holding water pressure as it should.
If, however, the leak originates somewhere in the line, which is much harder to access, test, and fix, then you are facing a real challenge because leaking water could cause significant damage to the floor, metal components, and electric wires over time.
As part of your ongoing RV maintenance routine, check for potential leaks by walking around the RV, inside and out, and looking for any sign of humidity, dampness, and soggy materials like carpeting, drapes, and even walls. Other warning flags are moss, decolorization of outside walls, and corrosion or rust on metal objects.
Finding signs of water is only the start of the journey because the signs are only symptoms. Now you need to identify the leaks’ source or sources. Switch off all electric power and gas inflow. Start with the wettest area and follow all visible connections between that damp area and the water tank itself.
Conclusion
The RV water heater helps you feel comfortable as you travel. An under-functioning or failed heater may indicate a problem with any one of the components working together to deal with the inflow and outflow of water, gas, and electricity required to make your experience seamless and safe. Maintaining these components will ensure that they function well on demand.
Be the first to be notified about FREE tips, hints, coupon codes, and email-exclusive information. All for FREE!