What are the best Travel Trailer Leveling Blocks? 2023 Edition
How to choose the best Travel Trailer Leveling System
Let’s talk about the two trailer leveling levelers that are the best systems on the market today. Trailer leveling systems are one of the most overlooked items in your trailer arsenal. You may think is just a cheap piece of plastic, but these travel trailer levelers can turn your ordinary tilted camper into a level palace in the middle of the outdoors.
What are the best leveling blocks for a travel trailer?
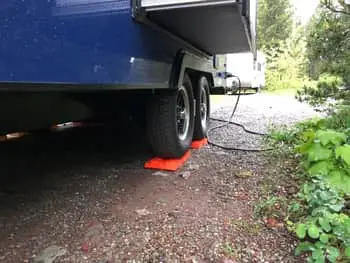
The two best leveling blocks on the market are the Lynx Levelers (block type) as well as the Andersen Levelers (ramp type). Both have great warranties and they are both very durable and do the job great. For some situations we use the Lynx Levelers and some the Andersen, but they can be used interchangeably.
Choosing the best travel trailer levelers is an important task for the comfort with your travels in your RV. There are two different styles of travel trailer leveling systems that I would recommend; one being Lynx Travel Trailer Levelers which are the bright orange building block type, and the other being the Andersen travel trailer leveling system which are ramps you drive on, then you or your partner chocks up the ramp and in an instant, your rig is leveled. Read more about our recommended levelers. Both types of levelers we recommend are good quality with a good warranty, and you will not go wrong if you buy either one. As we are camping for fun, we enjoy using both types because all items travel trailer are fun for us. Even leveling and black tank items. Ehhh… Maybe not that second one.
Why you need travel trailer levelers?
You may be wondering why you need to spend more money for another contraption for your trailer after you already have all of the accessories including the literal kitchen sink in your rig. You, your family, and your trailer all need a travel trailer leveling system for their own specific reasons.
Your family and yourself need your travel trailer level so you don’t roll out of bed halfway through the night, allowing you to get a good night’s rest. Sitting on that crooked dinette bench with grapes rolling all over to the floor wishing you had spent the extra 5 minutes to level your trailer makes leveling systems an easy sell.
Your trailer or RV needs to be level for several reasons; most importantly for your refrigerator. It will not function properly if it is not level. The slide out needs to be level to function properly and not get uneven on its tracks.
Cooking in a frying pan can be difficult if the oil you use rolls off to one side of the pan making those fried eggs less than perfect. Taking a shower in an unlevel trailer can leave a puddle of water in the shower pan that is unable to drain, this can be an annoyance to anyone if you also use this area for storage while on the road. We can all agree that dry clothes make happy campers. For more detail on how to level your travel trailer, read our article.
Types of Levelers
There are two types of levelers available for your trailer or RV. The first is the ramp type, which is considered an upgrade from the block type, the second is the block type which is the Lego building block style of leveler. Both serve a purpose, personally we carry both types on our travel trailer. We use our ramp type for leveling and our blocks for under our tongue jack and stabilizer jacks.
Sometimes depending on the situation, such as if we are on a hill, we use the block type as I think they are better in that situation. This is a personal preference on what we generally want to use at the time with no science behind it.
Ramp Type
The ramp type, also known as the Andersen Leveler, as well as other brands which make the same type such as Camco or Beech Lane are very easy to install. First, arrive at your site. Next insert the levelers under the tires and drive your travel trailer forward until you are level. Then put the chocks under the ramp and you are done. No back and forth or guesswork. These are the quickest type and provide wheel chocking as well as leveling. Ramp type levelers can be used for Travel Trailers, Camper Vans, RV’s, and Truck Campers. If you are using these on big rigs such as a Class A, make sure it has the weight rating to back it up.
Block Type
The block type are exactly as they are called; building blocks. First, arrive at your site, then guess how much leveling you will need, 1″, 2″, even 3″. Put your blocks under the tire and drive forward. If you guessed wrong, you will need to back up and re estimate your blocks. Leveling blocks are only available in 1″ increments, so to get closer, you will need to either dig a hole under your block, or add dirt or gravel to raise it. This is not hard, it just takes some more time. I am not sure how much you like setting up your trailer, but I like to get things done ASAP to enjoy the camping experience. The sooner I get out of the truck and in my hammock, the better.
Block type levelers can be used for Travel Trailers, Camper Vans, RV’s, and Truck Campers. If you are using these on large rigs, make sure they are rated to hold the weight.
The Best Travel Trailer Levelers Reviewed
| Stats | Andersen Levelers | Lynx Levelers | Camco Levelers | Homemade |
| Speed | Fast | Medium | Medium | Slow |
| Accuracy | Perfect | Within 1″ | Within 1″ | Within 2″ |
| Weight Limit | 30,000 Pounds | 40,000 Pounds | None Stated | None Stated |
| Type | Ramp | Block | Block | Block |
| Warranty | Lifetime | 10 Years | 1 Year | None |
Andersen Travel Trailer Levelers: The best ramp type travel trailer leveler
Pros:
- One time setup
- Also acts as a wheel chock
- Lifetime Warranty
- Ability to get perfectly level
- No Guesswork
Cons:
- Can be more expensive than alternatives
The Andersen travel trailer levelers are mostly the same concept as the block levelers. The difference being that you will not have to start over if you do not estimate the number of blocks correctly.
To use the ramp type levelers, first, drive to your desired camping spot, park about one foot off of where you want the trailers final resting space will be. Next, place the Anderson levelers in front of the wheels both axles if you have a dual axle, put the level in the trailer or activate your Level Mate Pro, and start driving. Pull forward and either you or your spotter can check the level as you drive up the ramps.
Once you are level, you or your spotter will put the chocks under the ramps you just drove up. You are now chocked and leveled in one step with no second guessing, backing up, or re leveling. The ramp type leveling system also acts as a wheel chock which can save some time. Make sure to chock the opposite wheels for additional security. When parked at a campsite, we also always utilize the X-Chocks for added precaution and to help trailer wobble while you are moving inside.
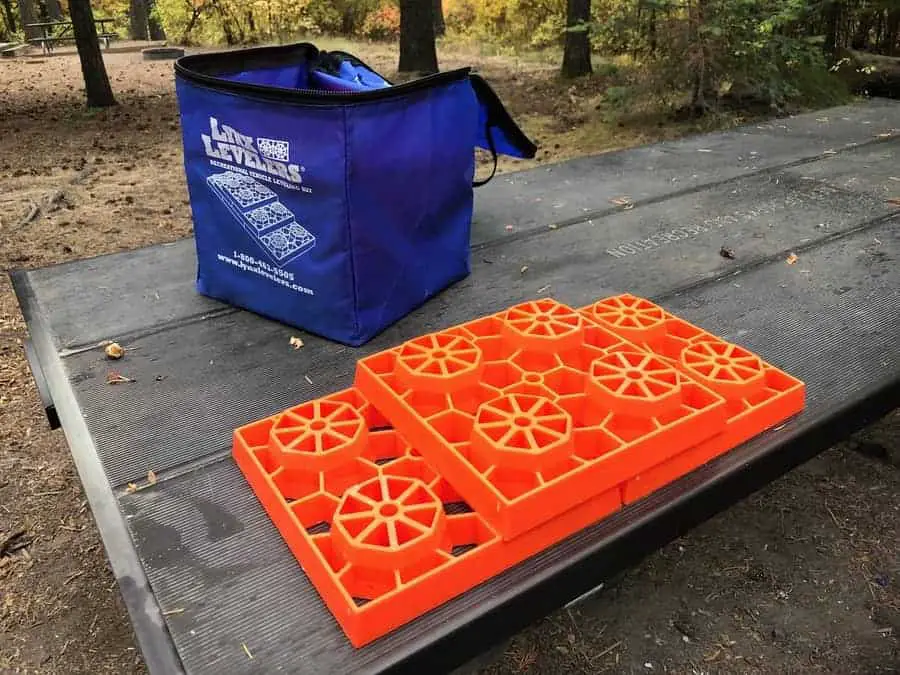
Lynx Levelers: The Best Block Type Travel Trailer Levelers
Pros:
- Easy to use
- Cheaper than alternatives
- Can also be used under leveling jacks in soft dirt
- 10 Year Warranty
- Comes with carrying bag
Cons:
- May take one or two tries to get perfectly level
- Only available in 1″ increments
The building block type is another type of leveling system which we carry in our trailer, and the Lynx is the best on the market today. Travel Trailer Leveling Blocks are relatively easy to use, first pull into your desired location about 1.5 feet from where you want your final resting space to be. Next check for level in your trailer, I use a 4’ level. There are also iPhone apps, the LevelMatePro, and bubble levels that will also work, but my brain prefers the good old-fashioned way as well as I already own a level and do not have to go purchase additional items. Someday soon I will try out these other leveling systems and give you my input.
Next assess how many blocks you will use. Most campgrounds are fairly level so you will find yourself only utilizing one to three blocks high. Stack your blocks either in the front of the tires or the rear depending on your final resting spot.
Tip: it is easier to pull forward over the blocks than go in reverse.
Also, it is easier to see if you are on the block from your rear-view mirror going forward. If you need two blocks, you can put one block down first, then stack two blocks next to it in a building block fashion.
Driveup on your stack of blocks and recheck level. Use your judgment if you need more or less blocks and repeat the process. Doing this a few times will make you an expert at estimating the number of blocks needed to achieve level. Chock both sets of wheels as well as install your X-Chocks if you own them to provide a very stable level travel trailer.
Remember, your leveling jacks are not for fine adjustments, they are for stabilization only. Don’t jack up the whole trailer with them or you can damage your frame or your jacks.
With the blocks being 1” in height, to get very precise, you can either build some dirt/gravel under the blocks, or dig some out if you need 1.5”. Typically, you will not notice being 1” off over 7-8 feet of width of trailer. The block type can also be used under your leveling jacks if you have soft ground to prevent sinking.
I prefer the Lynx over the Camco system as it comes in a handy storage bag, they are warrantied for 10 years, and have a stated weight rating of 40,000 pounds. Camco has a screw lock type storage system, are warrantied for 1 year, and do not state the weight rating. Function wise, the Camco functions just like the Lynx system and is about the same price.
Camco Levelers: A good alternative to the Lynx Block Type
Pros:
- Easy to use
- Cheaper than alternatives
- Can also be used under leveling jacks in soft dirt
Cons:
- May take one or two tries to get perfectly level
- Only available in 1″ increments
- 1 year warranty
- No stated weight limit
The Camco levelers are basically the same as the Lynx except for being a different color. We like the building block type as they are fairly easy to use and can be installed correctly with one person, or with a spotter as well. The Camco blocks are rated a bit lower in our book than the Lynx as they do not state their weight carrying capacity, as well as only provide a 1 year warranty. Functionally, they do the same thing: level your trailer.
These blocks have been used for many years by RV’ers with little trouble. The warranty really doesn’t concern me because these are a block that really does not have a chance of breaking.
As far as not stating their weight limit, I am sure these will hold most trailers or RV’s just fine, but it is nice to know if they are 20,000 pounds, 30,000 pounds or even more weight capacity.
Homemade 2×6 Levelers
Pros:
- Free
Cons:
- Will work in 2″ increments as a 2×6 is a hair under 2″ thick
- Can require more guesswork and digging under where you are trying to stay level
- Can be unstable as they do not interlock together
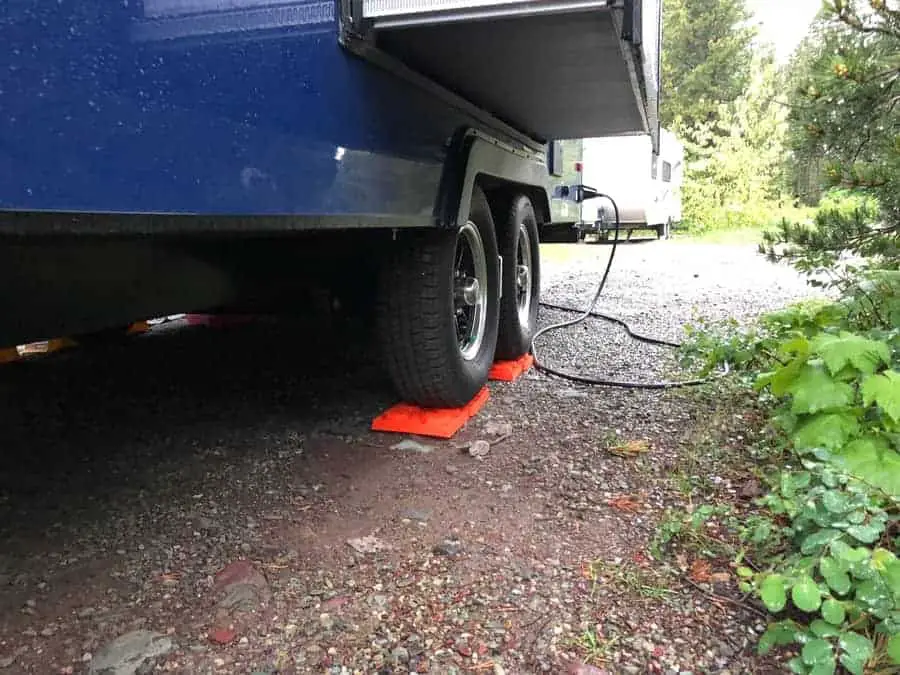
No one said you needed to purchase levelers. You can use 2×6 boards as levelers and be perfectly fine. There are some downsides though. These will have larger increments due to their size being taller than the other type of levelers, as well as if you stack multiple on top of each other, they can be unstable due to them not interlocking together. You can nail them together, but then when you need to switch sizes, you will have to remove the nails.
Other Notable Levelers
There are countless leveling block systems and ramp systems on the market today. Many of these others on this list are similar to the leveling systems we mentioned above, but may be copycat, or appear to not have the same qualities. When looking at these other levelers, they may work in some situations, but may be inferior in other situations. For your application, they may work just fine, but we prefer the recommended levelers above.
Camco RV Curved Leveler With Chock
The Camco Curved RV leveler with chock is very similar to the Andersen levelers, they have a weight capacity of 30,000 pounds which should handle most RV’s and quite all travel trailers out there. From the reviews, there are lots of complaints about these not gripping properly and the chocks shooting out leaving the trailer unchocked. This can create a very dangerous situation for anyone around the trailer as well as parties inside of the trailer. As a good note, always chock BOTH sides of your travel trailer just in case something like this happens and you are parked on a slippery surface. Many ramp levelers are including pads for this slippage situation.
As far as leveling capabilities, they can level your trailer as small as 1/4″ to up to 4″. They do appear to be a bit shorter than the Andersen levelers, which may be better if you have a really short wheelbase.
Beech Lane Camper Leveler
The Beech Lane Camper Leveler looks to be a splitting image of the Andersen unit. These are capable of holding 35,000 pounds and come with two rubber mats to put under the levelers to prevent them from sliding around when trying to level. Reviews seem to be good except for a few reviews where the grip tape attached to the levelers comes unglued and tires slide which is bad news. It is mentioned in their newer units that they do not include grip tape that causes failure with hot tires melting the glue.
The company seems to stand behind their product with a lifetime warranty even if you have to cut the levelers if you have small space between your dual axle wheels. It is good to see companies warranty their items in situations like these. As the price is very similar to the Andersen units, I think they are still a better unit due to having more mainstream usage.
Camco Tri-Leveler
The Camco Tri-leveler is a drive on ramp that escalates in height as you move forward. One flaw I see by looking at these is you are parking on a ramp which offers no way to chock your wheels. I would not trust the chocks on the other side of the trailer to keep your vehicle in place. Also, these are only rated for 3,500 pounds which is very little compared to other units.
I do see these being used for more of a Class C or camper van which you just drive up and park. The emergency brake and transmission can hold the vehicle in place of chocks. Personally, I would rather take that stress off my vehicle and stay away from these ramp type without chocks.
OxGord RV Camper Leveler Ramps
The OxGord RV camper levelers are like the Camco Tri-Leveler as they are a ramp type. The same analysis goes for these, I would stay away unless you have a camper van or Class C that you can drive up and park. Even though the block type take more work, I would prefer being on a level surface than being on a ramp with no chock.
BAL Light Travel Trailer Leveler
This unit is unlike all of the others, the BAL light travel trailer leveler allows you to park in your final resting space, then put the unit around the tire, and ratchet in place. This acts like a leveler as well as a wheel chock. The BAL unit fits 13″, 14″, and most 15″ wheels which are found on many tent travel trailers. This unit is made for single axle small lightweight trailers for chocking and leveling. The size of the unit is 21″x 19″ and 14 pounds, so make sure that you have enough space for storage and can deal with the heavier weight than lightweight levelers or ramp type levelers.
Through our research, we could not find a weight rating on this unit, but on their website, they show a picture of a tent travel trailer as well as a normal travel trailer. If you have a small camper, this could make leveling and chocking a breeze without having to get in or out of your vehicle. If this is your specific application, and you have room for it, then I would say this is a good contender.
Are you Level?
There are a few ways to determine if your travel trailer is truly level. Two are manual, and one is fully automatic you can do from inside your tow vehicle. You can guess what way is our favorite to level your trailer.
4′ Level
A 4′ level is a quick and easy way to determine if your trailer is level. We typically place our level on the floor or our RV when we are leveling. First side to side, then front to back.
This process is easy and simple, and uses a larger general area to determine level than bubble levels, but requires you to go in and out of your trailer, while moving the tow vehicle on your blocks or ramps and can add some extra steps.
Bubble Levels
Bubble levels are only as accurate as how level they were installed as well as how much sensitivity the bubble has over such a short distance. These levels can be mounted on the side and front of your trailer to tell you if you are level front to back and side to side. Bubble levels are cheap and easy to stick on and install, and some screw into your travel trailer. If you install these off level, you typically cannot redo it easily without making more holes, or redoing the stick tape.
One downside on the install would be to create more screw penetrations within your travel trailer, you will now need to keep this area sealed and check your sealant job periodically.
As bubble levels are small, the accuracy can be difficult to read over short distances of the width of your travel trailer. These work for good general use, but you may be off plus or minus 1-2 inches while stating your trailer is level.
Level Mate Pro
We have mentioned the LevelMatePro a few times in this article. This is a device that is installed within your trailer. Whenever you get to a campsite, you will activate your app on your phone, which doesn’t need service to work just a Bluetooth connection. You will begin your process of leveling with your ramps or blocks, and the app will tell you to keep going up your ramps, or how much lift is needed if you are using blocks to be perfectly level.
This small device completely takes the guesswork out of the leveling process and allows you to level your trailer without another person or without having to get in and out of your tow vehicle several times to check for level.
The device is installed in your trailer while it is perfectly level, and is configured to your specs of width and length. The installation process is easy and this device is a huge time saver. This is by far the easiest way to level your trailer as you have real time data of how level it is as well as recommendations on what you need to do to make your trailer level. If you like little gadgets and want to level your trailer quicker, this is a must have.
What Leveling System We Like
As mentioned, I personally like the ramp type trailer leveling system better as my spotter is usually chasing down our 1 year old. While she is chasing down the little one, I am in and out of the truck checking for level and do not have to start over if I estimated wrong. If you are trailing alone with Anderson travel trailer levelers, then you are in a good position to do a good job leveling your rig by yourself. If I had a dedicated spotter or LevelMatePro, completing this in one step would be quick and easy. Just use the Bluetooth app, drive the vehicle up the ramps, then put the vehicle in park when level and chock the ramps up and you are done.
What not to do While Leveling
- Don’t forget to chock both sets of wheels
- Don’t install levelers on an unstable surface
- Always take caution to make sure your trailer is properly stopped before unhitching
Conclusion
You can’t go wrong with either way of leveling blocks or ramps mentioned in this article. Lynx leveling blocks are comparable in price to the Camco system at the time of this article. The Anderson ramp system will run a bit more, but are totally worth it if you want to quickly level your trailer without any hiccups. If you have a dual axle trailer, you will need two ramp levelers. We currently have both Andersen Levelers and Lynx Levelers.
Be the first to be notified about FREE tips, hints, coupon codes, and email-exclusive information. All for FREE!

