11 Most Important Items To Inspect on a Vintage Travel Trailer Before Purchasing
Ready to hit the open road in style? Shopping for a vintage travel trailer is an exciting way to make that dream come true! But before you commit, it’s essential to do some careful inspection work.
You can inspect a vintage travel trailer before purchase by researching the year and model of the trailer and checking the exterior and interior for signs of wear and tear. In addition, test the trailer’s electrical, plumbing, and heating systems to ensure they’re safe and functioning.
Check out these tips to ensure your retro camper will provide just the home away from home or cross-country journey you’re looking for.
If you read this article and think you need a more in depth walkthrough on how to inspect a trailer, our inspection course can walk you through many of these items step by step and can save you THOUSANDS in the long run. Find out more here: The Savvy Campers RV Travel Trailer Inspection Course
1. Research the Model, Age, and History of the Trailer
If you’re in the market for a vintage travel trailer, I recommend doing comprehensive research before making an investment.
Here are a few tips:
- Gather basic information about your potential purchase, such as make and year of production, where it was purchased from, and even any previous owners. Gaining insight into these details will give more context to the RV’s condition and possibly uncover unique stories that come with owning an older camper.
- Dig into local newspaper archives from the area where it was likely sold and see if any ads or notices pop up of its sale by past owners. That could help you track down who had ownership before your purchase. Also, check city registries, as many have licenses and other records related to older models.
- Search for videos and photos of past models of the same era, and learn about their specs and customizations that may still be present today. This research could prove helpful if your vintage unit is experiencing any age-related issues since repair services may have already addressed them during that same era.
- Connect with groups specializing in taking care of older trailers and ask about common issues they have encountered. Also, find out if anyone knows where to track down spare parts or who specializes in restoration using original equipment, especially if the items are no longer made today.
2. Check if the Frame Is in Good Condition
A sturdy frame is one of the critical aspects of a vintage trailer. Not only does it provide support for the rest of the structure, but it also has a major impact on towing stability and safety.
Here are a few ways to check if an RV’s frame is in good condition:
- Inspect all of the welds carefully. If you spot any cracks or breaks in them, that could signify a problem with the frame that you should not ignore.
- Check for rust or corrosion on the frame. Any rust or corrosion could lead to significant structural damage over time, and you should address any issues immediately.
- Check for signs of previous accident damage. Look for any bends or dents that a collision could have caused. If they appear to be recent, chances are the RV wasn’t properly repaired after an accident and might need more work later down the road.
- Ensure there are no sags or wear marks on the floorboards. These can suggest that structural integrity has been diminished and could even lead to floors collapsing!
Tip: If you’re not confident in your ability to assess the condition of the frame yourself, then it’s always a good idea to consult with a professional who knows what they’re doing. They’ll be able to give you an accurate assessment of its condition and offer advice on how to proceed with repairs if necessary.
3. Check Onboard Systems (Water and Electric)
Inspection of your potential RV isn’t just about the frame but also what goes on inside. Specifically, it’s best to check if the RV’s water and electric systems are safe for use.
Here are a few things to consider:
- Check for any leaks or damage in hoses, pipes, and other areas that could be vulnerable to wear and tear over time. If any of these are present, ask the dealer to fix them before purchase.
- To ensure you’re getting the most out of your RV plumbing system, check that all taps are tightly sealed and functioning properly. No drips should occur when you turn them off. Then look at the pressure regulator and valves to ensure everything is in top shape with optimal performance.
- Ask a qualified electrician to look over the electrical systems on board. They should be able to check that everything is functioning correctly and safely. That includes running tests on all wiring connections, looking at switchboards, circuit breakers, etc., and checking any appliances, such as cookers or heaters, installed on board, too.
4. Look for Water Damage, Mold, and Mildew
After you’ve taken a good look at the camper’s mechanics, it’s time to check for water damage. Thoroughly investigating this is vital in ensuring that your vehicle remains structurally sound and safe. Plus, it can give you an idea of what repairs you may need to make.
Here are some things you should do:
- Keep an eye out for any signs of moisture on both outside and inside surfaces, like rusting, discoloration, peeling paint, or mold spots. If possible, try tracking down where the source might be and ask the seller to fix any issues before purchase.
- Check the underflooring and carpets for any signs of water damage. That may indicate a leaking roof or faulty plumbing system.
- Check for mildew or mold growth. Mold and mildew can be a major issue if left untreated, as it not only damages your RV’s structure but also poses health risks. To ensure you’re getting the best quality product for your money, thoroughly check inside all cracks and crevices, as these areas often show signs of spores in various shades such as black, green, yellow, gray, or white.
- Remember to look into hidden spots like cupboards, too. That’s an effective way to tell whether previous owners have kept up with maintenance on their rig.
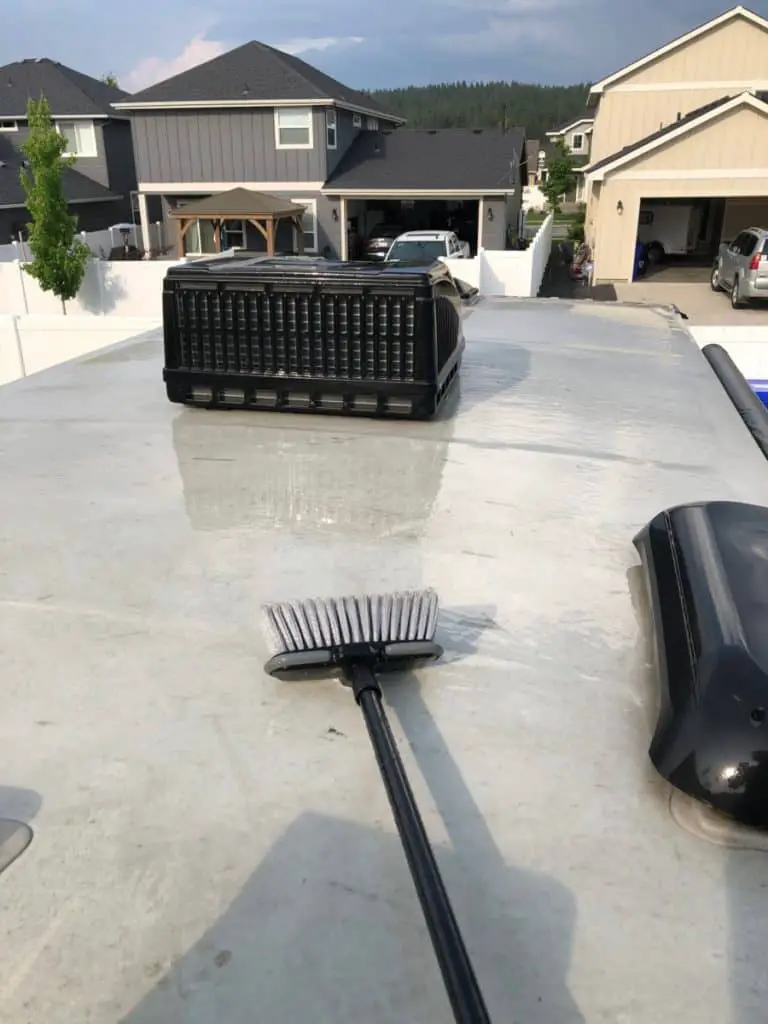
- Pay attention to the roof and any panels around windows and doors. Often, these areas can be prone to leaks which can cause big problems down the line if not addressed in time.
5. Test Windows, Doors, and Vents
Before committing to a vintage travel trailer, it would be best also to inspect these parts:
- Windows
- Doors
- Vents
These components are integral for both safety and comfort, so ensure they’re in good working order.
Here are a few guidelines that may come in handy:
- Check each window carefully. If you sense any cold air coming through, sealants or glass replacement may be necessary.
- When examining the door frames, pay close attention to their sturdiness and ease of opening/closing. Any dips in quality could signal problems down the line.
- Check the metal grates on all air vents for potential gaps or tears that could let in bugs and other animals. If they’re not properly sealed up, then your RV won’t be as secure. Additionally, ensure these covers are dust-free and firmly attached, so ventilation remains uninterrupted.
6. Assess the Brakes and Tires for Wear and Tear
Now it’s time to inspect the brakes and tires on your potential purchase. These are two essential safety features, so it’s critical to ensure they’re up to scratch.
Here are a few tips:
- Ensure the brake pads and shoes are in good shape. If not, ask for maintenance records from the owner or dealer.
- Look out for signs of wear on wheels and tires. Doing this is especially important since worn treads can make wet roads dangerous.
- Remember to inspect suspension components, too. Any bent parts may mean the vintage RV needs a tune-up or even more extensive repairs.
- Take the trailer for a test drive and ensure everything functions correctly. Check from the brakes to the lights and turn signals.
Remember: Checking the brakes and tires of a vintage trailer before buying is essential for both safety and comfort purposes. Paying close attention to wear and tear will enable you to make an informed decision that you can trust!
And if there are any issues, be sure to discuss them with the seller or dealer before purchasing.
7. Inspect Furniture Condition Carefully
The furniture in vintage trailers can be a major selling point. However, it’s also essential to ensure that the pieces are comfortable and well-made. Buying a broken-down couch or bed isn’t going to do you any good, so it’s a no-brainer to inspect the furniture carefully.
Here are a few guidelines for you to consider:
- Check for signs of damage, such as scuffs, tears, or wear and tear on any fabric materials. Also, look for signs of water damage, as this could be a red flag that the seller has been ignoring maintenance issues.
- Inspect the frame and legs of chairs or couches. Check for any bent or missing screws and examine for rust, warping, or other structural abnormalities.
- Ensure any fittings that open up can move without sticking, as you will likely need to replace these if they aren’t functioning properly. Remember to check underneath the cushions, too.
- Smell-test all furnishings before committing. Musty odors often indicate mold issues, while smoke odors could mean more significant problems, such as fire damage. If you suspect this kind of damage, then don’t hesitate to walk away and look elsewhere.
8. Test Any Hard-Wired Appliances
It’s essential to test any hard-wired appliances in a vintage trailer before signing on the dotted line. That’s especially crucial when dealing with used items that may have been neglected or poorly maintained.
Here are some tips you should keep in mind:
- Check each appliance for cracks and damage. Specifically, you must inspect cords, cables, and plugs for fraying or exposed wires, as these are major fire hazards.
- If everything looks good on the surface, then it’s time to test each appliance one by one. Start with the basics, like the fridge, stove, and oven.
- Ensure that the fridge is cold and the oven heats up properly. Both appliances should reach their optimal temperature without taking too long. If possible, also test out the stove by frying some eggs or boiling a pot of water.
- Check any built-in entertainment systems like TVs and stereos. If they don’t work, then you may need to update or replace the wiring altogether.
- Check the RV’s electrical system as a whole. Make sure all outlets work and that there are no exposed wires along the walls or floor. If all looks good, then you’ve likely found yourself a winner.
Extra tip: To ensure your safety, look for GFCI outlets and test them. These reduce the risk of electrocution by automatically shutting off power when they detect surges or shorts in wiring!
That said, be sure to check out “Why Does My RV Shock Me and How to Solve the Issue” for tips on preventing your camper from electrocuting you.
9. Note Any Exterior Customizations
The next step in inspecting a potential vintage trailer purchase is noting any exterior customizations. Often, vintage or antique trailers will have some form of customization that gives them character and makes them unique. Take note of the level of customization to help you accurately assess the worth and condition of your prospective trailer.
Consider the following:
- Scan around the trailer’s exterior for any unique embellishments or customizations that stand out, like brightly-painted adornments, rooflines extended with additional windows, or other structural changes, such as cutouts in frame walls to incorporate doorways,
- Even more subtle touches like mounting vintage lights on a feature wall can give the interior an inviting feel, so ensure you check these details.
Caveat: If you find yourself looking at a trailer with excessive customizations, take into account how it has been cared for over time. For example, a previous owner may have been enthusiastic about making changes yet reluctant to maintain those same additions throughout their lifetime. Be mindful of any quirks and special features that may become an issue down the road.
10. Check the Relevant Documentation
Another crucial step to take when inspecting a vintage trailer is to check the relevant documentation. That includes the title and registration papers of the vehicle. If these are not in order, you may run into problems later.
Here are a few important guidelines:
- Ensure all paperwork is up-to-date and that any addenda are current. These documents will also provide vital information, such as the age and condition of the trailer.
- Ideally, you should also go over any repair records that are available to gain a better understanding of how well the trailer has been maintained. If there’s no record, it’s worth doing some research into types of repairs that may have been conducted in the past or talking to previous owners if possible.
- Remember to check for a warranty. If the vintage trailer is still under warranty, then that’s one less thing you’ll have to worry about down the road.
11. Ask About Repair/Servicing Records
Finally, I highly recommend asking the seller to provide the RV’s repair and servicing records. It will help you assess how well the trailer has been maintained and any recent updates that have been made.
To put things into perspective, here are a few crucial questions to ask the seller:
- When was the last time the RV had a tune-up?
- How often has the trailer been serviced in the past?
- Are there any documented repairs that have been made to the trailer since its purchase?
These questions will give you a good indication of the reliability and safety of the trailer. If the previous owner has been diligent about servicing and repair, then you can rest assured that your purchase will be a sound one.
Red flags to watch out for: As I wrap up, here are a few red flags to keep in mind when inspecting a vintage trailer:
- Signs of rust, weather damage, or water leaks
- Leaky plumbing fixtures or corroded pipes
- Faulty wiring (e.g., exposed wires), which could be a fire hazard
- Appliances that don’t work properly or are outdated
If any of these issues are present, it’s probably best to pass on the purchase and look for a different trailer. If all appears well and the repair/service record is in order, go ahead and make your vintage trailer dreams come true.
That being said, here’s a quick video that may come in handy if you need tips for inspecting a used trailer before purchase:
The Bottom Line
When searching for that perfect vintage trailer, you must be a savvy shopper. It’s worth spending some extra time to investigate the paperwork and any past repairs or customizations before signing on the dotted line, as this can save you from making an investment that costs more than it should in long-term maintenance!
With these tips in mind, your journey into owning a classic trailer will be sure to bring many years of enjoyment down the road.
Be the first to be notified about FREE tips, hints, coupon codes, and email-exclusive information. All for FREE!