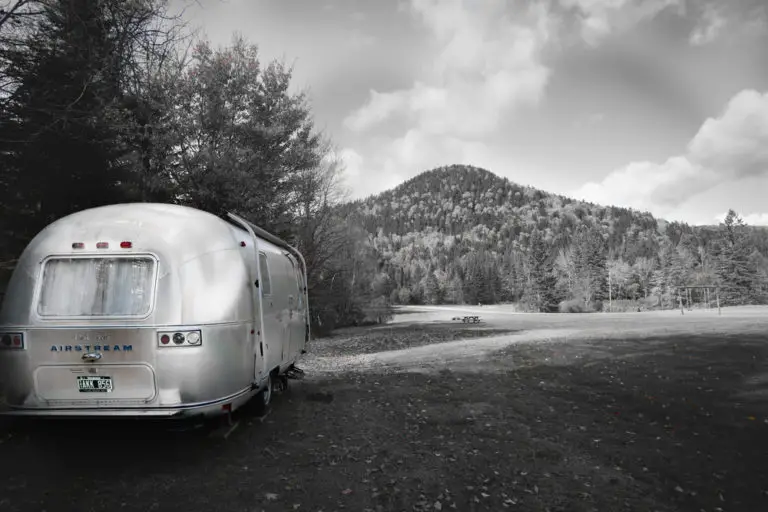
How To Winterize Tankless RV Water Heaters: 3 Essential Steps For Protection
As an RV enthusiast, you understand that preparing your vehicle for the colder months is crucial to maintaining its performance and longevity and winterizing your tankless RV water heater is top on the list. By taking the necessary steps, you can prevent potential damage from freezing temperatures, ensuring that your water system will be in good working condition when you’re ready to hit the road again.
The easiest way to winterize tankless RV water heaters is to prepare your RV for winterizing, drain any water from the system, and either use an air compressor to blow out your RV water pipes, or fill them with antifreeze with a water pump bypass ensuring your tankless RV water heater doesn’t freeze.
RVs with tankless heating systems still retain water which can cause ruin when frozen in the pipes or heater. You must ensure these internal mechanics get cleared before winter starts and do so correctly so you don’t cause damage. So, why and how do you winterize a tankless RV water heater?
Why Should You Winterize Your RV Water Heater?
If you store your RV with water still in the water heater or pipes, you run the risk of cracked pipes or a damaged water system that can lead to leaks. Even tankless water heaters hold a small amount of water when not used. If this system gets damaged during the winter frost, you may need to replace parts or the whole thing come spring.
Before the temperature dips to 32° and the pipes have time to freeze as they are inactive, you should winterize them.
How To Winterize Your Tankless RV Water Heater In 3 Steps:
Tankless water heaters are excellent. They supply and heat water on demand which is great for saving energy. These tanks are instant and can run on electric or gas lines.
To preserve this great function, you must prepare it for the winter ahead. If you are lucky, your RV already has an “antifreeze” feature that runs on electricity and prevents the water in the pipes and heater from freezing. However, this feature may only be reliable if there is no possibility of a power outage.
It is best to winterize your RV water heater To save yourself the headache of replacing your water system. Always refer to the tankless water heater’s manual before changing or adding something to the system.
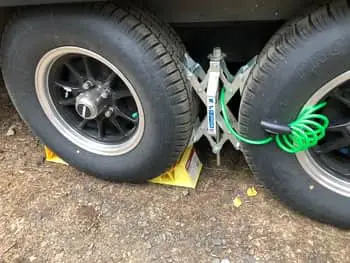
Step 1: Preparation for Winterizing
Before winterizing your tankless RV water heater, it’s crucial to gather all the necessary tools and supplies. Start by collecting the following items:
- Non-toxic RV antifreeze (typically 2-3 gallons)
- A water heater bypass kit, if not already installed
- A water pump converter kit, if not already installed
- A tank cleaning wand
- Basic hand tools, such as wrenches and screwdrivers
To prepare your RV for winterization, follow these steps:
- Disconnect your RV from any external water sources: Turn off the water supply and disconnect any hoses attached to your RV. This includes city water and any water hoses that supply water to your tankless water heater.
- Drain your RV freshwater tank: Locate the freshwater tank drain valve and open it. Allow all the water to drain out of the tank. Close the valve once the tank is empty.
- Install the water heater bypass kit (if needed): If your RV doesn’t have a bypass kit installed, follow the manufacturer’s instructions to install one. This kit allows you to winterize the water heater without filling it with antifreeze.
- Install, or engage, the water pump converter kit (if necessary): A water pump converter kit guides the antifreeze to the water pump. If your RV has one, follow the manufacturer’s instructions for installation or engagement.
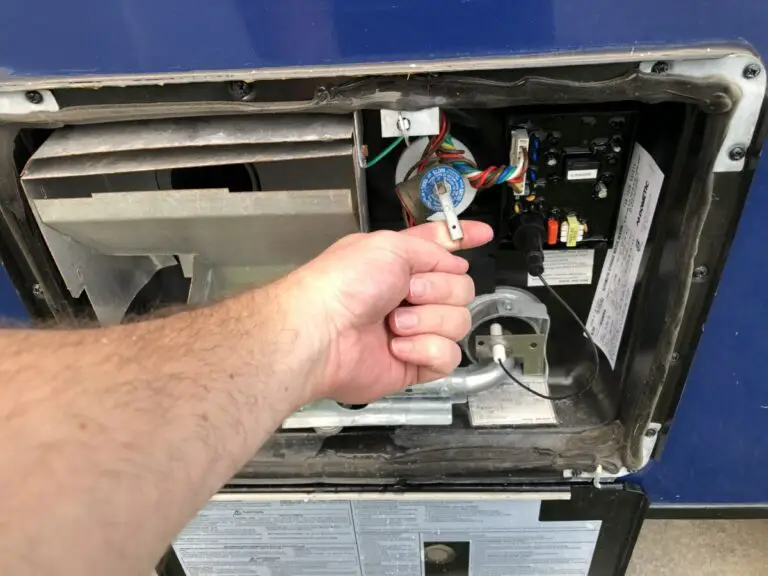
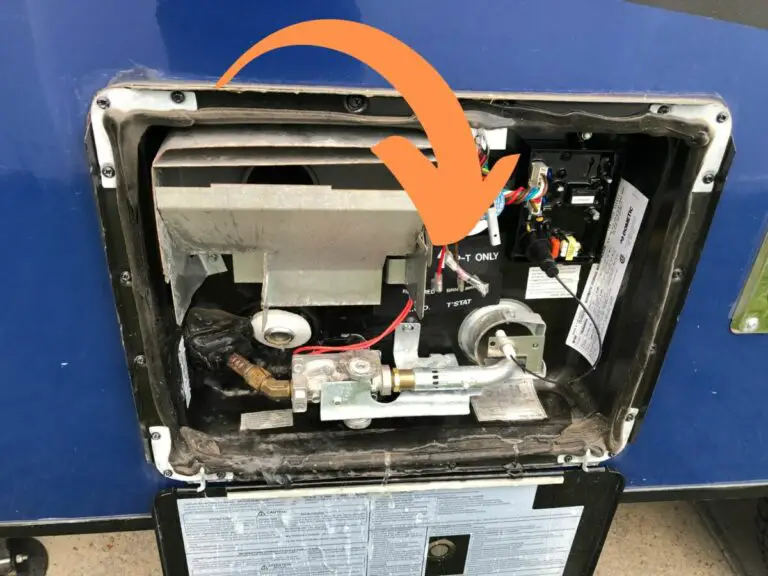
- Drain your tankless water heater: Turn off the RV water heater and let it cool. Locate the water heater drain valve and open it. Allow all the water to drain out of the unit. Close the valve once it’s empty. Detailed information of draining the water from your RV is in the next step.
Now that your RV and tankless water heater are prepared for winterization, you are ready to protect your system from the harsh temperatures of the winter months.
Step 2: Draining Water From the System
To winterize your tankless RV water heater, it is essential to drain any remaining water from the system. Draining the water will prevent freezing and potential damage to pipes and other components. Follow the steps below to properly drain the water from your tankless water heater.
Locate and Use the Drain Valve
- Turn off the power supply to your water heater: Before you begin, ensure that the power supply to your tankless water heater is turned off. This includes both electricity and gas.
- Close the hot water tap: Make sure there is no water flowing in your RV by turning off the hot water tap completely.
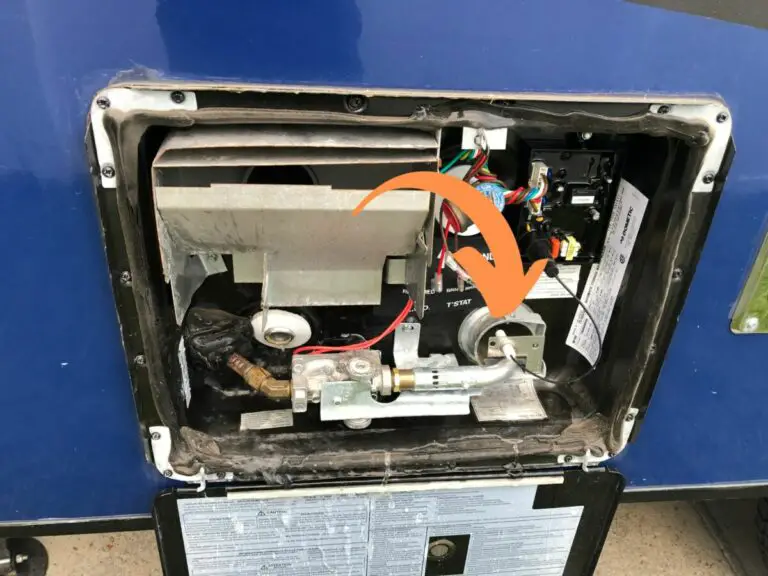
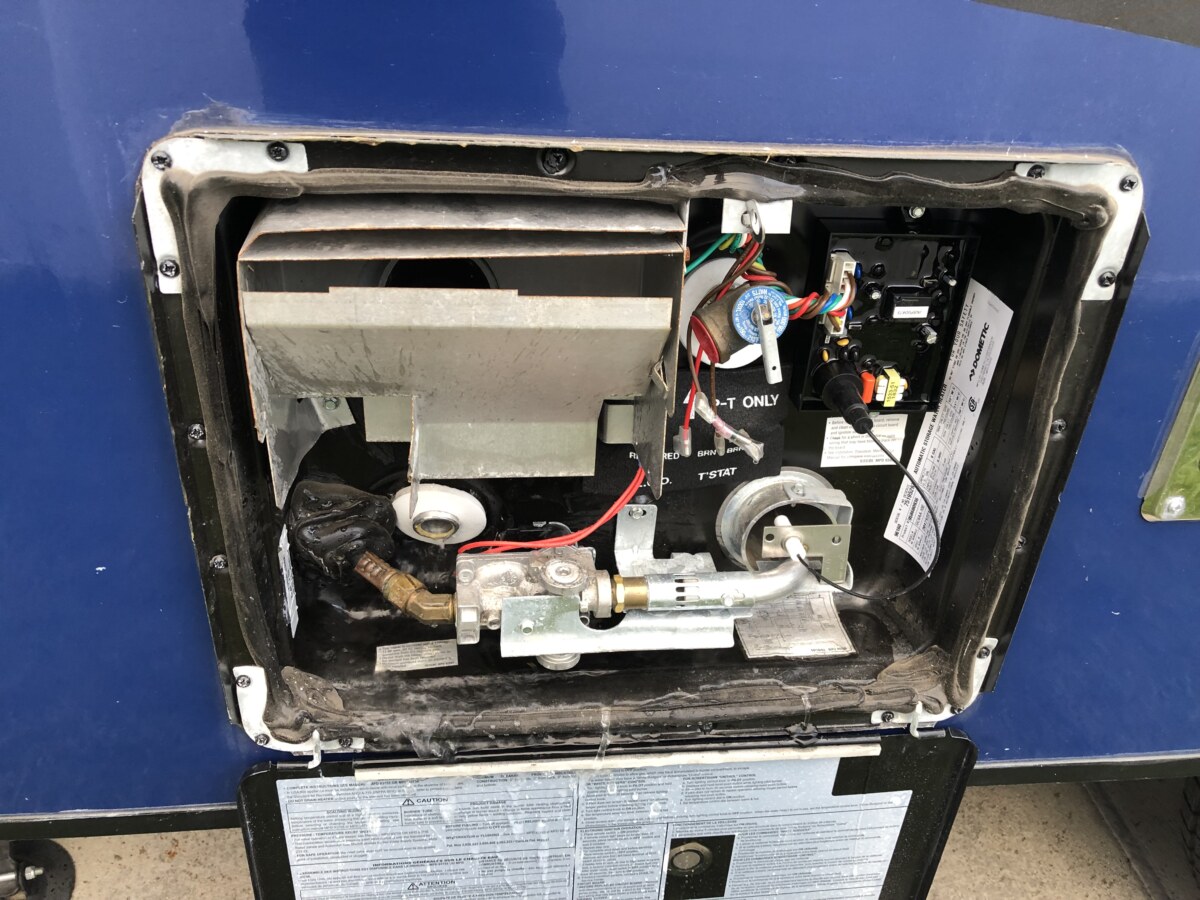
- Locate the drain valve: Find the drain valve on your tankless water heater. It is typically situated near the bottom of the unit and will be connected to a pipe or hose.
- Open the drain valve: Once you’ve located the drain valve, open it by turning the handle or knob. You may need a pair of pliers or a wrench to help with this. Be prepared for some residual water to flow out of the valve.
- Open the inlet valve: To ensure all water is drained from the system, locate and open the inlet valve. This will allow air to enter the water tank and push out any remaining water through the drain valve.
- Allow time for draining: Wait for the water to fully drain from the system, including pipes and the water tank. This may take a few minutes, depending on the size of your tankless water heater.
By following these steps, you have successfully drained the water from your tankless RV water heater system. This is an important step in winterizing your RV and will ensure the longevity of your water heater and pipes during colder months.
At this point you have two options on how to winterize your RV tankless water heater, first with compressed Air, second with antifreeze, or a combination of both. If you plan on using your RV anytime in the winter, you may wan’t to use the compressed air method as it will allow you to quickly fill it up again vs if you use antifreeze you will want to flush your system before you use it again.
Step 3: Winterize Tankless RV Water Heaters with Compressed Air
Some tankless water heaters, due to manufacturing, cannot be treated with antifreeze. However, relying only on compressed air to clear the tank is still an effective method of preparing your pipes and heater for winter. One brand that does not state it is safe to use with antifreeze is Camplux. To use this method, follow these steps:
Using Compressed Air to Remove Water from your Tankless RV Water Heater
To winterize a tankless RV water heater, using the air compressor method is an effective technique. First, you should gather the appropriate tools, including an air compressor and a blow out plug, which is necessary for connecting the air compressor to the RV water system.
Step 1: If you skipped the directions above, begin by turning off the water heater and allowing it to cool down if it’s been in use. Next, disconnect any water lines connected to the water heater. Attach the blow out plug to the city water inlet on the outside of your travel trailer and connect the air compressor to the blow out plug.
Step 2: When you’re ready to begin, set the air compressor output pressure to around 30-50 psi. This is a safe range to prevent damage to your RV water system. Slowly open the compressed air valve while closely monitoring the pressure gauge. Ensure that the pressure remains within the safe range during the entire process.
Step 3: Once you’ve started the airflow, make sure to open each faucet and valve (both hot and cold) throughout the RV one at a time, starting with the ones closest to the heater. This will help remove any remaining water from the lines. Over time, the compressed air will push any residual water out of the system, allowing it to dry out and minimize the chances of freezing damage during the winter months.
As a safety precaution, be cautious not to stand directly in front of any open faucet while the air compressor is on. The force of the compressed air can cause water and air to forcefully exit the faucet.
Step 4: When you see only air coming out of the lines, close the faucets and valves. This concludes the air compressor method for winterizing your tankless RV water heater, ensuring that it remains intact and operational when warmer weather returns.
Compressed air bursts can remove any excess water after draining the pipes. These bursts ensure no leftover water can freeze and damage your pipes over winter. Adding antifreeze to the pipes is a precautionary measure and not entirely necessary.
Alternative Step 3: Winterize An RV Tankless Water Heater with Antifreeze

One of the most worrying questions when winterizing a tankless RV water heater is whether it is safe to use antifreeze in the pipes. The good news is, it is safe! The bad news? The antifreeze can damage specific heaters’ internal components. Using it when not explicitly stated as acceptable could mean you lose your warranty, so always double-check for the manufacturer’s go-ahead.
If you decide to use antifreeze regardless, disconnect your heater from the pipes (bypass) and remove inline filters so the antifreeze cannot damage them. You can find instructions for disconnecting the heater from the water pipe in your user manual. Also, never leave your heater on or turn it on when there is antifreeze in the water system.
The best antifreeze to use has propylene glycol, and this is our favorite brand of RV antifreeze to use. Propylene glycol prevents the pipes from drying out as well as prevents freezing. It is nontoxic but can still harm pets and surroundings; it doesn’t taste great, either. You will use a few gallons of antifreeze, so make sure of your choice before proceeding.
Some brands with which it is okay to use antifreeze are as follows:
- Girard
- Furrion
- Truma Instant
For all the above, follow these steps:
First, you’ll need to drain all the water from your tankless water heater and plumbing system. Turn off the water supply, open all faucets, fresh water tank drain, and use the water pump to remove any remaining water. Make sure you’ve drained the entire system.
Once the water is completely drained, close all faucets. Now, you’re ready to introduce the non-toxic RV antifreeze into your plumbing system.
As a general guideline, use the following steps:
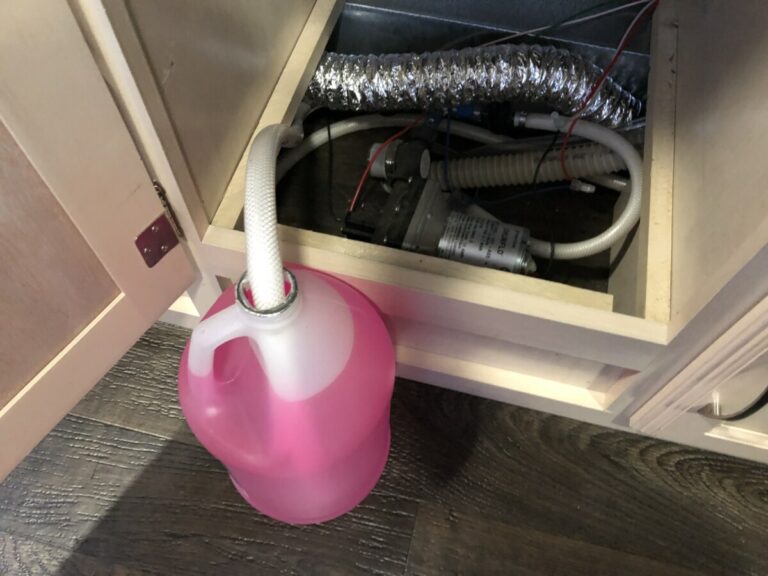
- Insert the water pump intake line on your water pump bypass kit into your bottle of antifreeze. If you don’t have a bypass, here is our favorite kit.
- Turn on the water pump, ensuring the water supply is still turned off.
- Open each faucet one at a time, starting with the one furthest from the water heater, until the pink antifreeze flows out. Do this for both the hot and cold water lines, as well as appliances connected to the plumbing system.
- You may want to make sure your water heater bypass is not selected to make sure antifreeze gets in your tankless water heater
- Don’t forget any outdoor showers, spray nozzles, or water going to any appliances such as a washer/dryer combo
The propylene glycol-based antifreeze will protect your tankless water heater and plumbing system from freezing temperatures, preventing costly repairs. Make sure to use non-toxic RV antifreeze to ensure the safety of your plumbing system and your own well-being.
The Truma heater requires you to remove the water filter and heating cartridge and leave them removed throughout winter.
When winter is over, you must flush out the antifreeze by connecting a water line, opening all taps, and flushing. Once the water runs clear, you are good to go. We usually like to sanitize our tanks and lines after winter to ensure they stay clean. Remember to take your heater out of bypass mode and sanitize the system in case of mold and bacteria.
Frequently Asked Questions About Winterizing Tankless RV Water Heaters
How do I keep my RV tankless water heater from freezing?
To prevent your RV tankless water heater from freezing, ensure it is well insulated, especially pipes leading to and from the heater. Additionally, use a heating pad or heat tape specifically designed for water heaters. Whenever possible, keep your water heater within an insulated compartment and provide a heat source if needed.
Can you use antifreeze in a tankless water heater?
No, you should not use antifreeze in a tankless water heater, as it can damage the internal components. Instead, winterize the plumbing system by ensuring water is drained completely, and use an air compressor to blow out any remaining water in the lines.
How do I protect my tankless water heater in the winter?
Protect your tankless water heater during winter by:
- Turning off the water supply and draining the unit completely.
- Blowing out the water lines with an air compressor.
- Insulating the pipes and water heater to prevent freezing.
- Applying heat tape or a heating pad specifically designed for water heaters.
Can you use your RV tankless water heater in freezing temperatures?
You can use an RV tankless water heater in freezing temperatures, but it is crucial to protect it from freezing. Insulate the pipes, keep the heater in a warm compartment, and use heat tape or a heating pad to ensure proper operation in cold temperatures. Be cautious of the water inside the heater as it can freeze and cause damage.
What is the process to de-winterize an RV tankless water heater?
To de-winterize your RV tankless water heater, follow these steps:
- Reconnect the water supply and turn it on.
- Open all faucets and let the water flow for a few minutes to remove air from the plumbing system.
- Close the faucets and inspect the water heater for leaks or damages before turning it on.
- Turn on the water heater, and test it for proper operation, ensuring the water is heating up as needed.
Be the first to be notified about FREE tips, hints, coupon codes, and email-exclusive information. All for FREE!