How do I Keep a RV Water Hose From Freezing?
As living in an RV on a year-round basis is becoming more and more popular, it’s essential to know how to keep your water from freezing. Even if you’re not living in your RV, many people like to go camping during parts of the year when temperatures drop below freezing. Either way, keeping the RV water hose that supplies water to your camper from freezing is essential.
To keep your RV water hose from freezing, you must add heat tape and insulate around the outside of the hose. Insulate from where the hose hooks up to your RV to where the hose is connected to the outside spigot. It’s crucial that you leave no part of the hose uninsulated.
In this article, we’re going to look at the different ways to insulate your water hose, as well as the different materials that you can use. We’ll also look at what can happen when your RV water hose isn’t insulated, so continue reading to learn how to enjoy your camper in the cold.
How do I insulate and heat my RV water hose to prevent freezing?
The best way to insulate your RV water hose is by making a heated insulated water hose. First start by using a heat tape cable, insulation tape, and foam insulation. Using all three of these things together in unison is the most sure-fire way of keeping your water hose from freezing. Let’s take a look at exactly how to utilize each component in a step-by-step process.
Items Needed To Make a Heated RV Water Hose:
- Disconnect and measure the length of your RV’s water hose.
To purchase the correct insulation and heating cable lengths, you need to know how long your RV water hose is. Disconnect your water hose from the RV and stretch it out in a straight line. Measure the length of the hose from one end to the other, and leave the hose disconnected.
- Purchase the parts that you’ll need.
Once you know the length of your hose, it’s time to go to a hardware or home improvement store and purchase the materials you’ll need. This includes the right size of foam insulation, a heating tape cable, electrical tape, and insulation tape to wrap your foam insulation in. Make sure that you purchase foam insulation round enough to accommodate your water hose and the heating cable.
- Run a heat cable along the length of the hose.
Before wrapping the hose in insulation, you will first attach the heating cable to the water hose. Attach the cable to the water hose every 6 to 18 inches with electrical tape, making sure not to coil or overlap the hose with the cable. Having coils in your heating cable can overheat and help your water hose if it gets hot enough. The finished product should have your heating cable running in a straight line with your water hose, almost looking like a single item.
Make sure to leave a little bit of heat tape at the beginning of the hose and at the end to wrap around your water spigots to keep them from freezing.
- Wrap the hose and cable in foam insulation.
Once the heating cable is attached to the water hose, it’s time to wrap them together in foam insulation. Your foam insulation should be round enough to encompass both the cable and the hose. Your insulation will have removable tape attached to its insides that pulls off, allowing the sticky sides to connect.
- Tape the insulation with insulation tape.
After completely wrapping the heating cable and water hose with the foam insulation, you should then wrap the insulation with duct or insulation tape. Duct and insulation tape are unique because they are incredibly sticky but have the added benefit of trapping heat. While your foam insulation will have sticky sides that press together as you wrap it around the hose and cable, it doesn’t form an air-tight seal.
By wrapping the insulation with tape, you further ensure that not a bit of cold air can creep through your insulating barrier and infiltrate your water hose. Even the smallest of gaps can allow your water hose to freeze up and cause severe problems for your RV.
- Provide electrical power to the heating cable and reconnect your water hose.
With your water hose and attached heating cable insulated and taped up, it’s time to reconnect your water hose and plug in your heating cable. Reconnect one end of your water hose to the campgrounds water supply and the other end to your RV water system. Once you do this, plug your heating cable into one of your RVs outlets or a campground outlet to provide power to it.
Pre-made Heated RV Hoses
,Cold Weather (Freeze Protection to - 20˚F),Standard Packaging")
There is an easier way, you can purchase a pre-made heated hose which are available in different lengths and different freeze protection temperatures. These hoses go bad just like other hoses, but unlike the hose you make above, a hose you buy cannot be replaced or repaired.
If you choose to build a hose, if the actual hose breaks, you can deconstruct the hose and build it again. The advantages of a prebuilt hose are that you can just plug and play and they are a lot smaller to store than a hose you build yourself with thick insulation.
What are the risks that a frozen water hose represents?
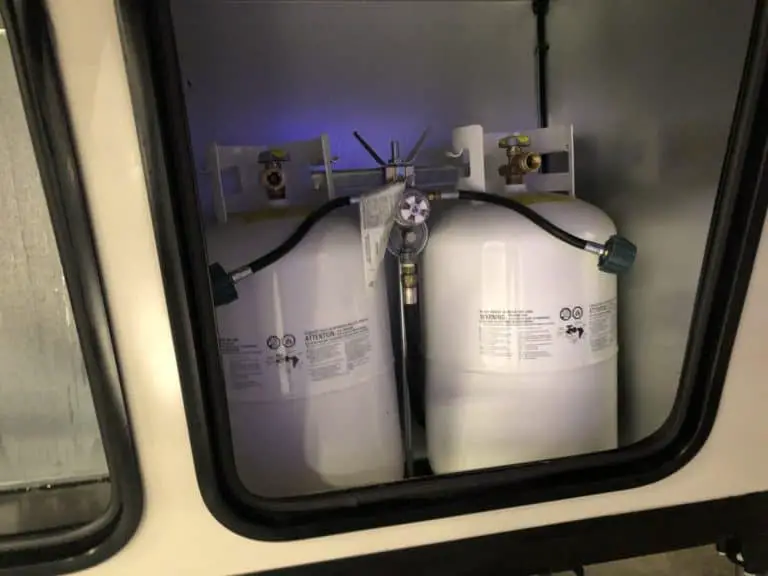
The big danger with a frozen RV water hose is that water expands as it freezes. When the water in your water hose freezes, there’s a chance that the water lines nearest to your water hose will freeze as well. If this happens, you run the risk of bursting pipes, damaged water valves, and excessive water damage.
If your water hose freezes, you’ll also be without hot or cold water until the problem is solved. You won’t be able to wash your dishes, take a shower, flush the toilet, wash your hands, or have running water of any kind. A frozen RV water hose is both a huge inconvenience and a hazard for plumbing or water damage.
What temperatures will a RV water hose freeze?
Your RV water hose can freeze at any temperatures under 32 degrees F. At this point if you don’t have a heated underbelly, pipes in your RV can begin to freeze as well and cause havoc. If you plan to camp at any winter temperatures, plan on a heated water hose to prevent damage.
How to thaw out a frozen RV water hose?
If your water hose does happen to freeze up, it’s vital that you know how to remedy the situation.
- Turn off the water supply at the outside spigot.
- Use a heat gun to thaw the hose end where it connects to your camper.
- Use the heat gun to disconnect the other end of the hose that connects to the spigot.
- Carry the frozen hose inside your camper or to a warm area to increase the dethawing process.
- Ensure that both ends of the hose are near a draining source so that the unfrozen water has a place to drain.
- Run your heat gun over the length of the hose and dethaw every square inch of it.
Be the first to be notified about FREE tips, hints, coupon codes, and email-exclusive information. All for FREE!