How to Paint a Travel Trailer: A Step by Step Guide
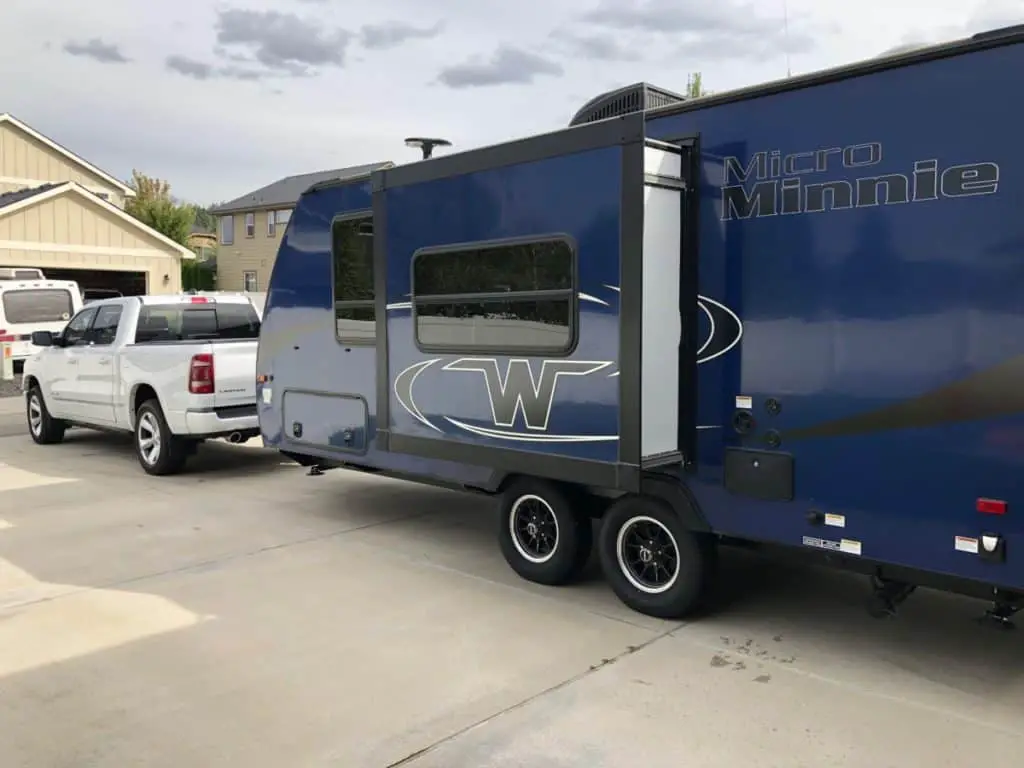
Painting a travel trailer is a great way to update the look of an old trailer, fix current damaged paint, and even add a protective layer against the elements for the exterior of your RV. It can be a good investment for a travel trailer owner whether it is needed or wanted. Taking a travel trailer into a shop to have this done professionally can cost the owner a pretty penny. To avoid this, consider painting your trailer on your own.
How Long Will Painting a Travel Trailer Take?
The time required in order to complete a paint job for the exterior on an RV really depends on the size of the RV and how quickly one can work. The bigger the travel trailer, the longer it will take, and vice versa. Think about setting aside a few full days to complete the job. All of these days do not have to be consecutive, as you could do different parts on different days. Having another person who can help you during the whole thing, or even just a few of the portions, will also make the project go by much more effectively and efficiently.
Things You Will Need to Do Before You Start Painting your Camper
Before you can begin, you need to make sure that you have access to an enclosed, ventilated space. While painting a trailer can be done outside, this will expose your trailer’s fresh paint to the elements of weather and dirt that might not otherwise be an issue. Your best bet in order for your paint job to turn out looking its best is to find an area somewhere inside that you can paint it and leave it to dry. Even placing the trailer under an awning provides some protection.
The second thing you will need to do before painting is assess the size of your trailer. Take some measurements and do some calculations to get a number for how many square feet are going to be getting painted on the exterior surface. This number is the most important number as it will determine how much paint and materials you will need.
Next up, head to the paint store to pick out the specific colors and finishes that you are wanting for your trailer. Talk to the professional at the paint store, who can discuss with you the different kinds of paints and finishes that are available to you. You do not want to end up walking out with the wrong kind of paint that will not adhere to the trailer well or will peel over time. As for color, this is very much based on personal preference, so get some swatches, take them home and discuss your desired look. When purchasing the paint, make sure that you are getting enough paint for a minimum of two coats.
After the paint store, head on over to the home improvement store near you to pick up your painting supplies. Remember that you get what you pay for. The higher quality materials may cost you more up front, but will end up saving you time as well as giving you a better looking trailer in the long run.
Before getting started, you will need to get together all of the supplies that you will need from start to finish. There is nothing worse than being in the middle of a project and realizing that something was forgotten at the store. Make a list and double check that you have everything before you start the actual paint job.
Materials You Will Need to Paint your RV
Having the right materials will allow the painting process to go by quickly and smoothly. You do not want to skimp in this department, but instead purchase the right materials that will get the job done. If you are ever in doubt, talk to a professional at the store for their recommendation on which supplies you should be using.
- Paint and Primer – When purchasing your paint, make sure that you get the right kind of paint for the exterior of a travel trailer. As was mentioned above, there are many kinds of paint and not all of them will work for your trailer. A primer goes on before the paint and will make your paint job look alot smoother and will allow the paint to adhere to the trailer better. If you need to, talk to the professionals at the store and they can help you get the right kind of paint for your job. You may want to go with expensive automotive paint, or you may want to go with cheap hardware store paint depending on the final product you want.
- A Paint Gun – Depending on the type of paint you get, you will need the right kind of paint gun that is qualified to spray that specific paint. This will really help you get an even look and shorten the amount of overall time spent painting the trailer as compared to using a paint brush or a roller.
- Note: If using a spray gun is not the way you want to complete the job, it is possible to paint your trailer with either a roller brush or with a regular paint brush. There are positives and negatives with each. Using a spray gun is considered the quickest and simplest method and will ensure you get in all of the nooks and crannies.
- An Electric Sander – Sanding a trailer entirely by hand will be next to impossible. Not only will it completely wear out your arm, you may literally not have enough power to scrub off the existing paint job. An electric sander will be used to prep the trailer for the paint job. It will smooth down all of the surfaces and remove the old paint job easily.
- Sandpaper – You will want to invest in some coarse, low grit sandpaper for the initial sanding. It will really break apart the existing paint job and make the surface very smooth. You will also want to purchase higher grit sandpaper for any small corrections that may need to be made after the initial paint job. This sandpaper will not tear away what you have done, but rather smooth a spot out for you to easily repaint over it.
- Various Cleaning Supplies – You will need to clean the outside of the trailer to remove any residue that was built up on the exterior of the trailer, both before and after the sanding process. You will need microfiber cloths, towels, and cleaning solutions. Make sure you have enough to do the entire trailer.
- Painter’s Tape – This will allow you to paint the exterior of your travel trailer without painting the parts that you want to stay the same. Invest in good quality painter’s tape so that it sticks well and does not allow paint to drip or soak where you do not want it to.
- A Paint Brush – This will be used for touching up the parts of the trailer that will need it after the initial paint job, such as the corners.
- Painters Drop Cloths – These will be placed on the ground so you don’t get paint on your driveway or the surface you park your RV. They can also be thrown over your tires or other items you do not want to get paint on.
If you do not own the supplies that are listed above, they can be easily bought from your local home improvement store. If you are not wanting to invest in some of the more expensive items, such as the paint gun and sander, these can also typically be rented by the hour or the day from the store as well. Check with your store to see what rental options are available.
Prepping the Trailer
While this may not seem like the most appealing part, prepping a travel trailer’s exterior to be painted is the most essential step to ensure that all of your hard work will look excellent and stay looking excellent over long periods of time and usage. This will more than likely also be where most of the work happens and will be the least amount of fun.
You will want to wipe down and clean off the trailer as best as possible before you begin. You do not want any dirt or grime messing up your ability to paint a smooth surface. Using a hose and some cleaning supplies, go over every inch of the trailer, scrubbing wherever is needed in order to get it as clean as you can before you begin.
Once the trailer is clean, now it is time to sand down every surface of the exterior that you want to paint. This is to remove the old paint job and create a smooth, workable surface for repainting. Use one of the coarse sanding sheets and the electric sander to do this, as sanding by hand will not be as effective. This will probably be the longest, hardest part of the process, but it is essential in order for the paint to adhere to the trailer. Give yourself ample amounts of time to do this properly and not wear yourself out before the rest of the process begins.
If the paint job you currently have is not too damaged, or you have an aluminum or fiberglass trailer, you may be able to scuff up the current paint and paint over your current exterior and still have a great looking paint job.
Once you have sanded the trailer, you will need to clean the trailer again because of all the dust created when sanding. If any of this is left on the trailer, it can affect how smoothly the paint will go on and it could possibly create an uneven finish when you are done.
Once the trailer has been sanded and cleaned, now its time for the fun part. It is time to get painting! Gather your supplies, and give yourself enough time to do this in one sitting. It can be difficult to clean up if you need to do something halfway through.
Steps for Painting the Trailer
Once you have gathered all of the things that you will need, it is time to get going.
- Use the painter’s tape to tape off every single part of the exterior surface that you do not want to be painted during this process. For now, it is better to over-tape than to under-tape. Not properly taping off the sections may result in some avoidable headaches where you are going to have to remove paint from those unwanted locations. For the trailer’s windows, you may want to use trash bags and cut them to the size of the window and then tape over them and around the edges. This will prevent any of the paint from getting onto the window glass. Do this to any other part of the exterior that you want to prevent paint from getting to as well. You can also remove any accessories or items that you do not want to be painted. This may be quicker than taping.
- Read the instructions on the paint gun to make sure you know how to use it correctly and that it can be used with the type of paint you are about to use. When you are ready, carefully pour the primer into the paint gun. Before spraying the trailer itself, practice using the paint gun on another object, such as a piece of wood or cardboard. You will want to do this away from the trailer so that you do not accidentally spray the trailer when you are not ready. After practicing, begin spraying the trailer, starting from one end and working your way to the other.
- Wait an hour or the recommended time based on the type of primer you use after priming to begin the actual paint job in order to allow the primer to dry and set on the exterior. You will need to clean out your paint gun anyway before you are ready to use the actual paint with it.
- Fill the paint gun with your choice of colored paint, and begin the process again. Always practice first to ensure that that gun is working properly with the new paint, and then work your way from one side of the trailer to the other. Once you have completed the first coat, you will need to wait about an hour for it to dry depending on the type of paint.
- Once the first coat of paint has had time to cure, you can repeat the previous step by adding a second coat on top of it.
- Once the second coat has been completed with the spray gun, you will want to take a small brush and some paint while looking around the entirety of the trailer and touch up the places that were not covered as well as the others. Also, be on the lookout for dried paint drips, as you will want to sand those with the high grit sandpaper and paint over it for a smooth and even look.
- If you are using a clear coat, now is the time to spray it. Do the same when painting and spray your trailer. After that clean out your gun very well.
- Once the paint has been allowed to dry substantially, carefully remove all of the painter’s tape from the trailer and throw away. Do not wait to do this for too long as it could possibly end up tearing all the paint off the trailer if the paint has already completely dried.
- You will need to let the trailer sit in order for the paint to really set in and be ready to take on the open road. Just because it looks dry on the top does not always mean that the underneath is dry as well. The longer you can wait, the better.
After Painting
Pay attention to the information on the paint cans regarding how long your specific paint takes to cure. While some paint may be ready to go a few days, it may take others up to a week to be road ready. You do not want to have put in that much work for it to be damaged by test driving it too soon!
Also, consider applying a sealant to the outside of the trailer once the paint is completely cured. This will add an extra layer of protection, both for your recent paint job and for the exterior of the trailer against the weather.
Common Trailer Painting Mistakes
With such a big job, it is very important to be careful at each step you take. Avoiding these common mistakes can prevent mishaps that could occur during the painting process or even later while heading down the road.
- The biggest mistake that can be made while painting a trailer is not properly preparing the exterior surface before you begin. Yes, it is tedious and time-consuming, but it will prevent the paint from peeling off later down the road, and will ensure that the paint sticks the first time around.
- Another big mistake that travel trailer owners make when painting their RV is trying to do it with the wrong kind of paint and primer. Not all paints are created equal! They each have unique ingredients that make them designed for specific surfaces. Even if it seems to go on properly, it could peel off or deteriorate after a while. Talk to a paint professional to ensure that you are getting the perfect paint for your specific job.
- Make sure you read the instructions as carefully as possible. Thinking you know how to work a paint gun or an electric sander does not always mean that you will know how to work the model that you will be using during the paint job. Read through the instructions for each piece of equipment so that you do not have any mishaps that could have been prevented by correcting user error.
Painting a trailer allows an owner to choose their own style and will end up saving them a lot of money in the long run. While it may take a decent amount of time, it is very possible to complete this DIY at home!
Be the first to be notified about FREE tips, hints, coupon codes, and email-exclusive information. All for FREE!


