How to Summerize a Travel Trailer
Winter’s finally behind you and Summer is just around the corner, there’s no better time to get ready for RVing. But it’s not as simple as jumping in and going, you will need to summerize your travel trailer.
That means you summerize RV or you summerize your camper trailer whichever one you have because it’s time to get your RV ready for summer road fun. Follow these simple steps below to de-winterize your travel trailer and have a great summer season!
Removing RV Covers
Let’s start with the RV cover. Removing the RV cover is just going back through the process you went through to put it on. Untie the cords, uncinching and unlatching of straps around the bottom edges of your RV. Loosen the cover skirts and make sure nothing is going to snag on them when you’re ready to lift the cover. Make sure to have a partner to help so you don’t rip your cover on sharp corners or an antenna.
Find the ladder of your RV and start lifting the cover from that side as you get up the roof. From the rooftop, start lifting up the skirts all the way around so that they bundle up around you by the roof edge.
Once the skirt is up, bring together the cover into a bundle, making sure the front end is still easy to see. You then get off the roof holding on to the other end of the RV cover as you climb down.
That’s when you slowly pull down the RV cover to the ground to get it ready for summer storage. Make sure the cover is completely dry before you ball it up to store so mildew does not grow inside.
This is the best time to make sure you store it ready when you need it.
Lay your RV cover out on the ground end to end. Brush off leaves and branches you see on your RV cover. As you roll it together in a bundle, make sure you lift the right and left edges of the cover to the center of your roll until you get to the end.
Make your roll as tight and compact as possible. It’s not just for space-saving. It’ll also to protect the fabric from accidental tear or puncture. Make sure to put the rolled up RV cover back into its bag before storing.
Store your RV cover in a cool dry place such as a basement or garage so it is ready for the next time you need it.
Open Up Your RV
Now that you’ve got the cover off of your RV, let’s open up the camper. Let the fresh air in and watch for what needs fixing.
You can start by opening doors, windows, roof vents, extending out the slide outs and the awning. Check the hinges, the rollers. Check for creaking sounds. If there is creaking sounds, make sure you lubricate them right away so they don’t stick and make noise all summer season.
Check for holes and tears. Check for anything loose. Check for cracks. Check for anything that’s broken.
Check the AC unit and vents for sign of leaks or condensation that came in over winter..
You might want to start putting together a checklist of what needs fixing, replacing or adjusting.
You might want to have your handy lubricant fluid ready for hinges and rollers. Watch for anything that’s sticking when they shouldn’t be.
Do a walkthrough, opening and moving anything. They may need attention.
Watch for stains, molds, dripping, pooling inside and outside the RV. Clean and remove them immediately and look into what caused them and repair if need be.
Connect Your Battery
Let’s get some power into your RV and complete the rest of your checklist.
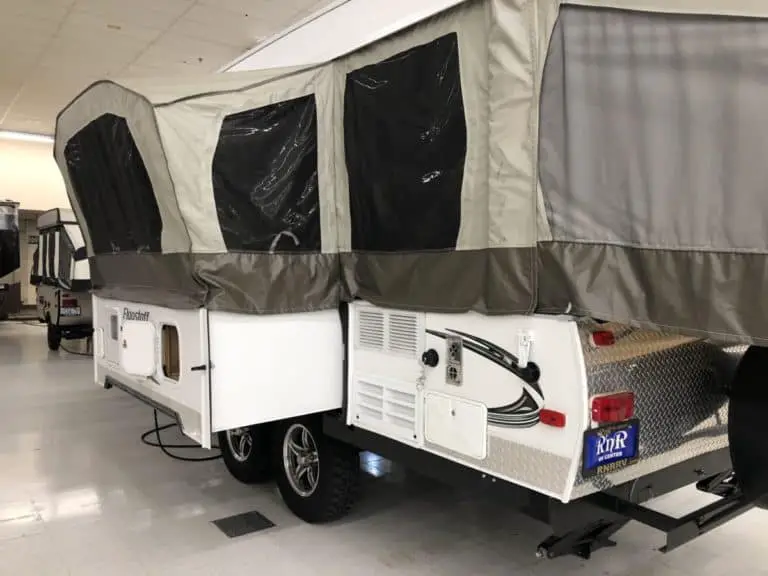
Get to your RV battery. That’s usually right in front of your camper where it is connected with the truck if you have a travel trailer. If yours is a camper, then it varies. It could be in the interior floor compartment, the retractable entryway steps, the exterior compartment or in the engine compartment itself if you have a RV.
If you still don’t know where it is, you’ll have to go walk your camper, talk to someone you bought your camper from and just plain ask them.
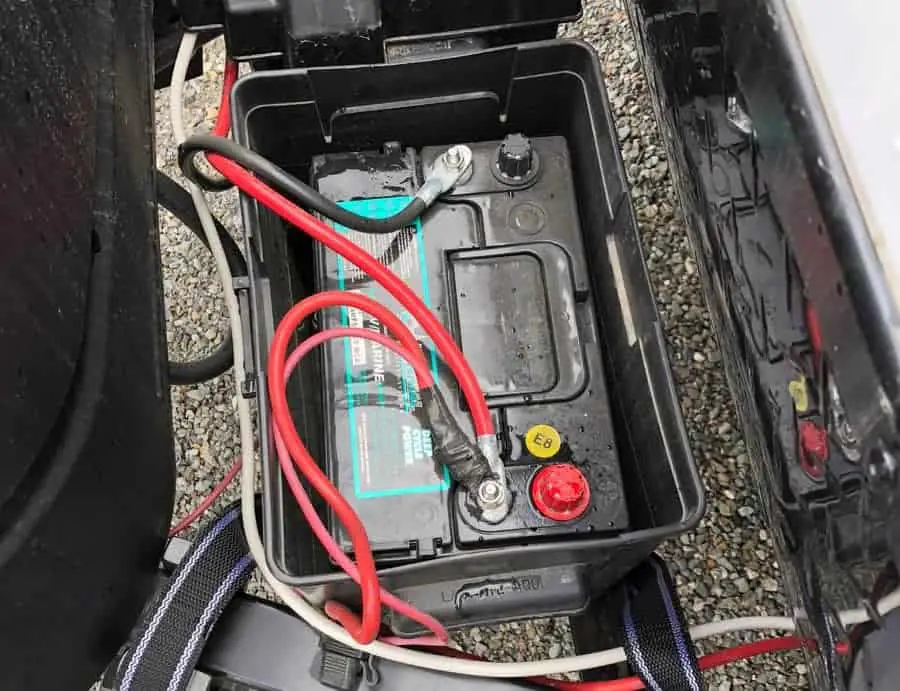
Open the outer cover that protects your 12-volt battery from the external element. It’s strapped with a latch that keeps the lid secure.
Since your RV was winterized, I’ll assume your battery was disconnected and removed to keep it from fully discharging. This time we’ll have to reconnect the battery to the rest of the RV.
Reconnecting usually just means re-attaching the positive and negative terminal by screwing the negative connector to it first before the positive. You’ll need a socket or crescent wrench for that. If you have dual batteries, look at the photo of how they were hooked up you took in the fall when you removed them and install the cables exactly how they were.
If you have the battery switch, it’s a lot easier. You just twist the red knob back to on. Even though we have a battery switch, we remove our batteries from our trailer as we live in freezing conditions. If you live in warmer conditions, switching the battery off is all you need to do.
Then, just plug the battery to an outlet to start recharging. We’ll need it to purge our water system and get the propane tank going for the water heater, refrigeration, furnace and the stove.
The battery has lost its charge after some months, even if it’s disconnected. So plug your RV into a 110 outlet to let it charge back up to full. You should have been charging over winter or had it hooked to a battery tender, so this step may not be necessary.
Purge and Ready Your RV Water System
Sanitize RV water lines
You’re now ready to clear and clean out your RV’s water line.
Start off filling your RV water tank with fresh water from your home faucet with a hose, drain, and fill again.
The anti-freeze fluid is something that should have been in your RV water system as a protection against freezing winter weather that cracks frozen pipes.
Get over to the hot water tank, open the lid and make sure the drain plug is screwed in well. You want to clean out the line with fresh water. If you have a water tank bypass, now is the time to switch it back over.
Once your water tank is filled up, switch on the water pump and walk to every water faucet in your RV. Turn each one on to purge the diluted anti-freeze water out.
Go the kitchen sink and turn on the faucets. Go to the bathrooms and flush. Turn on every single faucet in your RV until the unmistakable pink anti-freeze has drained out and only clear water is flowing.
Don’t forget to drain the outside shower or faucet when you’re purging the water pipes, including the valves on your low point drains.
You should also drain the diluted anti-freeze through the main water drain under the RV and from the hot water drain panel if you added it to your hot water tank. You’ll have to unscrew the hot water drain plug from the panel.
After draining, just screw the rods back in.
Now that the anti-freeze has been drained, drain your fresh water tank again. Fill your fresh water tank up and you can now add in household bleach to disinfect the water system following the ratio of a quarter cup of bleach per fifteen gallons of water in the system. Just take the total gallon capacity off your RV water tank and do your computation.
Use a gallon jug mixed with water and bleach to put a diluted amount in the freshwater tank and not to put bleach directly down the fill as it can be too strong.
With the household bleach in your water system, turn on the faucets again just for a few seconds until you smell bleach, enough to let the bleach diluted water through more of the pipes.
As for the hot water pipeline, go to the back of the hot water tank and turn the valve to the open position which should automatically turn on the hot water pump. This raises the hot water tank pressure. After a few minutes, the hot water tank pump will shut off by itself and your tank will be full.
You can then turn on the hot water faucets to purge the air that’s left in the water pipes and allow the new water with bleach to circulate the hot water system. Do this until the sputtering water from the faucet turns into a strong flow. Then, turn it off and let the system be for at least twelve hours to sanitize. It can help to drive your travel trailer around the block to let the bleach water slosh around your tank to fully sanitize your fresh water tank.
Purge the bleached water solution the same way you drained off the anti-freeze from the water system. Drain your tank from the low water drain, refill, and drain again. Do this until you don’t smell bleach water anymore. Then, fill back the tanks with fresh clean water and purge the faucets until you do not smell any bleach water, and you are ready for your road trip.
Get Your Propane, Heater, Gas And Fridge Ready
Propane Tank and Hose Check
Checking for leaks and the condition of your propane hoses are important. You don’t want the risk of losing propane in the middle of your trip when you can take care of those before where there are supplies and parts readily available.
You’d want to eyeball and feel the propane hoses, including the main line that connects the propane regulator to your RV unit. There shouldn’t be any cracks or any sign of wear. Check the connections. Things should look clean, solid and in the right order. You can use a spray bottle with dish detergent to spray on fittings or hoses to check for bubbles which indicate leaks.
If there’s any possibility of leaks, the first things that you’d want to look at are the hoses first. Changing them costs less than any other part of the propane system.
Check the propane tank gauge. Replace any one or both of your propane tanks when needed. You’d want to be ready with at least one tank full and another ready for a refill so you won’t ever find yourself without heat when you’re out on the road.
When all the checking is set and done, just put the propane housing cover back on and strapped.
Stove and Oven
With your propane turned on, fire up your stovetop burners to check that the propane system is working well. Let it burn for a few seconds just to make sure everything’s ok, then turn it back off. You can also fire up your oven to make sure it is operational if equipped.
Water Heater
Get to the travel trailer controller panel and turn the gas water heater on with a switch.
Then, get over to the gas water heater panel outside to see if it’s fired up and running. Seeing it’s working, after a few minutes just turn it back off.
You can feel the heater with your hands by the heater air vents or by the fans and vents.
Refrigerator
Next, check if the fridge is going to work. Turn the fridge on. Wait for the light to turn on, go back outside to check on the fridge vent and listen for the sound that it’s running. It will sound like a small fire burning as it begins to cool your refrigerator.
Also, start your refrigerator on 110 volts to make sure that side of the operation is working as well.
Furnace
Lastly, turn on your furnace to make sure it is heating properly. Let it run and burn off any dust for 5 or so minutes.
A/C
If your trailer is equipped with an air conditioner, make sure to turn it on and make sure it is cooling. It may need serviced and to have coolant added or replaced.
If any of the switches don’t fire the first time, just switch it back off and on again. If your items don’t work after that, you may need to troubleshoot your equipment.
Check Gas and Smoke Detectors
Since we’re looking over the propane system, it makes sense to take this time to check on all your gas and smoke detectors. They should have their operating lights on, ready and working.
You should find the smoke detectors up on the ceiling of your RV and the gas detector down close to the RV flooring near the gas stove as propane gas tend to hug the ground because of their density.
Your carbon monoxide detectors are at or near the ceiling since they are lighter than air.
Replace the batteries of these detectors when necessary, if you live in a cold climate, replace every year.
You’d want all these working for a stress-free road trip.
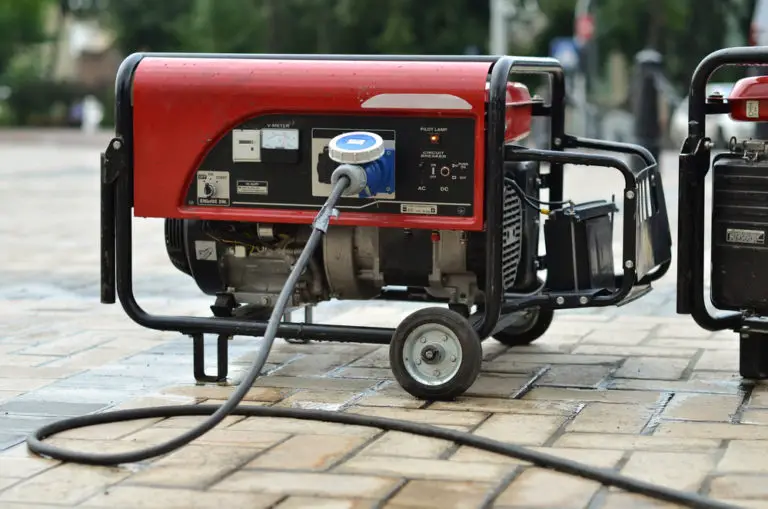
Check the Generator
Your RV has been sitting idle throughout winter, chances are you’ve not been doing any generator running maintenance during those months. You’d want to make it a point to do that the next winter.
Go through the checklist for generator maintenance.
- Check for oil.
- You’ll need to change the oil after running the generator for 50 hours at this point and then every 150 hours of running.
- Check oil filter.
- Check the coolant.
- Check the air filter.
- This should be changed every 500 hours to keep your generator running efficiently.
An Hour Meter near the generator on-off switch should tell you when the last service was done on the generator. Get it to its needed generator maintenance service when it’s time. You’d want your running at its best when you’re out enjoying it on the road.
Now that you want to get your RV ready, let’s get into the first steps into getting your RV generator prepped (if equipped or even a portable model).
Walk to the back of your RV and look through and feel the exhaust piping with your hand. Make sure they’re solid, without holes or cracks. It’s important they’re in working order for your carbon monoxide safety when you turn on your generator for the first time in months.
Go around by the side of your RV to the Shoreline panel. Inside it, you’ll want to make sure the generator plug is connected to the Onboard Vehicle Receptacle.
Now that you’re confident your external exhaust is in good shape and your generator is connected to your RV unit, walk back to your RV to start the generator which should be just near the entry door as you go in.
Starting the generator powers up the transfer switch which powers up the breakers and into your appliances.
You’ll need to press the toggle for priming until the light blinks, then you’re ready to press the ON button for the generator. Just keep pressing the generator ON button until you hear it start running.
You shouldn’t be experiencing any generator surging or shutting off. Keep it running for an hour to get the generator system back up ready to go.
This assumes you’ve got enough oil and coolant in your generator system to do this warm-up start.
If you have a portable generator, take these same steps as well as any other maintenance in the owners manual.
Check The Dump Tank System
Head over to your dump tank monitor and check on how much water there is in your tank. Hopefully, you’ve cleaned out your dump tank system of grey and black water. If not, just go ahead and clear them out at an RV park where the facilities for dumping are complete and ready for use.
After dumping, go ahead and rinse your tank with clean water and dump.
Washing Your RV Exterior
Chances are you won’t need to do any washing on your RV exterior, but, as you’re not just getting your RV ready for summer, you’re getting it ready for an upcoming trip. You’d want to make it look as pristine as you can. It is not generally a good idea to use a pressure washer unless you have a fiberglass trailer and are very careful. If you have aluminum siding, stay away from pressured water.
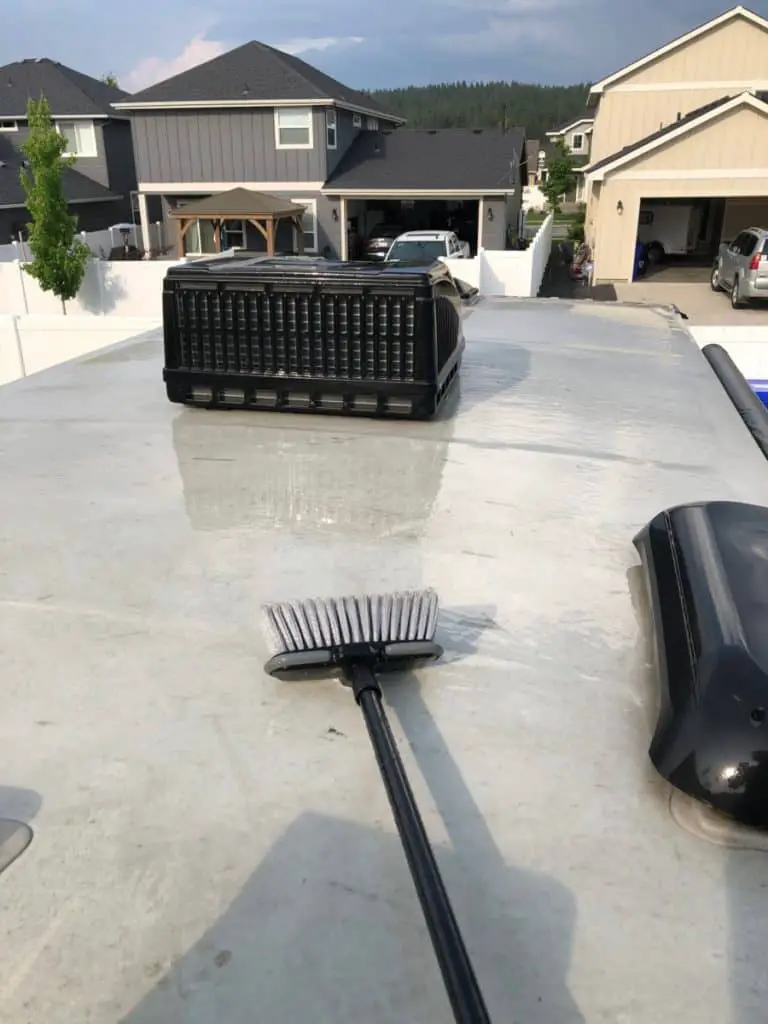
Washing starts from the top, the roof.
Use a soft bristle brush and dish soap to wash the roof of your RV. Make sure to get corners and any areas where dirt accumulates. After a good brushing, rinse all the soap and look to see if you need to redo any parts.
Next rinse the RV exterior of the side you are starting on and begin to wash.
When it comes to soaping, use an RV specific soap that will cut grease, bugs, dirt, droppings and leave the wax coating so you can start with a fresh coat in the spring.
Then, we turn to the brush to scrub the soapy foam over the sides. That’s when we can use an extendable brush that’s specially made for soap brushing for the RV. You’d start lathering, washing and loosening the dirt off for easy rinsing. You’d want to watch out for more of those crevices especially around panels, window sills and weather strips.
When you’ve done your soaping and brushing, just go ahead and rinse down your RV and use the waffle weave drying towel for easy drying.
Clean The Interior
Make sure to go through the interior of your RV and clean all surfaces including cabinets and your refrigerator. This will ensure your trailer is clean for your first use camping. Also make sure the bathroom including shower and toilet are clean as well.
Check Interior Lighting
Check the lights on the interior of your RV to make sure none have burned out leaving you in the dark. This can lead to a bad camping trip. Also make sure you have an extra bulb or two just in case you do have one go bad while out camping.
Waxing Your RV
Once you’re done with washing, soaping and rinsing, you’re ready to wax your RV to a shine.
The wax you apply is not just to make your RV have the showroom finish, but it also acts to protect the paint from the hard UV rays from the Sun. We recommend an RV specific wax that helps restore your finish.
You can use a one-step cleaner wax that cleans, polish and protects the paint on your RV in one application. You’d also want to use a polisher with its waxing pad. This tool will cut down waxing time in no time.
Make sure you attach the waxing pad on the polisher before you do any wax application.
When you start off your waxing, you’d want to shake the bottle with your wax. Put some of it on your waxing pad and use your finger to push it into the pad so that when you turn the polisher on, you’re not touching the dry pad on the RV paint.
Set your polisher to half throttle. You don’t need full power on for this work and can ruin your paint if you do so.
When you’re ready to apply the wax, make sure to have your pad touching the paint before you turn it on. Make a slow overlapping application on the surface, working and going back on each section about four times.
You’d want to wax your RV in sections at a time for a thorough waxing.
When your RV is waxed through, let the wax sit until it forms a haze and then wipe it all off with a microfiber towel for a clean shine.
Check Trailer Lights and Breaks
Make sure your RV trailer lights work. Have someone help you confirm your trailer lights are working when you step on the breaks, turn signals, signal lights, backup lights, as well as other exterior accessory lights you may have. Make sure you fill up your brake fluid on your tow vehicle for your road trip.
Enjoy your Camping!
If you take your time to make sure you go through each of these steps in your to-do list, you’ve just completed summerizing your travel trailer and will have a good, clean travel trailer to use all summer long.
Be the first to be notified about FREE tips, hints, coupon codes, and email-exclusive information. All for FREE!