How long does it take to set up a travel trailer?

Setting up your travel trailer at a campsite is a process that largely depends on your trailer, amenities, location, and experience. On average, it should take around 30 minutes to an hour to completely set up your trailer.
Here is a guide to setting up your travel trailer, with all the steps you need and approximate times each step should take. Keep in mind that setting up your travel trailer will get easier over time, so don’t be discouraged if it takes you longer on the first try! The process will also go faster if you have family or friends who you can delegate to help.
Tip: It’s helpful to create a checklist for yourself so you don’t forget anything, and to make the process quicker!
Steps to set up your travel trailer:
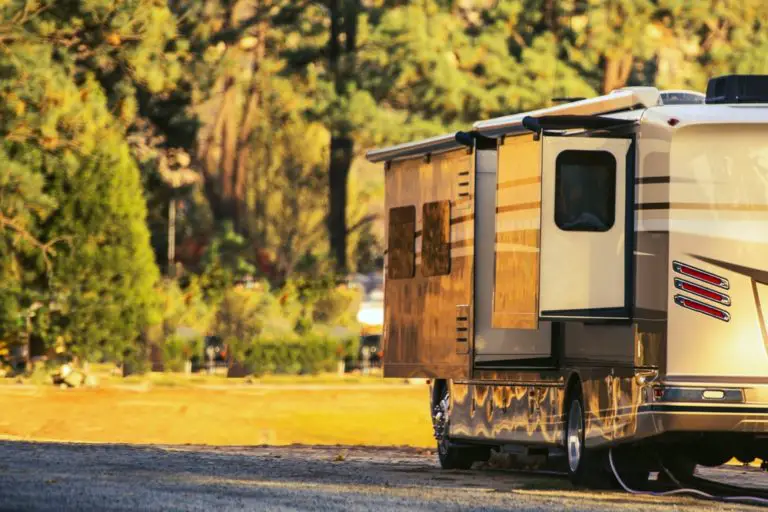
Here are the steps to setting up a travel trailer. Please note, these steps are meant for travel trailers- RVs that are towed behind a vehicle (as opposed to motorized RVs, truck campers, etc.). Fifth wheel trailers will have similar steps, but may have a few differences (especially when it comes to unhitching).
Arrive at your campground / Park in your campsite
What you need: A good driver! Possibly a campsite reservation.
Time it takes: 10 minutes or less
Once you reach your destination, you may have to check in with the campsite owners to confirm your registration and get your site number. The size of your campsite will determine the flexibility you have for parking and picking a good, level parking spot. Having a campsite map can come in handy. Booking in advance will speed up the process and avoid disappointment. Here’s a guide for booking your campsite.
Once you’ve got your site, pick your parking spot and use your tow vehicle to drive or back in. It’s helpful to have another person spot you while doing this! Make sure your trailer is close to power/sewage/water facilities (if you have these amenities). You don’t want to get set up and then realize you need to move. Other factors to consider is space needed for pop-outs (if applicable) and areas of sun/shade (for comfort). Make sure to mind your neighbors!
Got a tricky spot? Check out our guide on How to Backup a Travel Trailer in a Tight Spot.
Tip: Setting up in the daylight will make this whole process MUCH easier.
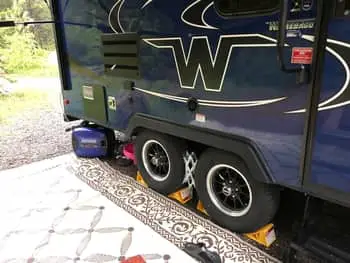
Level your trailer side to side
What you need: Blocks and/or wedges, portable level (the kind with liquid and bubbles)
TIme it takes: 5 minutes or less
After you’ve parked your travel trailer, it’s important to get it at level as possible. Not only will this make your stay more comfortable, it will also allow your amenities (such as your fridge, water, etc.) to function effectively. Leveling side to side is done BEFORE unhitching (you’ll level front and back later).
Use your bubble level to check if your trailer is level. If it’s not, you’re going to use your blocks/wedges to raise up whichever side is lower. Do this by putting them in place and driving your trailer on top of them (with the wheels on the wedges/blocks). Make sure to check the level again, and repeat this process if necessary. There are a lot of block and wedge options available for purchase, including these Lynx Levelers. You can also take a look at our list of Best RV Leveling Blocks.
Tip: This step will be much easier if you pick a good, flat parking spot.
Unhitch your tow vehicle
What you need: Tongue jack (crank or electric), wheel chocks or x chocks, rubber block/pad, towel
TIme it takes: 10 minutes or less
Take your time when unhitching your travel trailer, especially when it’s your first time. You don’t want to get this part wrong, or hurt yourself! Also, purchasing an electric tongue jack costs more but is a great option for people with back problems.
First, use your chocks to prevent your trailer from rolling or wobbling. Here are some great options if you need to purchase chocks. It’s also helpful to get locks for your chocks! Start cranking to lower your tongue jack. It’s a good idea to put a rubber pad or block under your jack to prevent it from sinking into the ground. Release tension and put on your parking brake (for your towing vehicle). Take off any safety chains and/or emergency cables.
Release your hitch ball and use your tongue jack to lift the trailer until the hitch clears the ball. Disconnect wire harnesses, and then move your towing vehicle away (don’t forget to take off the parking brake!). Use your towel to wipe away grease, if needed.
Tip: Check your manual for hitching and unhitching instructions and warnings! Also, pick a jack based on the weight of your travel trailer. This option is electric and has a weight capacity of 3,500.
Level Front to back with Tongue Jack
What you need: Tongue jack (crank or electric), portable level
TIme it takes: 5 minutes or less
Use your level to see if your trailer needs to be leveled from front to back. Once again, make sure your tongue jack is on top of a mat or blocks (so it doesn’t get stuck in the ground) and use it to level your trailer. Periodically double check the level this with your bubble leveler! Use blocks to maintain level. Repeat this process until you’re level.
Tip: Some newer models of RVs come with auto leveling systems that use hydraulics to level your trailer.
Put out Stabilizer Jacks
What you need: Stabilizer jacks (manual or electric)
TIme it takes: 5 minutes or less
Stabilizer jacks help to keep your trailer safe and comfortable. After you’re level, set up your stabilizer jacks on the ground or on blocks or pads (like with the tongue jack, this is preferably because it will avoid sinking or unstable ground). One stabilizer should be placed on each corner of your RV under the frame.
Do not use stabilizer jacks to level. This can be dangerous and can damage both your trailer and the jacks. Putting on chocks or x chocks will also help with this process and general stability. For the best tools to stabilize, check out our complete guide to How to Make a Travel Trailer More Stable.
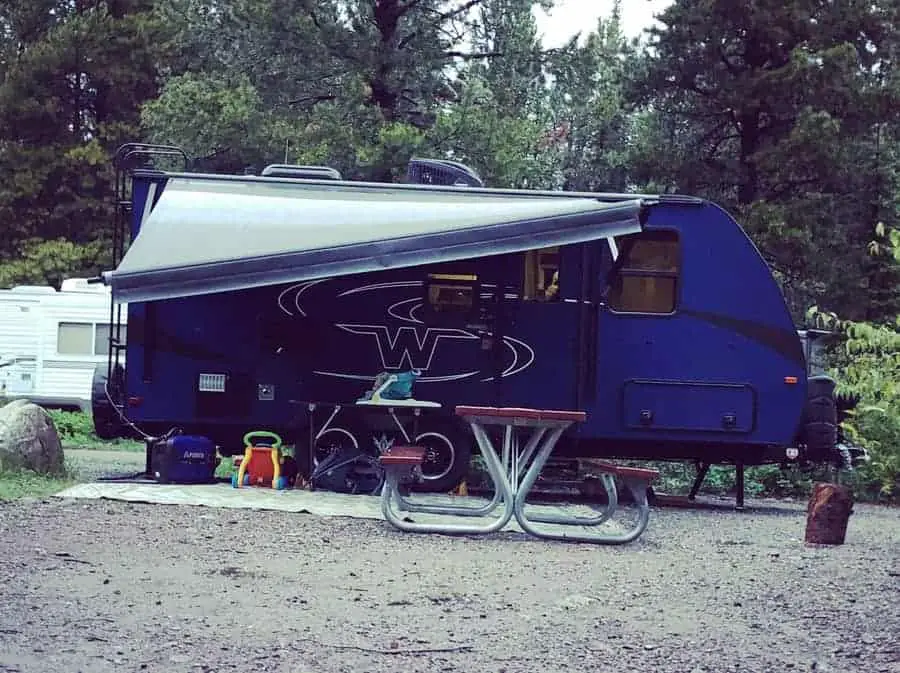
Put slide outs out
What you need: Nothing really, possibly lubricant
TIme it takes: 5 minutes or less
Before sliding out the pop out section of your trailer, go back to step one and double check that there’s nothing in the way! Most trailers have electric, hydraulic, or tip out slide outs. Once you’re ready, you really only need to flip a switch and your pop outs will pop out! If your slide out is stuck, you may need to use a lubricant. Please note that for electric slide outs, you’ll need to be connected to battery power.
If you have an awning, release the locks and loosen up the awning arms. Put the ratchet into roll out position (if applicable) and use a rod to grab the strap. Slide out arms and tighten knobs, then lift handles to place your awning at the height you want. Lock in place by releasing the levers. You may need a lubricant if you have issues with the awning mechanisms sticking.
Hook up power or set up generator
What you need: Plugs, extension cords, adapters, surge protector
TIme it takes: 10 minutes or less
To set up your electrical connection, plug in your surge protector to the campsite power dock. Having a surge protector can really be a life saver and is highly recommended, click here for more information and surge protector recommendations. If needed, add a power adapter and then your extension cord. Connect your electric cord to your trailer, and lock it (if applicable), then connect your power cord to the extension cord, completing the circuit. Check to make sure the power is working!
If you’re hooking up to a generator, take out your generator and set it on the ground near your trailer. Connect your generator to the fuel supply (usually the RV’s fuel or a separate propane tank) if you are running on propane, or fill it up with gas if not. Next hook up your power cable from the generator to the trailer and you are ready to start if you need power right away.
Tip: Need to buy a generator? Here are our recommendations.
Hook up water and sewer (if available)
What you need: Water pressure regulator, extensions, hoses (including a potable drinking water hose)
Time it takes: 10 minutes or less
Don’t mix up your hoses! Connect your potable drinking water hose to your tank to the campground’s water spigot. Turn the spigot on and check the water level and pressure on your trailer’s gauge. If the pressure is too high, then you need to add a regulator to the spigot. Test your water to make sure it’s running.
If you are at a campground that provides a sewage facility, connect your black sewage hose. It’s best to use gloves for this process. Many campgrounds have a central dump facility, so you’ll dispose of waste at the end of your trip or whenever you need to (but this will require moving your trailer to the dump site).
Set up any outdoor rugs, tables/chairs, bbq’s, etc.
What you need: The sky’s the limit!
TIme it takes: Varies, around 10 minutes or less
Once your travel trailer is properly set up, you can bring out all your fun camping equipment. Build a fire, put out your chairs, or spend time assembling your cooking station and your pink flamingo decor- this step really depends on your personal interests and camping needs!
Tip: A rug right outside your trailer door(s) is a good idea to prevent dirt and leaves from tracking in.
Relax and Enjoy You Home Away from Home!
It should take between 30 minutes and one hour to set up your travel trailer. With practice, the right tools, a good checklist, and helpful friends or family, this time can be significantly shortened. Make sure to read any necessary manuals before you go, and try to set up in during dry weather (if possible) and during the daytime!
Be the first to be notified about FREE tips, hints, coupon codes, and email-exclusive information. All for FREE!