13 Tips to Restore a Vintage Airstream
A fully restored vintage airstream is a sight to behold. However, there are many steps involved in getting an airstream to that point, and with those steps come more opportunities for mistakes. Most of these mistakes happen because those restoring the airstream are new to the process and are figuring out how to do everything through trial and error instead of experience.
If you’re looking to restore a vintage airstream but you’re not sure where to start, this is for you. In the following sections, we’ll provide you with 13 tips that should get your restoration project started and keep it running smoothly. We’ll not only give you tips on what you should do, but we’ll also tell you what kinds of common mistakes you can avoid, keeping the process on track.
How Do You Restore a Vintage Airstream?

Restoring vintage airstreams works in much the same way as restoring a home. You have to first have a vision. Then you must assess what needs to be changed, rip everything out and slowly piece together what you have in your mind.
What you have to do specifically will vary depending on the extent of the restoration and the condition of the airstream. That said, there are a few tips that will apply across the board. Some of them are geared towards specific problems like leaks, that almost every classic Airstream has, while others will just help give you a place to start and motivation to keep going.
All in all the following tips should help make the best of your vintage airstream restoration project:
1. Set Realistic Expectations for Your Vintage Airstream Renovation
Renovating a vintage airstream can take a great deal of time as well as a considerable amount of money. While there are steps you can take to reduce the cost and even potentially the amount of time the restoration takes you, it’s still important that you enter with realistic expectations.
Don’t expect to finish the process until at least half a year or more. It’s estimated to take about 6 to 12 months to restore or renovate a vintage trailer. Keep in mind, that’s if you’re working full time on the restoration project, every single day. If your work only allows you a few hours a day or a few days a week for work, it could take a couple of years.

As far as costs go, you can expect to pay at least somewhere between $25,000 and $100,000 when all is said and done. It is a relatively expensive process with a lot of hidden costs you’ll discover as you go. Just remember this is the total you’ll have spent by the end of the project, not an amount you’ll have to come up with all at once.
2. Find the Right Used Airstream
Before you can renovate an airstream, you have to find a used one. While in theory, you could renovate just about any airstream, you’ll save yourself a lot of time, money, and headaches by knowing what to avoid and what to look for in a seller.
Each of the following tips should help you pick the right airstream for your renovation project:
- Look for one you can inspect in person: In the internet age, you can purchase just about anything without even having to see it in person. Remember, it’s easier to hide or gloss over issues in a Craigslist posting than it is in person. If you can, always try to inspect the airstream you’re looking to renovate before you buy.
- Compare prices before you buy: Don’t buy the first used airstream that comes your way without comparing prices. It’s a good idea to go and get an assessment of the problems so that you can look for similarly conditioned airstreams and how much they are selling online.
- Ask A LOT of questions: Asking lots of questions will not only give you a better idea of what you’re getting, it’ll also help you understand how reliable the seller is as a source of information. Do a little research before you go in and ask pointed questions about specific issues like leaks, the state of the interior and the frame.
- Watch out for red flags: When you’re dealing with a seller you want to make sure and watch out for red flags that they may be trying to brush over issues. One of the biggest of these is if they have all the doors and windows open as if to air out the place when you show up. They very well could be covering up the smell of water damage.
Remember, the extent to which you plan on restoring your airstream can play a huge role in what you look for when you buy. For example, if you’re intimidated by doing a full “shell off” restore, you’re going to want to look for one where the frame isn’t sagging and the shell has minimal damage.
3. Assess the Problems

Whether you’ve already got your airstream, or there’s one for sale you’re still thinking of buying, you’ll need to assess its problems to decide if a restoration project is worth it for you.
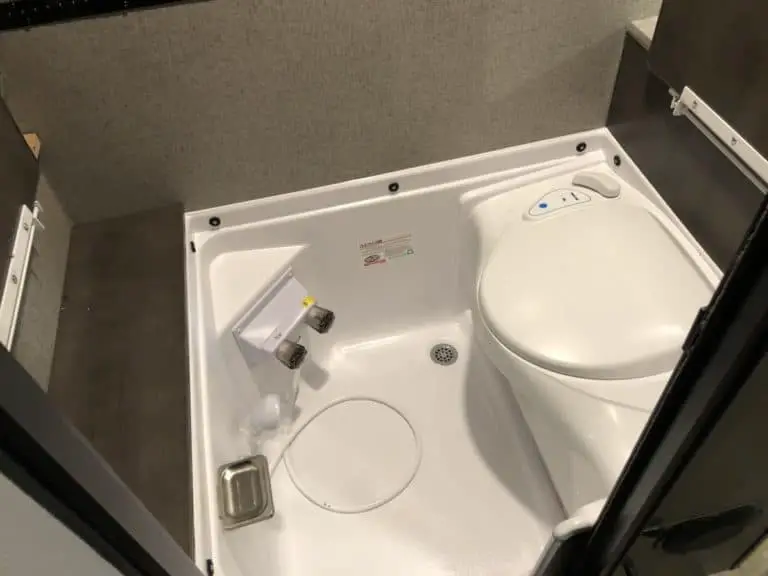
- Check out the condition of the body: The body/shell of an airstream is one of the most expensive parts to replace. A good condition airstream shell can cost $10,000 or more. If you’re still shopping and you find one with a beat up or unsalvageable aluminum shell, you need to ask yourself whether or not the cost of replacing it makes sense for you.
- Look at how low the airstream sits in the back: The frame of an airstream is another part that can be costly and time consuming to restore if it has significant enough problems. If the rear bumper appears to be sagging away from the shell, chances are the frame is bent from the weight of the rear bath.
- Look for signs of mold and water damage on the interior: If you feel the floor lightly sink in some places as you walk across it, that’s a sign of significant water damage to the underlying floorboards.
- Check for windows, doors and cabinetry that need replacing: None of these problems on their own should be enough to dissuade you from choosing to renovate. Still, knowing how many of these problems there are will help you plan out your remodel.
Don’t worry if you don’t find every problem on your initial assessment. Unless you’re the luckiest person in the world, that won’t happen. Many of the issues you have to fix during the remodel will be discovered as you go. Instead, focus on the big issues like water damage or a bent frame, while taking note of as many minor problems as you can.
4. Ensure You Have a Place to Store Your Project
You’re going to need a decent amount of space to store your airstream itself, the parts you take off of it, and the new parts you order.
It’s best to keep the parts of your airstream you’ve removed in an enclosed area like a garage or a shop. In fact, if you can store the airstream itself in an enclosed area, it’s not a bad idea to do so.
Just make sure wherever you decide to set up shop, you have plenty of space to work, and convenient areas set up to keep track of whatever you take out of the airstream.
5. Breakdown the Restoration Process Into Steps
It’s easy to overwhelm yourself when you think about all the things you’ll have to do to restore the vintage travel trailer. You’ll need to understand (or be able to hire people who understand) everything from electrical work and plumbing to interior decorating and design. Floors will likely need replacing, insulation may need to be put in and cabinetry work will be a must. Whew!
While there is no simple step-by-step process to restore an airstream–every case will be unique–there is a general order of operations that tends to work out for the better. It’s always a good idea to start with the essentials and work your way towards the, perhaps more fun, but less necessary process of decoration and interior design.
It’s also a good idea to start at the bottom and work your way up with most of the repairs. You’ll want to address issues with the running gear, belly pans, frame, and bumper while you have easier access to them. During this initial repair process, you’ll also want to weathertight vents, windows, doors, and really any other openings to prevent further water damage.
While most of these repairs move from the bottom up, there are some that don’t. For example, you’re probably going to need to get the interior skins, insulation, and plumbing/electrical before you put in the floor. So take this as more of a guideline and not a hard and fast rule. Do things in the order that makes the most practical sense for the repairs you need to make.
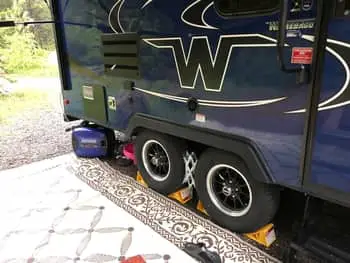
6. Check for Leaks No Matter Your Airstream’s Condition

One of the most persistent problems with old airstreams is the development of leaks. Leaks can form in virtually any place there is an opening or a chance of an opening. They seem to be the one problem that plagues everyone who owns a vintage airstream trailer. In large part because these old airstreams had a bit of an overreliance on sealant.
Even if you just bought the airstream you’re restoring and the seller assured you it has no leaks, it probably does. It’s extremely common for sellers to claim there are no leaks in their airstream, even when there are. It’s not necessarily because they are lying, but because leaks can happen in so many places. Many of them are easy to miss until they become a much bigger issue.
The following locations are prime places to find leaks in a vintage airstream:
- Windows and doors: The sealant and caulking around your windows and doors are common culprits for leaks. You should check these areas regularly for any signs of water damage coming through.
- Vents: The joints that hold the vents on your Airstreams roof in place can become a source of leaks over time. You should regularly check the caulking and make sure no water is getting in.
- Rear Bumper: Yes even the bumpers can be the source of leaks. Check around where the beltline meets the top of the bumper. Usually the sealant will have worn away, leaving a small open line for water to come through.
- Rivets and seams on the shell: These can be some of the hardest leaks to isolate. Even if all the seams look perfectly sealed on the outside, they may not be. Water can get in around the screws or through the seam itself.
- Around air conditioners: Just like with home air conditioners, those in airstreams can lead to leaks in the long run. You should regularly be checking the area around your air conditioner for any signs of water damage.
- Places where previous renovations were made: If you’re not the first person to try and restore a particular airstream, you’ll want to check out the previous owners work to make sure they didn’t make any mistakes. A common mistake that leads to leaks is not adding some sort of sealant when you put new screws in the airstream skin.
How to Find Leaks in Your Vintage Airstream
Finding obvious leaks can be relatively simple even if they aren’t simple to fix. The less obvious leaks on the other hand, usually end up causing long-term damage because they don’t get caught.
- Look for water stains: Water stains–even small ones–are one of the biggest indicators that a leak is happening. You should thoroughly examine the interior of the airstream to check for any possible water stains.
- Check anywhere there is an opening: We’re not just talking doors, windows and vents, but virtually any place where there is a seal on the shell. Over time the sealant between seams will give and water will start seeping through.
- Feel for depressions in the floor: We mentioned this before, but you should pace around the floor, feeling for any slight depressions as they are a sign of serious water damage.
- Look when the inside skin panels are removed: Some of the leaks on the outer seams of the airstream are hard to spot because they are small breaches in the sealant. It’s easier to pick these out when the inside skin panels are still removed and some light can come through the breach.
- Have a partner help you: One highly recommended method is to have you or your partner stand inside the airstream while the other person sprays it with a garden hose. The person with the hose must slowly cover every inch of the airstream, pausing as they go while the person inside should watch for where any water is coming through.
Even after you’ve totally finished renovating your airstream, you should regularly check for leaks. Unfortunately, leaks pop up quite frequently in vintage airstreams.
7. Pause Before Throwing Anything Out
As you take apart your vintage airstream, you’ll be tempted to throw out parts that you think you don’t need. Don’t do this. Particularly with parts that are unique to the individual airstream you’re working on such as cabinetry or sinks.
Not only can many of these parts be refurbished themselves, but you may find getting replacements more difficult than you imagined. Also, a lot of the parts will come in handy later when you’re looking for replacements and need to know exactly what you’re replacing.
Please note, this doesn’t mean you should throw nothing out and allow a big pile of trash to sit outside the Airstream during the entire process. Instead, it just means that you should think carefully about what you decide to get rid of. If there’s a small chance that you might need something later, just save it until you’re certain you don’t need it.
8. Save Polishing for the End of the Process
Many airstream owners will want to immediately polish the trailer shell because they assume it will be easy, and the shine of the aluminum will give them the motivation to keep going. Please don’t make this mistake. They often find that the polishing process is way more complicated than they thought and become discouraged from the get-go.
While it’s not absolutely necessary, it’s probably a good idea to save your polishing for closer to the end. You will need to get a variety of tools ready to do it. This includes both a variable speed rotary polisher and a cyclo dual-head orbital polisher, as well as polishing pads, hold pads, and of course the polisher. And that’s just the basics.
You also may have to go through a process of determining how many steps you’ll need to take, like removing a plasticoat. All of these add up to making the polishing process take days or even weeks.
That’s why we and so many others in the airstream community, recommend that you don’t start with the polish but instead get the essentials done first. The polish is better left for when the whole end of the project is in sight and you have that extra, final burst of motivation.
9. Find the Parts You Need Online

Finding the high-quality parts you need is one of the biggest challenges to restoring an old airstream. Many of the parts you’ll need either aren’t manufactured anymore, or they can only be found with specialty dealers. Most of what you will be buying will be used from other vintage Airstreams.
Fortunately, the online Airstream community has created places like vintageairstream.com to find parts, details about what you need, and expert advice. This is a great place to go to make a plan of what exactly you need. Further, later in the process, you can go back there for “how to’s” on every step of the process. Think of it as a one-stop-shop.
Another great resource is vintagetrailersupply.com. You can search for any of the supplies you need for your restoration project. If there is something you need, they should have it. They carry everything from gaskets and wheels to awnings for vintage airstreams. They even have the materials and tools you need to polish the shell when you’re coming to the end of the process.
Of course, all this is not to say you shouldn’t also check out your local area. Any place that deals in RV’s or RV parts may have what you’re looking for. The trick is to learn as much as possible about exactly what you need and call in ahead of time to see if they have it.
10. Expect the Unexpected
Anyone who’s ever renovated or restored a classic Airstream will tell you that it’s a long, difficult process, which takes all kinds of unexpected twists and turns. You can expect the project to take longer than you initially estimated and to cost more than you originally planned for.
While this may sound gloomy, it’s the reality of restoring an Airstream. There will always be problems you didn’t notice at first, and challenges that require more work than you anticipated.
The key to dealing with this is to expect it from the beginning and to tackle your restoration one step at a time. Expect to spend at least 20% more than whatever your initial cost estimation is and don’t look at your restoration schedule as a fixed timetable, but rather one that is constantly updating based on current information.
11. Document the Process if You Plan On Future Projects
Many people who restore one vintage Airstream, ultimately end up wanting to restore another one. If you think you might end up being one of those people, you should document the process of your restoration.
You really want to take note of a little bit of everything. Keep track of what worked for you, what didn’t, and any ideas you have to improve the process next time around. Write down or record the tools that you used, which ones you thought you’d need but didn’t, and which ones you only discovered as you worked.
The easiest way to do this is simply to take some video while you’re working, followed by an explanation of what you did that day. There are also some people who post their restoration projects online. You can do this via your own website or on social media.
12. Get Involved in the Online Airstream Community
While the finished product makes it all worth it, the actual process of restoring an airstream can be quite stressful. Having support and guidance as you work is a crucial element to sticking with the project.
Fortunately, there is a vibrant Airstream community online, full of people ready to give you tips and support on your project. There are YouTubers, bloggers, and online guru’s happy to answer any question you have.
Further, in online forums like “Air Forums,” other renovators and experts are just a few clicks away 24/7, for any specific questions you might have. Even if you feel shy about posting your own questions, you can almost certainly find someone else who has already asked them for you.
13. Don’t Put Too Much Pressure On Yourself
When you run into problems during the restoration process, it can be frustrating to go online and see others who have happily finished their project, with seemingly no issues. Seeing their airstream all polished up, with the most interesting interior design, can make you feel like you’re doing something wrong.
Just remember that every Airstream restoration project is different, and depending on the challenges a particular model has, the time it takes to finish can range dramatically. Even
Instead of comparing where you’re at now with where someone else’s finished project is, use it as motivation. Look at images of finished Airstreams and think of all the possibilities for yours. When you finally get your finished project together it will be just as unique, impressive, and interesting as any of the others you have seen.
So Really, How Do You Restore a Vintage Airstream?
Restoring a vintage airstream requires patience and flexibility throughout the entire process. When you’re buying the Airstream itself, you don’t want to just jump on the first deal that comes your way, but rather compare prices and conditions. Remember to ask a lot of questions and inspect the airstream yourself to make sure it’s something you can handle.
As the restoration begins, you’ll carry that patience and flexibility forward by planning out what you’re going to do on a realistic timeline. While you do want to have both cost and time estimates ready to go for your project, you should expect them both to be exceeded. Even if it takes a little extra time, if you stick through to the end you’ll have a truly classic Airstream.
Be the first to be notified about FREE tips, hints, coupon codes, and email-exclusive information. All for FREE!